

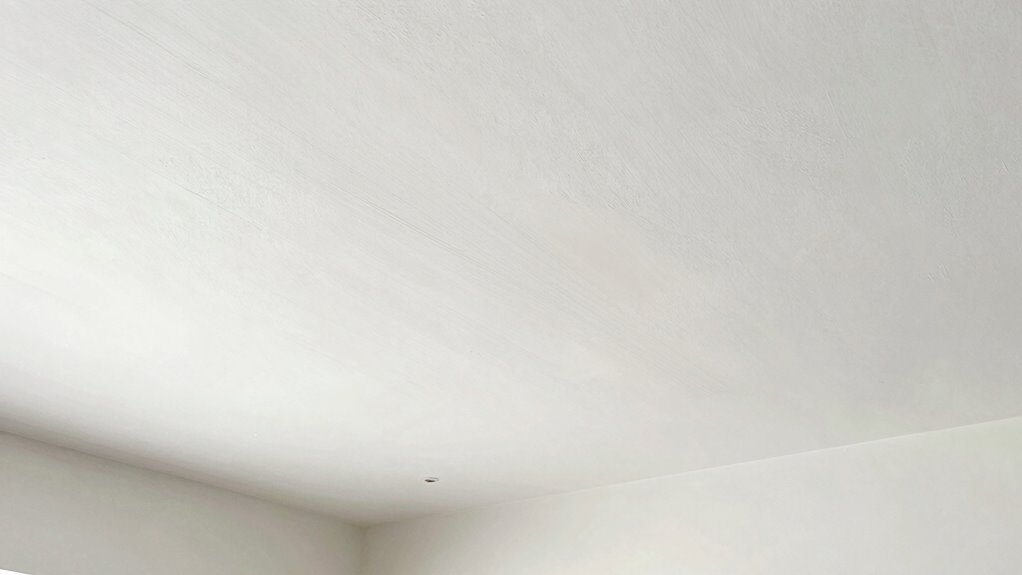
The biggest mistake in color drenching is forgetting about the ceiling. Since ceilings are often overlooked, they can cause uneven color absorption, visible flaws, or mismatched finishes. Proper surface preparation, choosing the right paint, and using suitable tools are essential for a smooth, even finish. Ignoring your ceiling can throw off the entire look of your project, but understanding how to tackle this surface will set you apart—keep going to discover how to perfect it.
Key Takeaways
- Many overlook the ceiling, leading to uneven color absorption and visible flaws post-drenching.
- Proper surface preparation and priming are essential to prevent drips and ensure even paint coverage on ceilings.
- Ignoring ceiling texture can cause inconsistent application and highlight imperfections during drenching.
- Failing to consider lighting effects on ceiling color may result in dull or undesirable finishes.
- Neglecting to blend ceiling edges with walls can create harsh lines, detracting from a seamless, professional look.

Zinnser 03688 Covers Up Stain Sealing Ceiling Paint, White
Zinnser
As an affiliate, we earn on qualifying purchases.
As an affiliate, we earn on qualifying purchases.
Why Ceiling Color Matters in Drenching Projects

The color of your ceiling can considerably impact the success of your drenching project. Light reflection plays a pivotal role here; brighter ceiling colors reflect more light, making the space feel larger and more open. Conversely, darker shades absorb light, potentially creating a dull or cramped atmosphere. Ceiling texture also influences how paint adheres and reflects light, affecting the overall look after drenching. Smooth textures tend to enhance light reflection, giving a polished finish, while rough or textured surfaces can scatter light, reducing brightness. Choosing the right ceiling color and texture isn’t just about aesthetics—it’s about optimizing light flow**** and creating a balanced environment. Additionally, understanding Light reflection principles can help you select the most effective color and texture combinations for your project. Paying attention to **ceiling paint quality can further improve the durability and appearance of your drenching work, ensuring long-lasting results. Using appropriate lighting techniques** can further amplify the effects of your chosen ceiling colors, enhancing the overall ambiance.

18-Piece Paint Roller Kit with 3.3ft Extension Pole, 4" & 9" Roller Covers, Paint Tray & Brushes for Professional Painting, House Paint Rolle for Interior Walls, Ceilings & Home Projects
【Complete 18-Piece All-in-One Painting Kit】The paint roller kit will get everything you need in one box: Includes 3-section…
As an affiliate, we earn on qualifying purchases.
As an affiliate, we earn on qualifying purchases.
How to Prepare Your Ceiling for Smooth Drenching

To guarantee smooth drenching, you need to start with proper surface preparation. Clean and sand your ceiling to remove dust and imperfections, creating a solid base. Applying a high-quality primer will help the paint adhere evenly and prevent drips or streaks. Additionally, wearing cycling gear such as a comfortable helmet and reflective clothing can enhance your safety during application or maintenance. Ensuring your preparation process covers all necessary steps and includes surface priming techniques will lead to a more professional and lasting finish. Remember that proper surface preparation is crucial for avoiding issues like uneven color drenching or surface imperfections.
Surface Preparation Essentials
Before you start drenching your ceiling with paint, make certain it’s properly prepared to achieve a smooth finish. Begin with clean, dry surfaces—remove dust, cobwebs, and grease. Use the right brush techniques to ensure even coverage; gentle, consistent strokes help prevent streaks and lap marks. When choosing your paint sheen, opt for flat or matte finishes to hide imperfections, making drenching easier and results more uniform. Sand any rough spots lightly to smooth out surface irregularities, and wipe away dust afterward. Proper surface prep reduces the need for multiple coats and helps your drenching look flawless. Remember, a well-prepared ceiling sets the stage for a stunning, professional-looking finish that lasts longer and resists peeling or cracking.
Primer Application Tips
Ensuring your ceiling is properly primed is essential for a smooth, even drench. Use effective primer techniques to create a uniform base that enhances surface adhesion. Start by choosing a high-quality primer suited for your ceiling material. Apply it evenly with a roller or brush, making sure to cover all areas without leaving streaks or thick spots. Allow the primer to dry thoroughly before proceeding, as this helps prevent uneven absorption and bleeding through your topcoat. For best results, lightly sand any bumps or drips after drying to ensure a smooth surface. Proper primer application minimizes the risk of peeling or peeling and guarantees your color drench will adhere flawlessly, delivering vibrant, consistent results. Remember, a well-prepared primer layer is your foundation for a perfect finish. Additionally, understanding surface preparation can significantly impact the overall quality of your drenching project. Incorporating proper surface cleaning techniques can further improve adhesion and final appearance.
Zinnser 03688 Covers Up Stain Sealing Ceiling Paint, White
Zinnser
As an affiliate, we earn on qualifying purchases.
As an affiliate, we earn on qualifying purchases.
Choosing the Best Ceiling Paint Colors for Your Room
Choosing the right ceiling paint color can dramatically influence the overall feel of your room. Light, neutral shades like soft whites or pale grays can make the space feel larger and more open, especially if your ceiling has textured features. Darker colors can add coziness but may make the room feel smaller if not balanced with proper lighting. Consider how lighting effects will interact with your ceiling color. For instance, warm lighting can enhance beige or cream hues, while cool lighting complements blues or grays. Here’s a quick guide:
| Ceiling Texture | Lighting Effects | Best Color Choice |
|---|---|---|
| Smooth | Warm | Soft white |
| Textured | Cool | Light gray |
| Stippled | Bright | Pale blue |
Additionally, understanding how paint finishes can impact the appearance of your ceiling can help you make a more informed choice. The reflectivity of different finishes can influence how colors appear under various lighting conditions, further enhancing the room’s ambiance. A properly chosen ceiling color combined with suitable lighting and color contrast can create a more dynamic and inviting space. Choose wisely to create the desired ambiance.

Nichiyo 10 Inch Ceiling Paint Roller with Shield Roller and Shield with Adjustable Head Ceiling Paint Rollers No Drip Roller Splatter-Free Brush Paint Brush for Painting Ceilings Wall (EL01152)
Package Includes: Features a roller shield and a quality roller cover. Durable blue plastic paint guard with adjustable…
As an affiliate, we earn on qualifying purchases.
As an affiliate, we earn on qualifying purchases.
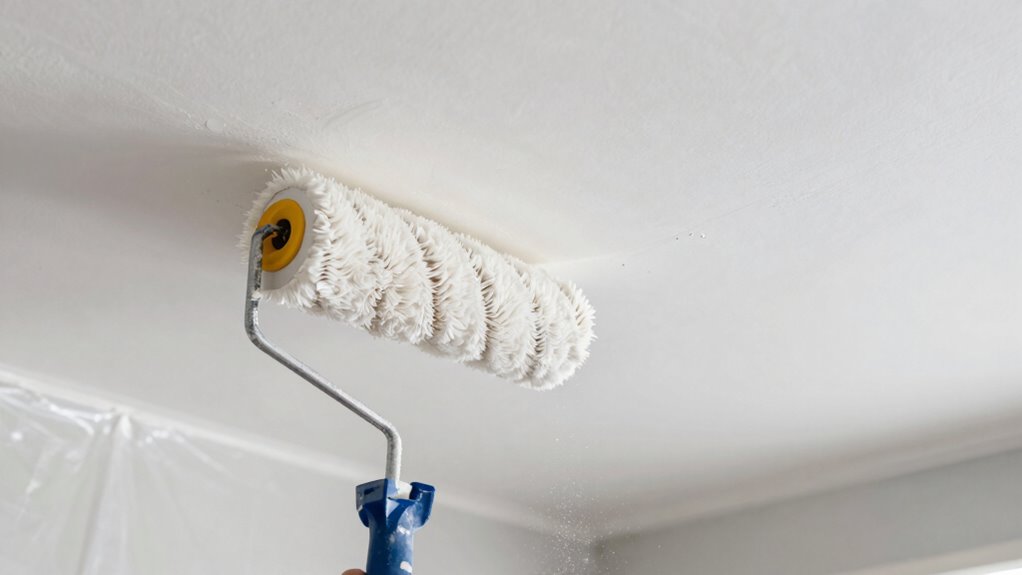
Techniques to Achieve Even Coverage on Your Ceiling
Achieving even coverage on your ceiling requires careful technique and attention to detail. Start by preparing the surface, ensuring it’s clean and smooth, especially if your ceiling has a textured finish. Use a high-quality roller with a thick nap to better reach textured areas and create uniform coverage. Work in small sections, maintaining a wet edge to prevent streaks or lap marks. Consider lighting effects—natural and artificial light can highlight uneven spots, so check your work under different lighting conditions and touch up as needed. Apply multiple thin coats rather than one heavy layer to avoid drips and ensure consistent color. With patience and attention to texture and lighting, your ceiling will get a flawless, even finish.
Essential Tools and Materials for Ceiling Drenching

To achieve a professional finish, you need the right tools and materials for ceiling drenching. Investing in essential painting tools guarantees smooth application and even coverage. Using high-quality drenching materials helps prevent drips and streaks, making your project easier and more successful. Additionally, understanding proper maintenance routines can extend the lifespan of your tools and ensure consistent results. Regularly inspecting and replacing worn-out tools is also important to maintain optimal performance, which is crucial for achieving flawless paint application. Proper tool care practices can significantly enhance the durability and effectiveness of your equipment. Maintaining tool maintenance routines not only prolongs the lifespan of your tools but also ensures they perform at their best for every project. Consistently cleaning and storing your tools properly is crucial for maintaining their performance and longevity.
Essential Painting Tools
Having the right tools is essential for a smooth ceiling drenching process. You’ll want high-quality brushes suited for ceiling work to master brush techniques, ensuring even coverage and minimizing drips. A sturdy roller with an extension pole makes covering large areas faster and more efficient. Keep your paint storage organized in airtight containers to prevent spills and maintain paint freshness. Taping off edges before you start helps create clean lines and prevents accidental splatters. A step ladder ensures you reach every corner comfortably and safely. Using these essential painting tools, combined with proper brush techniques and reliable paint storage, streamlines your ceiling drenching, reduces mess, and enhances the overall finish. Proper care of painting tools makes all the difference in achieving a professional look. Additionally, understanding Gold IRA markets can help you make informed investment decisions when planning your financial future. Staying aware of market trends and insights can also guide your project choices and timing.
Quality Drenching Materials
Choosing high-quality drenching materials is essential for a flawless ceiling finish. Superior materials ensure accurate color matching and enhance paint durability, preventing chipping or fading over time. When selecting materials, focus on those that provide consistent flow and coverage. Picture yourself holding:
- A smooth, well-rounded roller for even application
- High-grade primer that seals surfaces perfectly
- Precise mixing tools to match colors flawlessly
- Durable brushes designed for detailed work
These tools help you achieve a seamless drench, avoiding streaks or mismatched hues. Using quality materials ensures your ceiling’s color stays vibrant and resilient, even under exposure to sunlight or moisture. Investing in the right drenching supplies guarantees your work looks professional, lasts longer, and maintains its stunning appearance for years.
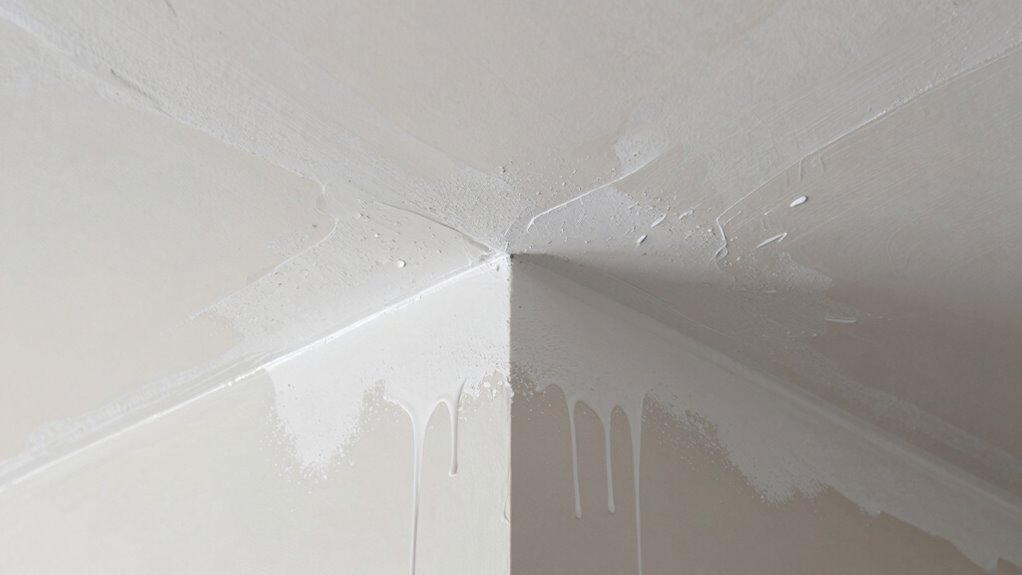
Common Ceiling Painting Mistakes and How to Avoid Them

Ceiling painting mistakes can easily ruin your project if you’re not careful. One common error is neglecting the existing ceiling texture, which can cause uneven paint absorption and visible flaws. Always prepare the surface properly, smoothing or cleaning textured ceilings before painting. Another mistake is ignoring lighting effects; different lighting can highlight imperfections or alter the appearance of your chosen color. To avoid this, test your paint under your room’s lighting conditions first. Using the wrong tools, such as a roller not suited for textured surfaces, can also lead to uneven coverage. Take your time with each coat, maintain a consistent technique, and consider how lighting impacts the final look. These steps help ensure a smooth, professional finish that enhances your ceiling’s appearance.
Troubleshooting Blotchy or Uneven Finishes

Uneven or blotchy finishes often result from inconsistent application techniques or inadequate surface preparation. To troubleshoot, start with thorough color testing to verify your chosen shade matches your vision. Proper paint mixing is essential—stir thoroughly to avoid streaks and color separation. When applying, watch for these common issues:
- Overlapping wet edges before they dry, causing streaks
- Applying uneven pressure with your brush or roller
- Skipping surface cleaning, leading to poor adhesion
- Rushing through the process without allowing proper drying time
How to Blend Ceiling Color Seamlessly With Walls
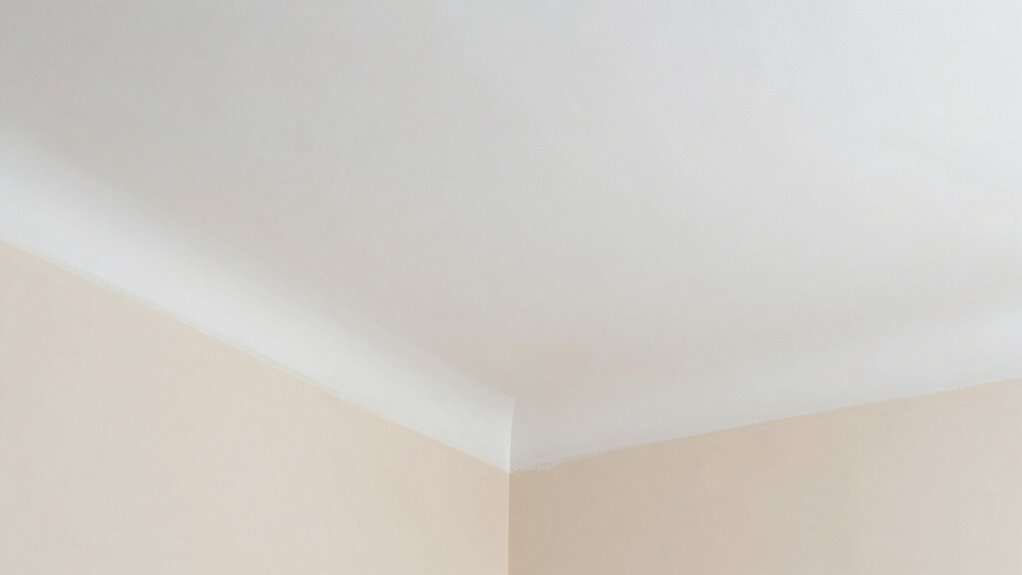
To achieve a seamless blend between your ceiling and walls, start by preparing both surfaces thoroughly and selecting a high-quality paint. Address any ceiling texture issues to ensure a smooth, even surface, and repair or sand down imperfections. When painting near ceiling moldings, use painter’s tape to create crisp lines, but avoid overly sharp edges that can look unnatural. For a seamless look, consider using the same paint finish on both the ceiling and walls, and apply paint with a roller for broad, even coverage. Feather the paint just beneath the ceiling moldings to blend the colors smoothly. Taking these steps helps eliminate harsh lines and creates a unified, polished appearance, making your ceiling and walls look effortlessly connected.
Final Tips for a Flawless Ceiling Finish
Once you’ve prepared your surfaces and chosen the right paint, finishing touches can make all the difference in achieving a flawless ceiling. To enhance your ceiling texture, focus on smooth, even application and avoid drips or streaks. Pay attention to ceiling moldings, using a small brush to carefully paint edges and intricate details. For a polished look, consider feathering the paint at the edges to blend seamlessly. Keep your workspace well-ventilated and work in consistent lighting to spot imperfections early. To ensure perfection:
- Use a high-quality roller for even coverage
- Tape around ceiling moldings to prevent splatter
- Lightly sand any rough patches before final coat
- Apply a second coat if needed for uniform color and texture
Final Inspection: Ensuring Your Ceiling Looks Perfect

Before declaring your ceiling finished, take the time to thoroughly inspect every inch to catch any flaws or imperfections. Look for uneven patches, missed spots, or drips in the ceiling texture. Check the paint sheen across the surface—it should be consistent, whether matte, eggshell, or semi-gloss. Use natural light to highlight subtle differences in texture or sheen that might be invisible indoors. Here’s a quick checklist:
| Aspect | What to Look For | How to Fix |
|---|---|---|
| Ceiling Texture | Smooth, uniform appearance | Sand or reapply texture if needed |
| Paint Sheen | Even gloss level | Touch up areas with inconsistent sheen |
| Overall Finish | Flawless, clean surface | Light sanding or repainting if necessary |
A careful inspection guarantees your ceiling looks perfect before you call it complete.
Frequently Asked Questions
How Do I Prevent Drips or Streaks During Ceiling Drenching?
To prevent drips or streaks during ceiling drenching, focus on proper brush techniques and paint consistency. Keep your brush loaded with enough paint but avoid overloading, which causes drips. Use smooth, even strokes and work in manageable sections. Maintain a consistent paint consistency—neither too thick nor too thin—and blend each stroke seamlessly. This approach guarantees a streak-free, professional finish without unwanted drips.
What Are the Best Drying Times Between Coats for Ceilings?
Like a masterful artist timing each stroke, you should wait about 2-4 hours between coats on ceilings, depending on your paint sheen and room conditions. If you used a high-gloss or semi-gloss finish, lean toward the longer end. Make sure your paint primer has fully dried first, as this provides the best base. Rushing can lead to streaks or uneven coverage, so patience ensures a flawless finish.
Can I Use Different Colors on the Ceiling and Walls?
Yes, you can definitely use different colors on the ceiling and walls. To create a striking look, consider color contrast, which can make your space feel more dynamic. Just guarantee your choices promote design harmony, so the colors complement each other rather than clash. Use a consistent style or tone to tie the different colors together, and test samples beforehand to see how they interact in your lighting.
How Do I Fix Accidental Paint Splatters on Adjacent Surfaces?
Don’t worry if you get accidental paint splatters on adjacent surfaces; you can easily fix them with proper paint removal and surface prep. First, gently scrape or blot the splatters with a damp cloth or sponge. For stubborn spots, use a mild paint remover suited for the surface. Always clean the area thoroughly to guarantee smooth reapplication. Taking these steps prevents damage and keeps your project looking professional.
What Safety Precautions Should I Take During Ceiling Drenching?
During ceiling drenching, you should wear safety gear like goggles, a mask, and protective clothing to prevent paint splashes and fumes. Make certain proper ventilation by opening windows and using fans to disperse fumes and moisture. Take breaks outside or in well-ventilated areas, and keep the workspace clear of tripping hazards. These precautions help keep you safe from inhaling fumes and prevent accidents while achieving a smooth, professional finish.
Conclusion
Remember, your ceiling is the canvas of your room’s masterpiece. Overlooking its role in drenching can turn a beautiful space into a patchwork quilt. By paying attention to color choices, preparation, and technique, you’ll avoid the common mistake of neglecting this essential surface. Think of your ceiling as the silent conductor—when it’s done right, everything else falls into harmony. Don’t forget it; your room’s perfect finish depends on it.