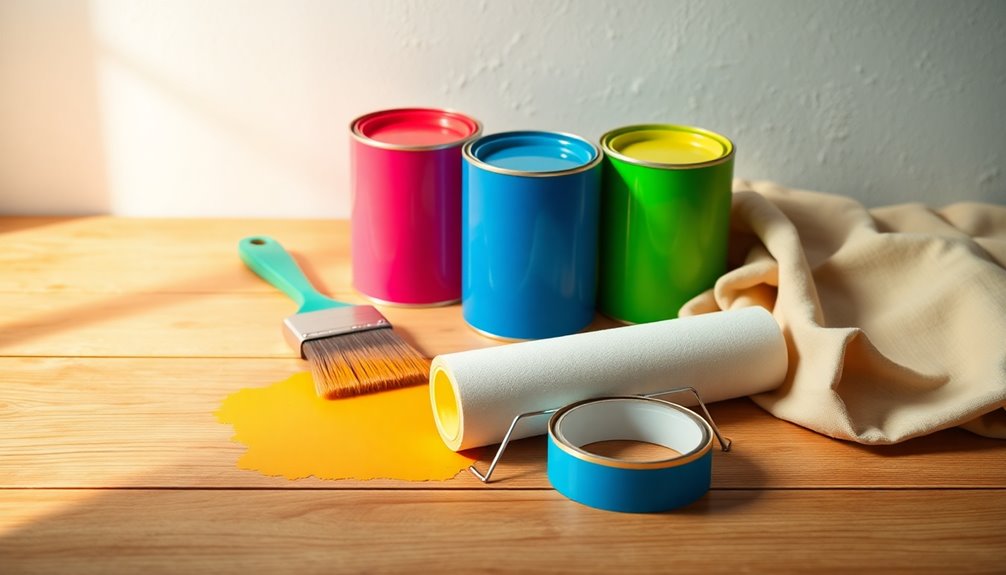

When it comes to DIY wall painting, you need essential tools for a successful project. Start with a wall cleaner, filler, and a filling knife for surface prep. High-quality brushes, a standard roller with a 3/8-inch nap, and painter's tape guarantee clean lines. Don't forget safety gear like goggles and gloves for protection. Also, using a step ladder and canvas drop cloths is a must. Stick around to discover more tips and techniques for your painting success!
Key Takeaways
- Start with a wall cleaner to ensure surfaces are dirt-free before painting for better adhesion.
- Use a 2 ½-inch angled brush for precision in corners and edges, complemented by a standard 9-inch roller for larger areas.
- Invest in durable canvas drop cloths and high-quality painter's tape to protect surfaces and achieve clean lines.
- Employ a flexible putty knife and sanding sponge for filling imperfections and achieving a smooth finish.
- Prioritize safety gear like goggles, gloves, and a respirator to protect against paint splashes and harmful fumes.

Pro Grade Paint Roller Kit, Brush & Roller,10 Piece Set, Wall Painting Naps for Professionals & Homeowners – All Paints & Stains, Washable, Reusable, Easy to Clean, Superior Absorbency.
WHAT'S IN THIS 10 PIECE PAINT KIT FOR WALLS: includes one plastic paint tray; one 9 inch roller…
As an affiliate, we earn on qualifying purchases.
As an affiliate, we earn on qualifying purchases.
Essential Tools for Surface Preparation

When you're prepping a wall for painting, having the right tools makes all the difference. Start with a wall cleaner like Spic and Span mixed with water to guarantee your surfaces are dirt-free. This step's vital for paint adherence and prevents bubbling.
Next, grab a filler and filling knife; a two-inch knife works wonders for smoothing excess spackling compounds over any patches. Don't forget to use a sanding sponge to blend those patches seamlessly.
Protect your floors and furniture with canvas drop cloths, and cover larger areas with a dust sheet to keep debris at bay. With these essential tools, you're set for a smooth application of quality paint and a stunning finish. Additionally, consider using advanced filtration systems to keep your workspace free from dust and allergens during the painting process.

ScotchBlue Original Multi-Surface Painters Tape, 1 Inch Wide (0.94 in. x 60 Yds), 1 Roll, Blue Paint Tape Protects Surfaces and Removes Easily, Masking Tapes for Indoor and Outdoor Use (2090-24NC)
READY. SET. TAPE!: 1 roll of 1.41 inches x 60 yards tan Scotch General Purpose Masking Tape, a…
As an affiliate, we earn on qualifying purchases.
As an affiliate, we earn on qualifying purchases.
Must-Have Painting Accessories

When you start painting, having the right accessories makes all the difference.
Must-have items like painter's tape and drop cloths help you achieve clean lines and protect your space.
Plus, handy tools like a paint pail and extension pole keep your project efficient and organized.
Essential Painting Accessories
Painting your walls can transform a space, but having the right accessories makes all the difference in achieving a professional finish.
Start with durable canvas drop cloths to protect your floors and furniture from paint splashes. Use high-quality painters tape for clean lines and to prevent paint bleed, ensuring a crisp look.
A roller extension pole allows you to reach high walls and ceilings without the hassle of a ladder. Don't forget a flexible putty knife for filling nail holes and smoothing spackle, preparing your walls for perfection.
Finally, sanding sponges will help you smooth out imperfections, promoting better paint adhesion.
With these essential accessories, your DIY project will shine with professional results.
Helpful Painting Tools
To achieve a polished look for your walls, having the right tools on hand is just as important as your accessories. Here are some must-have painting tools and accessories to take into account for your DIY project:
| Tool | Purpose |
|---|---|
| Painter's Tape | Creates precise lines and prevents paint bleed |
| Drop Cloths | Protects floors and furniture from splatters |
| Putty Knife | Applies and spreads spackle for a smooth surface |
| Sanding Sponges | Blends patches and enhances paint adhesion |
| Brush Cleaner | Maintains quality brushes and prolongs lifespan |
Investing in quality brushes and paint rollers will also guarantee a flawless finish. With these essential tools, you'll set yourself up for successful wall painting! Additionally, ensuring proper lighting control can significantly enhance the overall look of your painted walls.

Rhibak Paint Roller Kit with Extension Pole, 27 Piece Set, 2 to 4 Ft Pole, 4"9" Paint Rollers, Paint Brushes Set for Professional Painting,House Paint Roller for All Latex and Oil Paints & Stains
【All IN ONE 】Great painting tool kit with 4 Inch paint roller cover *6 , 9 Inch paint…
As an affiliate, we earn on qualifying purchases.
As an affiliate, we earn on qualifying purchases.
Choosing the Right Brushes and Rollers

When you're ready to paint, picking the right brushes and rollers can make all the difference.
A 2 ½-inch angled brush is perfect for those tight corners, while a standard 9-inch roller with a 3/8-inch nap works well on most wall surfaces.
Understanding the brush types and roller nap selection helps you achieve a smooth, professional finish every time.
Brush Types Comparison
Choosing the right brushes and rollers can make a significant difference in your DIY painting project, especially if you want a smooth, professional finish.
When you consider brush types comparison, a 2 ½-inch angled brush is perfect for cutting in and detailing around edges. For larger areas, larger brushes help speed up the process.
Opt for synthetic brushes when using water-based paints, as they guarantee a smooth application and easy cleanup.
When it comes to your paint roller, select quality roller covers—like a 3/8-inch nap for most walls—to achieve even coverage.
Investing in quality brands like Wooster and Purdy assures durability and enhances your quality painting experience, making your project look polished and professional. Additionally, diversifying investments in tools can improve your overall project outcomes and provide better value for your money.
Roller Nap Selection
After selecting the right brushes, it's time to focus on roller nap selection for your painting project. Choosing the correct roller nap can greatly impact paint application and coverage. Here are some tips to take into account:
- 3/8-inch nap: Ideal for most interior walls, balancing paint coverage and texture on smooth to semi-smooth surfaces.
- 1/2 to 3/4-inch nap: Best for rough surfaces like textured walls or stucco, ensuring adequate paint pickup.
- 1/4-inch nap: Perfect for very smooth surfaces, minimizing texture for a sleek finish on cabinets and furniture.
- High-quality synthetic roller covers: Enhance paint application, especially with latex paint, providing a smooth finish and reducing lint shedding.
Matching the roller cover material to your paint type will yield best results.

Utopia Drop Cloth for Painting (9×12 ft, 1 Pack) Washable and Reusable Drop Cloth for Painting, Furniture & Floor Protection Highly Absorbent Paint Cover – Thick Canvas Tarp for Outdoor and Indoor Use
Functional Drop Cloth – The 9 x 12 feet professional grade Canvas Drop Cloth works as a protective…
As an affiliate, we earn on qualifying purchases.
As an affiliate, we earn on qualifying purchases.
Safety Gear for a Secure Painting Experience

To guarantee a secure painting experience, it's important to equip yourself with the right safety gear. Start with safety goggles to shield your eyes from splashes and irritants, making sure a clearer field of vision during the painting process.
A respirator is essential for protecting against harmful fumes and dust, especially when you're working with volatile substances.
Don't forget gloves, which act as a barrier against skin irritation from paint and solvents. Wear non-slip footwear to help maintain stability on potentially slippery surfaces.
Finally, a sturdy step ladder is crucial for safely reaching high walls or ceilings, preventing falls and allowing you to guarantee a flawless finish.
Prioritize your safety to enjoy a successful DIY project!
Specialized Tools for Enhanced Efficiency

When you want to boost your painting efficiency, specialized tools can make all the difference. Here are some essential tools to take into account:
- Inner-Fed Paint Rollers: Say goodbye to messy trays and hello to quick touch-ups without drips.
- Paint Sprayers: Achieve a smooth, professional finish while covering large surfaces or intricate details swiftly.
- HANDy Paint Pail: This handy tool features an adjustable strap, a magnetic brush holder, and a built-in scraper, keeping your workspace organized and mess-free.
- Roller Extension Poles: Reach those high walls and ceilings comfortably, reducing the need for ladders.
Don't forget dripless caulking guns to guarantee a neat finish on gaps and cracks, making your painting tasks even more efficient!
Techniques for Clean Edges and Finishes

Achieving clean edges and finishes can elevate your painting project from ordinary to professional. Start by using high-quality painter's tape; press it down firmly along the edges to prevent paint bleed.
When cutting in around trim and corners, a 2-and-a-half-inch angled brush provides precision, allowing for smoother lines. For sharper lines, run a damp rag along the tape edges before painting to seal them better.
After you've painted, remove the tape while the paint is still slightly wet for the cleanest edges without pulling off dried paint.
Additionally, consider using a paint edger tool for quick and precise edge work along ceilings and walls, which can greatly enhance the overall finish of your project.
Tools to Avoid for a Smoother Process

While clean edges and finishes are essential for a polished look, choosing the right tools is just as important.
To help you avoid pitfalls, steer clear of these tools that can hinder your painting process:
- Paint Pads: They often fail to deliver a smooth finish, leading to uneven applications.
- Overly Specialized Brushes: These can clutter your toolkit and mightn't be versatile enough for various tasks.
- Painting Edgers: They may apply paint unevenly, creating visible lines that require extra touch-ups.
- Fillable Paint Products: These can lead to messes and inconsistent applications; traditional paint tools work better.
Instead, opt for reliable rollers and a flat-head screwdriver for opening cans to keep your project smooth and efficient.
Elevating Your Project With Professional Services

If you're looking to elevate your painting project, enlisting professional services can make all the difference.
Professionals utilize high-quality tools and techniques to deliver a stunning, professional finish that transforms both interior and exterior spaces. By hiring experienced painters, you save time and effort, allowing them to handle the careful work of wall preparation and paint application.
They know the best materials and methods for various surfaces, which helps improve your painting results and minimizes common DIY pitfalls. Their thorough processes, like spackling and sanding, guarantee a smooth and durable finish. Additionally, many professionals also focus on energy efficiency by using eco-friendly paints that contribute to a healthier home environment.
Ultimately, investing in professional services not only enhances your home's aesthetic but can also increase its value, making it appealing to future buyers.
Frequently Asked Questions
What Tools Do You Need for Painting Walls?
For painting walls, you'll need a few essential tools.
Start with a high-quality angled paintbrush for detail work and a 9-inch roller with a 3/8-inch nap for smooth surfaces.
Don't forget a sturdy paint tray to make application easier. A durable drop cloth protects your floors and furniture, while painter's tape helps you achieve clean lines.
Finally, grab a putty knife and spackling compound to fix any imperfections before you start painting.
What Supplies Do I Need to Paint a Wall?
To paint a wall, you'll need a few essential supplies.
Start with high-quality paint, a 2-and-a-half-inch angled brush for edges, and a 9-inch roller for larger areas.
Grab painter's tape to guarantee clean lines, and use canvas drop cloths to protect your floors and furniture.
Don't forget spackle to fill any holes, a sanding sponge for smoothing, and a paint pail with a strap for easy mobility as you work.
What Do I Need for a Paint Project?
For your paint project, you'll need essential tools to guarantee a smooth process.
Start with high-quality brushes and rollers for even application. Grab a sturdy drop cloth to protect your floors and furniture. Don't forget painter's tape for clean edges.
A step ladder helps you reach those high spots, while an extension pole makes rolling easier.
Finally, have spackling and a putty knife ready to fix any wall imperfections before painting.
What Are the Basic Tools for Painting?
For your painting project, you'll need a few basic tools.
Grab a high-quality angled brush for trim work, a 9-inch roller for walls, and a sturdy paint tray to hold your paint.
Don't forget painter's tape for clean edges and a reliable drop cloth to protect your floors and furniture.
These essentials will help you achieve a smooth and professional finish while keeping your workspace organized and mess-free.
Conclusion
To sum up, having the right tools can make all the difference in your DIY wall painting project. By investing in essential items for surface preparation, choosing the right brushes and rollers, and prioritizing safety gear, you'll set yourself up for success. Don't forget to explore specialized tools for efficiency and techniques for clean edges. With these recommendations, you can achieve a professional-looking finish while enjoying the process. Happy painting!