To apply limewash for soft, textured walls, start by choosing a complementary color and testing it on a small area. Prepare your tools—stiff brushes, sponges, and rollers—and clean and repair your walls beforehand. Dampen the surface lightly and apply thin coats with your brush or sponge, using dabbing or stippling techniques to create texture. Build up layers gradually, allowing each to dry. With patience and attention to detail, you’ll achieve warm, textured walls that exude charm—learn more to perfect your technique.
Key Takeaways
- Prepare walls by cleaning, repairing, and lightly dampening for optimal limewash adhesion.
- Choose a suitable limewash color that complements your decor and test it on a small area first.
- Use stiff-bristled brushes, sponges, or trowels to apply thin, even coats, creating textured and varied effects.
- Work in sections, layering multiple coats and allowing each to dry thoroughly to build depth and richness.
- Incorporate creative tool techniques like stippling or dabbing to achieve a soft, textured, handcrafted finish.
Are you considering a natural way to refresh your walls? Limewash offers a beautiful, textured finish that can transform any space into something warm and inviting. Before you dive in, it’s essential to understand the basics of applying limewash to create that soft, textured look. The first step is selecting your color palette. Limewash comes in a variety of hues, from subtle earth tones to more vibrant shades, so choose one that complements your existing decor. Keep in mind that limewash’s translucent quality means the underlying wall color can influence the final appearance, so testing your chosen color on a small section first helps guarantee you get the look you want.
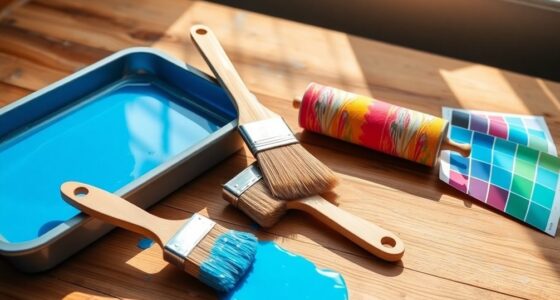
Once you’ve picked your color palette, gathering the right application tools is crucial. You’ll need brushes with stiff bristles, such as masonry or chip brushes, as they help apply the limewash evenly while creating the desired textured effect. A spray bottle can be handy for dampening the wall surface, which helps the limewash adhere better and enhances its natural, mottled appearance. Some prefer using a roller for larger areas, but be cautious—rollers can sometimes remove too much of the limewash or create an overly uniform surface. Sponges and trowels are also useful for adding variations and textures, giving your walls a more authentic, handcrafted feel.
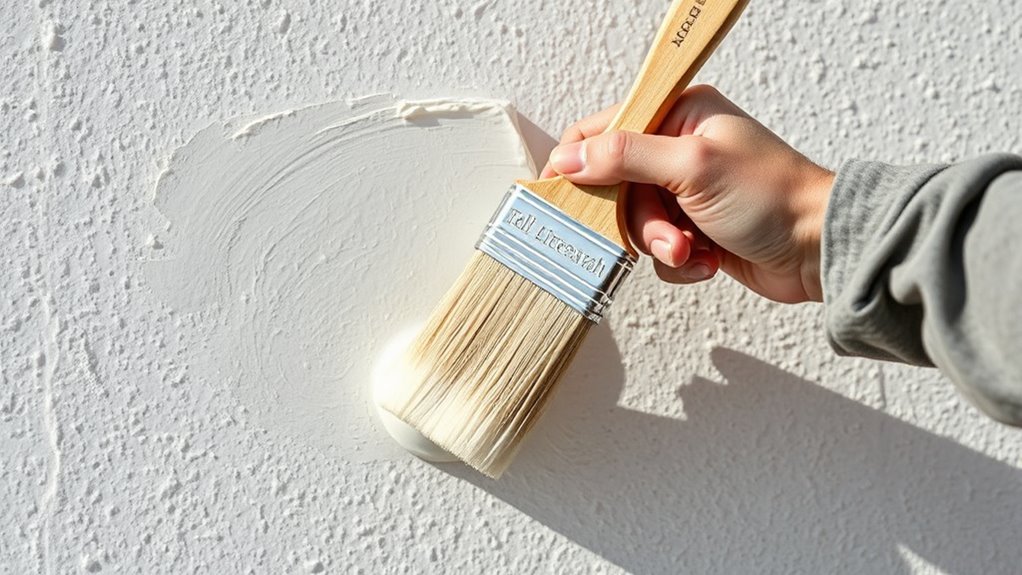
Preparation is key to achieving a professional look. Start by cleaning the walls thoroughly to remove dust, dirt, and grease, ensuring the limewash bonds well. Repair any cracks or holes with a suitable filler, then allow everything to dry completely. Dampen the wall surface lightly with water before applying the limewash; this prevents the material from drying too quickly and helps achieve a consistent texture. When you’re ready to apply, dip your brushes into the limewash mixture, removing excess to avoid drips. Apply the limewash in thin, even coats, working in manageable sections. Use your application tools creatively—dabbing, stippling, or brushing—to create the textured, layered effect characteristic of limewashed walls.
Work methodically, and don’t rush the process. Multiple thin coats build depth and richness, so let each layer dry thoroughly before adding the next. This approach also prevents cracking and uneven texture. As you progress, step back periodically to evaluate the overall look, adjusting your technique as needed. Remember, limewash is a natural material, so some variation and imperfections add to its charm. With patience, the right tools, and a thoughtful color palette, you’ll achieve soft, textured walls that bring warmth and character to your space, all while embracing a natural, eco-friendly finish.
Frequently Asked Questions
Can Limewash Be Used on Exterior Surfaces?
Yes, limewash can be used on exterior surfaces. It offers excellent durability, making it a popular choice for outdoor walls. When choosing exterior limewash options, make certain you select a formulation designed for outdoor use to withstand weather conditions. Proper application enhances its longevity, allowing your walls to develop a beautiful, breathable, textured finish that ages gracefully over time. Just follow the right techniques to maximize limewash durability outdoors.
How Long Does Limewash Last Before Reapplication?
You might find that limewash durability varies, but typically, you’ll need to contemplate reapplication every 5 to 10 years. It’s like life itself—sometimes, the surface we build begins to fade or wear, reminding us that reapplication isn’t just maintenance but renewal. The frequency of reapplication depends on exposure to weather and upkeep, so keep an eye on your walls to maintain their soft, textured beauty over time.
Is Limewash Suitable for Damp or Humid Environments?
Limewash can be suitable for damp or humid environments, but its durability depends on proper application and maintenance. In humid climates, you should consider additional protective coatings to enhance limewash durability and prevent moisture damage. Regularly inspecting your walls and reapplying limewash when needed helps maintain their appearance and functionality. Proper preparation and choosing the right limewash formulation guarantee your walls stay protected and beautiful despite humidity challenges.
What Are the Safety Precautions When Applying Limewash?
Prioritize protection; wear protective gear like gloves, goggles, and a mask to prevent irritation. Guarantee excellent ventilation by opening windows and using fans, which helps disperse dust and fumes. Follow safety steps diligently, avoiding inhalation and skin contact. Carefully handle limewash, and clean tools thoroughly afterward. By taking these precautions, you keep yourself safe while enjoying the beautiful, textured finish limewash provides.
Can Limewash Be Tinted or Colored?
Yes, you can tint or color limewash using various color options and tinting techniques. You simply add mineral or pigment-based colorants to the limewash mixture before applying it. This allows you to attain a range of hues, from subtle earth tones to vibrant shades. Make sure to mix thoroughly, and test your color on a small area first to confirm it meets your desired look before covering your entire wall.
Conclusion
Now that you know how to apply limewash, your walls will transform faster than you can blink! With just a few simple steps, you’ll create a textured masterpiece that’s practically bursting with character and charm. Imagine your space radiating timeless beauty, turning heads everywhere you go. So grab your brush, embrace the process, and watch your walls become the most breathtaking, soft-textured wonders anyone has ever seen—faster than you ever thought possible!