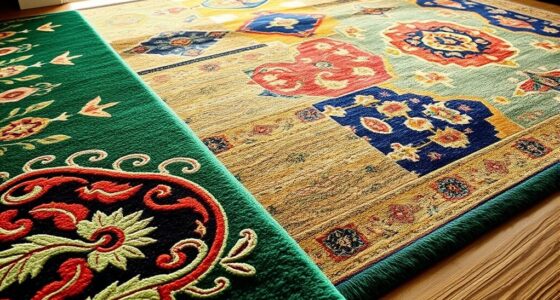

Transform your space with these ten epic furniture and decor makeovers! Revamp a vintage hutch into custom cabinetry, or turn old doors into stunning wall art. Upcycle pallets into chic outdoor furniture, or give an unused dresser new life as a bathroom vanity. You can even craft a unique coffee table from reclaimed wood. Each project adds character and style, making your space truly your own. Stick around to discover even more inspiring transformations!
Key Takeaways
- Transform vintage hutches into custom kitchen cabinetry, enhancing functionality and rustic charm with natural materials and polished finishes.
- Repurpose unused dressers into stylish bathroom vanities, utilizing remaining drawers for storage and applying water-resistant paint for durability.
- Create stunning wall art from old doors by cleaning, sanding, and customizing with paint or decorative finishes for a budget-friendly aesthetic upgrade.
- Upcycle pallets into outdoor furniture pieces like benches and tables, applying weather-resistant sealants and adding cushions for comfort and style.
- Craft unique coffee tables from reclaimed wood, emphasizing character through personalized elements and protective finishes to enhance natural beauty.

72" Coffee Bar Cabinet with Power Outlet & LED Light, Farmhouse Large Kitchen Hutch with Sliding Barn Door, Tall Bar Cabinets with Storage Drawers & Wine Glass Rack,Pantry China Cabinet,Vintage Brown
FARMHOUSE BAR CABINET WITH SLIDING BARN DOOR: This tall bar cabinet features two flexible sliding barn doors, offering…
As an affiliate, we earn on qualifying purchases.
As an affiliate, we earn on qualifying purchases.
Revamping a Vintage Hutch Into Custom Kitchen Cabinetry

When you decide to revamp a vintage hutch into custom kitchen cabinetry, you're not just enhancing functionality; you're also adding a unique touch to your space.
This solid wood piece of furniture, measuring 4' 5" wide and 74" high, can conceal your microwave while providing much-needed storage.
Start by removing the hutch doors for painting, giving it a fresh new look with a DIY approach that keeps costs low.
Stripping the top and applying an Early American Minwax stain will guarantee it blends seamlessly with your kitchen decor.
Reusing and enhancing the existing hardware with Rub 'n Buff finishes off the transformation beautifully.
Your revamped hutch will become a stunning focal point in your kitchen, merging style with practicality. Incorporating natural materials into your design will enhance the rustic charm of the piece.

fadaoet Pallet Sofa Set Natural Wood Solid Acacia, Large Modular Outdoor Furniture for Garden, Patio, Balcony, Weather-Resistant Seating
Durable Acacia Wood Construction Crafted from 100% solid acacia wood, this 4-piece outdoor pallet sofa set offers exceptional…
As an affiliate, we earn on qualifying purchases.
As an affiliate, we earn on qualifying purchases.
Transforming Old Doors Into Stylish Wall Art
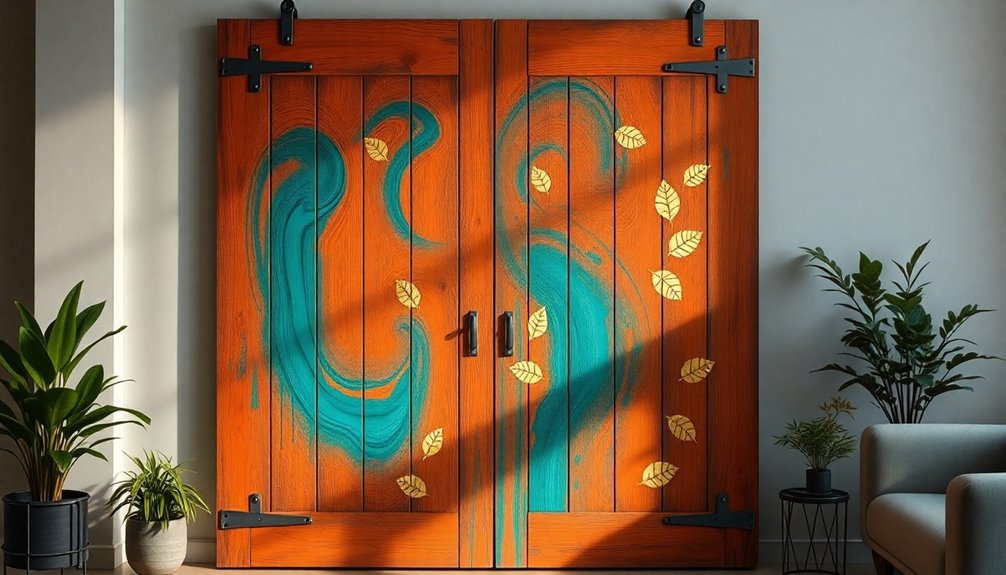
Transforming old doors into stylish wall art not only breathes new life into forgotten pieces but also adds a unique flair to your home décor.
Start by cleaning and sanding your doors to enhance their natural beauty. You can use paint, stain, or decorative finishes like Rub 'n Buff for a striking look.
Don't forget to incorporate new hardware, such as knobs or hinges, to add an artistic touch while preserving their original character.
If you really want to think outside the box, consider creating a stunning arrangement of multiple doors to form one cohesive piece.
This budget-friendly DIY project requires minimal investment but offers a high-impact aesthetic upgrade that'll leave your guests speechless!

HEIRLOUM Reclaimed Wood Table Top – Rustic Recycled Wooden Piece Perfect for Signs, Counters, Kitchens, Dining and Coffee Table Tops (Straight Plank Table Top, 24" x 30")
BEAUTIFUL UNIQUE PIECES: Each piece of wood is uniquely weathered and aged for a genuine vintage artifact you…
As an affiliate, we earn on qualifying purchases.
As an affiliate, we earn on qualifying purchases.
Upcycling Pallets Into Chic Outdoor Furniture

If you're looking to spruce up your outdoor space without breaking the bank, upcycling pallets is a fantastic option. You can create simple yet stylish designs using cost-effective materials, making it perfect for any DIY enthusiast. Plus, with a few creative finishing touches, you'll have unique furniture that reflects your personal style. Incorporating natural materials can enhance the overall charm of your outdoor furniture.
Simple Design Ideas
Upcycling pallets into chic outdoor furniture not only saves you money but also adds a unique touch to your outdoor space.
Transforming pallets can take your DIY game to the next level, offering versatile options like benches, tables, and lounge chairs. For just around $30, you can create stunning pieces that enhance your outdoor gatherings. To guarantee durability, sand the pallets and apply weather-resistant sealants. By adding cushions and outdoor-friendly fabrics, you'll create a cozy atmosphere perfect for entertaining.
Get creative with your designs—stack pallets for tiered planters or arrange them into unique configurations. These simple ideas can redefine your outdoor area, making it feel like an inviting extension of your dining room. Additionally, ensure your outdoor furniture is properly vented to prevent moisture buildup and enhance longevity.
Cost-Effective Materials
Pallets are an affordable and eco-friendly material that can elevate your outdoor space without breaking the bank. You might've used to think that chic outdoor furniture was out of reach, but upcycling pallets proves otherwise.
Sourced for free or at a low cost, pallets can transform into stylish benches, tables, or chairs using just a few basic tools. With a little sanding and staining, you can achieve a polished look that rivals any store-bought piece.
Plus, adding cushions or outdoor fabric enhances comfort and style, creating inviting spaces for relaxation or entertaining. By utilizing pallets, you not only save money but also contribute to sustainability, encouraging creativity while reducing waste in furniture design. Additionally, using eco-friendly disposal options for any leftover materials ensures that your project remains environmentally conscious.
Creative Finishing Touches
While crafting chic outdoor furniture from pallets can be a fun project, adding creative finishing touches truly elevates the final look. You can transform basic pallet designs into stunning pieces that wow your guests.
Start by applying a weather-resistant sealant or outdoor paint to protect your furniture and enhance its durability. Customizing colors and patterns allows you to match your outdoor aesthetic perfectly.
Don't forget to incorporate cushions and decorative elements; these add comfort and visual appeal, making your seating area inviting. Consider adding small accessories like lanterns or potted plants to complete the space. Additionally, using weather-resistant materials ensures that your furniture withstands the elements and lasts for years to come.
Engaging in this upcycling process not only fosters creativity but also promotes eco-friendly practices while giving you stylish outdoor furniture on a budget.

Clear Coat – Eco-Friendly Clear Satin Sheen Top Coat for Chalk Style Furniture Paint, Very Durable, Non Yellowing, Waterproof Sealant for High Traffic Furniture – Indoor/Outdoor – (4 oz)
Eco-Friendly, Low VOC: Crafted with an ultra-low VOC formula, our 4oz clear coat keeps your creative space fresh…
As an affiliate, we earn on qualifying purchases.
As an affiliate, we earn on qualifying purchases.
Turning an Unused Dresser Into a Functional Bathroom Vanity
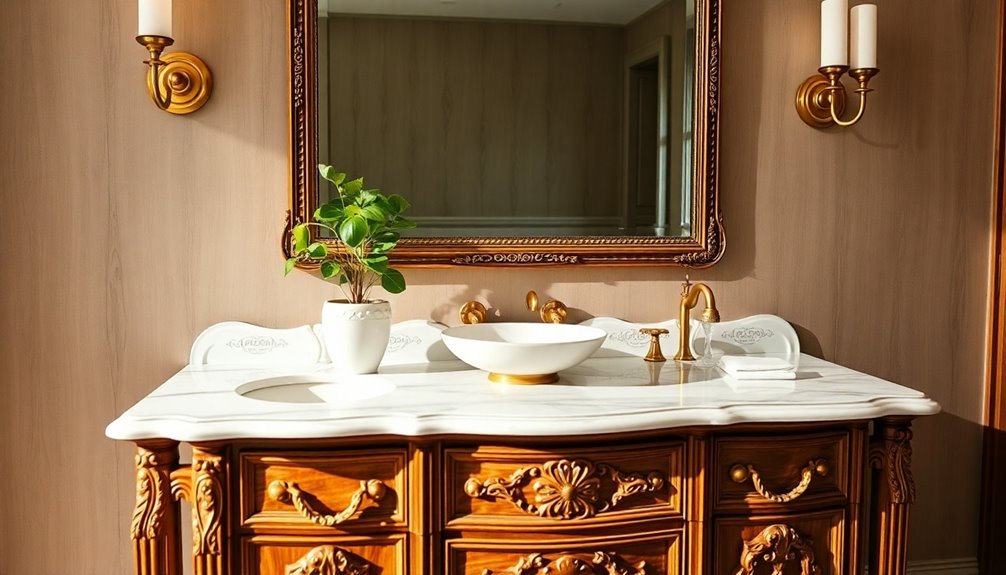
If you've got an unused dresser lying around, why not transform it into a stylish bathroom vanity?
This DIY project not only repurposes old furniture but also offers you clever storage solutions.
With a few adjustments and some creative touches, you can create a functional statement piece that enhances your bathroom's look. Additionally, using responsibly managed forests for any wood components in your project can further support eco-friendly living.
Repurposing Unused Furniture
Transforming an unused dresser into a stylish bathroom vanity can give your space a fresh look and added functionality. Start by removing the top drawers to make room for a sink and plumbing, while the remaining drawers store your toiletries and towels.
Sand and paint the dresser with water-resistant paint to withstand humidity. Consider adding a sturdy countertop—like solid wood or polished stone—on top to elevate the design.
Don't forget to install a mirror above the vanity for a cohesive feel and to brighten up the bathroom. Natural materials can enhance both aesthetics and durability, making your vanity a standout piece.
Here are some tips to make your project a success:
- Choose water-resistant finishes
- Select functional and stylish hardware
- Measure your sink and plumbing
- Personalize with decor
- Guarantee proper ventilation
Stylish Storage Solutions
Creating a stylish storage solution in your bathroom can be as simple as repurposing an unused dresser into a chic vanity.
Start by modifying the dresser to accommodate plumbing, ensuring it's functional for your sink. Utilize the drawers to store toiletries and essentials, effectively decluttering your space.
A fresh coat of paint or stain can help the dresser blend beautifully with your décor, adding a personal touch without breaking the bank.
For added elegance, consider a countertop made of marble or quartz, which not only enhances the dresser's appearance but also provides extra surface area for daily items.
Finally, incorporate decorative hardware to complete the look, reflecting your unique style while keeping it budget-friendly. Additionally, incorporating natural materials into your design can promote tranquility and enhance the overall ambiance of your bathroom.
DIY Vanity Transformation
Repurposing furniture not only maximizes space but also adds a unique touch to your bathroom. Transforming an unused dresser into a functional vanity is an affordable and stylish alternative to traditional options.
Start by measuring the dresser to guarantee it fits your space, then adjust the height for comfort. You'll need to make key modifications, like cutting sections for plumbing and installing a sink.
Consider these tips to elevate your vanity project:
- Use chalk paint or a waterproof sealant for a fresh finish
- Add new knobs or handles for a personalized touch
- Confirm proper drainage and water supply access
- Incorporate open shelving for extra storage
- Accessorize with decorative items that match your decor
Additionally, using eco-friendly paints can ensure a healthier home environment while enhancing your vanity's appearance.
Converting a Crib Into a Cozy Reading Nook

When you're looking to make the most of an old crib, turning it into a cozy reading nook is a delightful way to breathe new life into the furniture.
Start by removing one side to create an open seating area, then add soft cushions for comfort. Incorporate shelves or storage baskets within the crib's structure to keep books and reading materials organized and easily accessible.
A fresh coat of paint or stain can personalize the nook and enhance its aesthetic appeal. Soft lighting, like fairy lights or a small lamp, sets a warm atmosphere perfect for diving into stories.
Finally, personalize your nook with themed decorations, such as wall art or plush toys, to create a dedicated space for relaxation and imagination. Additionally, including educational toys can further enrich the reading experience, encouraging interactive learning and fostering a love for books.
Breathing New Life Into Tired Chairs With Bold Upholstery
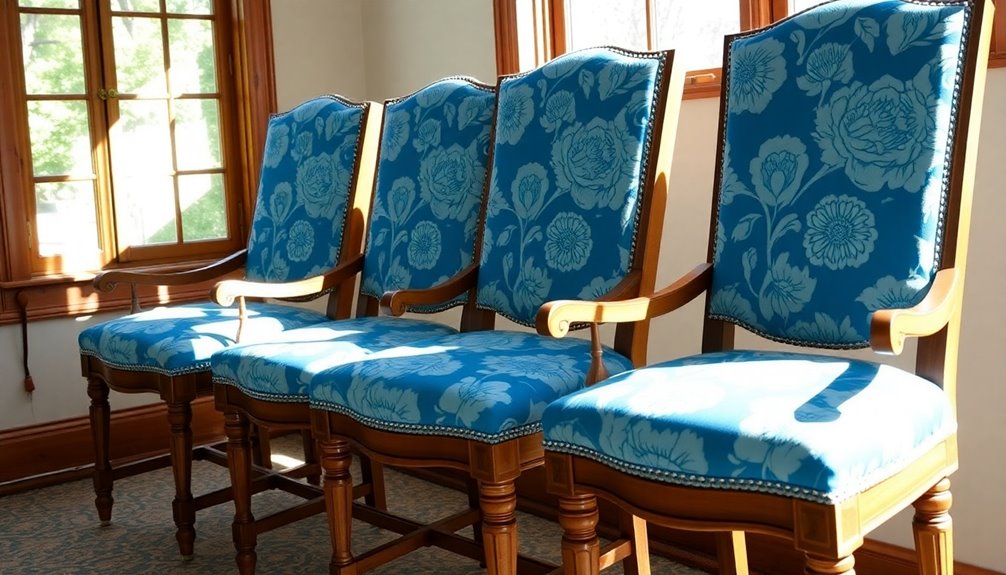
If you've got tired chairs, bold upholstery can breathe new life into them with vibrant colors and patterns.
You can easily tackle this DIY project, transforming vintage finds into stunning focal points for your space.
Let's explore some techniques and fabric choices that will elevate your seating arrangements!
Choosing Vibrant Fabrics
How can you breathe new life into tired chairs? Choosing vibrant fabrics is the key! Bold upholstery can instantly transform your furniture, adding a fresh, lively touch that enhances any room.
Consider using bright colors and striking patterns to make your chairs a focal point, showcasing your personality.
- Opt for durable fabrics that withstand wear and tear, especially in high-traffic areas.
- Make cleaning easy with materials that resist stains—perfect for homes with pets or kids.
- Mix and match different fabrics for an eclectic, personalized look.
- Choose colors that uplift the mood and energy of your space.
- Let your creativity shine through by experimenting with various textures and styles!
DIY Upholstery Techniques
Revamping tired chairs with bold upholstery is a rewarding DIY project that can dramatically change your space. Start by selecting a vibrant fabric that complements your decor and is durable for daily use. Carefully remove the old fabric and padding, noting the construction for easier reassembly. Next, use a staple gun to attach the new fabric, pulling it taut for a smooth finish. Enhance comfort by adding new padding or foam beneath the upholstery. Finally, reattach any decorative elements, like trim or buttons, to polish your chair.
| Step | Description |
|---|---|
| 1. Select Fabric | Choose a bold, durable fabric. |
| 2. Remove Old | Carefully take off old fabric and padding. |
| 3. Staple New | Attach new fabric securely with a staple gun. |
| 4. Add Padding | Incorporate fresh padding or foam. |
| 5. Finish Touches | Reattach decorative elements for a polished look. |
Transforming Vintage Finds
While vintage chairs might seem worn out, they hold incredible potential for transformation. By reupholstering them with bold, vibrant fabrics, you can breathe new life into these pieces. High-quality upholstery materials not only elevate their appearance but also promise durability.
Stripping down the old fabric allows you to start fresh, adding new foam for enhanced comfort. Consider incorporating contrasting colors or patterns; it creates a striking focal point in any room.
Plus, you can achieve stunning makeovers on a budget by sourcing chairs from thrift stores.
- Explore local thrift shops for hidden gems
- Choose fabrics that reflect your personal style
- Don't forget about new padding for comfort
- Experiment with patterns for visual impact
- Enjoy the DIY process and showcase your creativity!
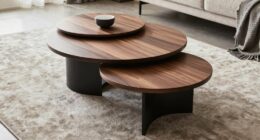
Crafting a Unique Coffee Table From Reclaimed Wood
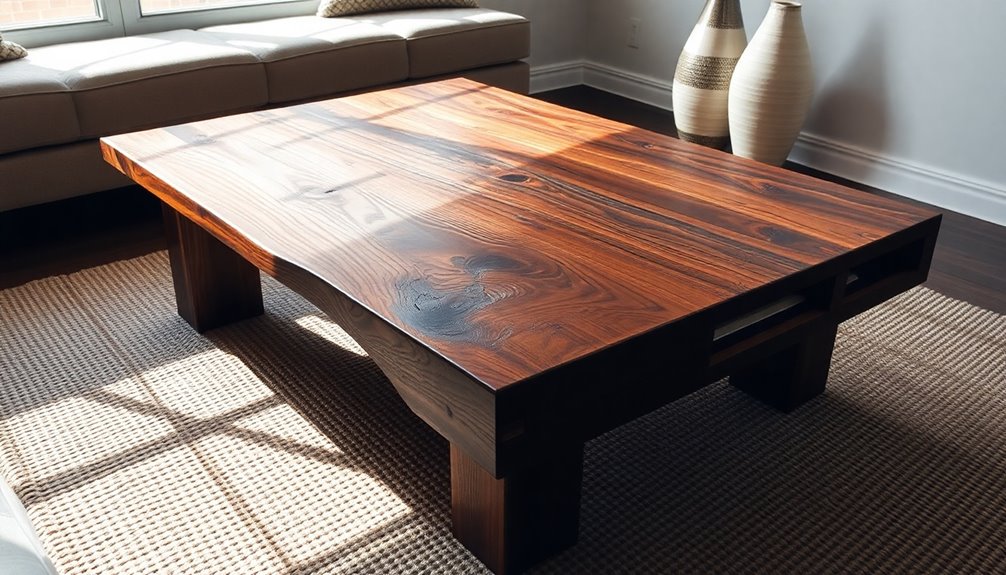
Crafting a unique coffee table from reclaimed wood not only adds character to your living space but also allows you to create a piece that reflects your personal style. Start by selecting high-quality salvaged planks that showcase their weathered beauty. Measure and cut the wood to your desired dimensions, ensuring stability. Assemble the table using wood glue and screws, and consider adding metal legs for a modern touch. After sanding the surface, apply a protective finish to enhance the wood's natural charm. Personalize your creation with unique elements like shelves or decorative inlays.
| Element | Description | Example |
|---|---|---|
| Wood Type | Reclaimed oak | Weathered finish |
| Table Shape | Rectangular or round | Custom dimensions |
| Design Feature | Shelves or drawers | Hidden storage |
Designing a Statement Piece With Painted Accent Furniture
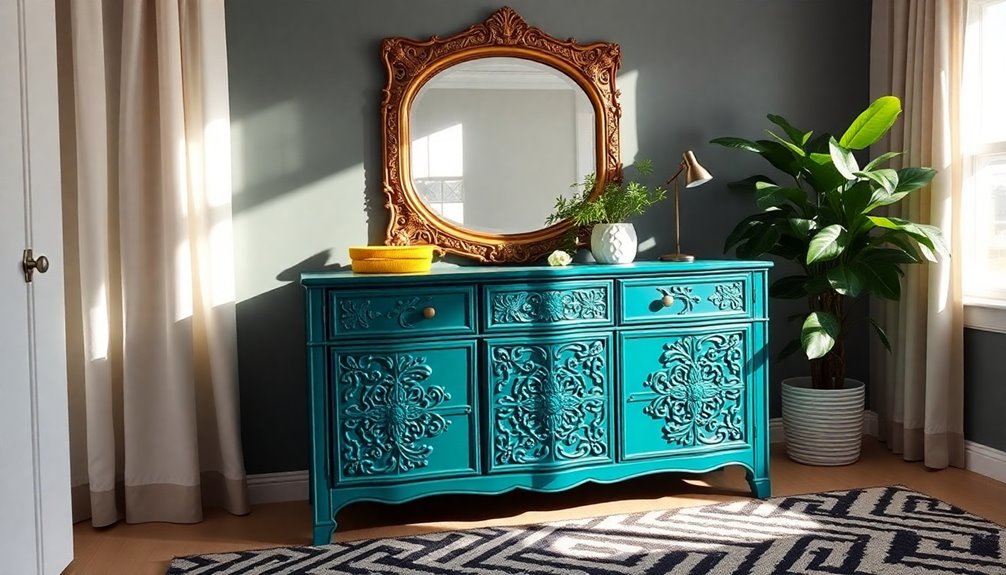
A painted accent piece can instantly elevate the style of any room, showcasing your personality and creativity.
Transforming a hutch into custom cabinetry is a fun DIY project. Start by removing the doors, then flip it upside down for stability while painting. Consider using gold leaf and ebony finishes to enhance hardware, giving it a chic look.
Stripping the original finish and applying an Early American Minwax stain can create a seamless appearance. Incorporate glass shelves and lighting for added visibility and functionality.
Best of all, you can keep costs low by reusing materials.
- Choose a bold color for your accent piece.
- Experiment with different finishes.
- Add unique hardware for flair.
- Use lighting to showcase your piece.
- Keep it budget-friendly and stylish!
Giving New Purpose to a Sideboard With Creative Storage Solutions
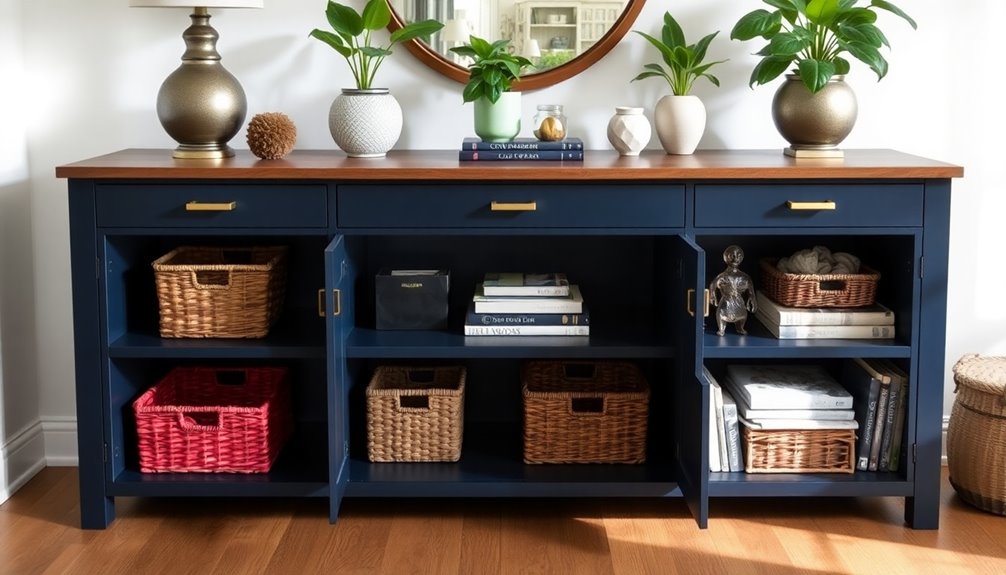
Transform your sideboard into a stylish storage solution that maximizes your kitchen space.
Start by concealing appliances like microwaves, keeping your kitchen looking open and organized.
Take advantage of your sideboard's solid construction to add glass shelves and lighting, enhancing visibility for decorative items.
A simple update with a fresh finish on existing hardware—like using Rub 'n Buff—can elevate the aesthetic without breaking the bank.
Consider relocating or integrating a coffee bar into your sideboard setup to boost functionality even further.
Best of all, this project can fit any budget, with total costs potentially as low as $12 for paint and hardware.
Immerse yourself in this DIY endeavor and watch your sideboard transform into a practical centerpiece!
Refreshing a Tired Bookshelf With Color and Texture

Revamping your bookshelf can breathe new life into your space, making it not just functional but also a statement piece.
Start by choosing bold paint colors or textured wallpaper as a vibrant backdrop. Mixing materials like wood, metal, and fabric adds depth and interest.
To enhance the aesthetic, consider these tips:
- Add plants for a touch of greenery.
- Stack books horizontally to create visual variety.
- Use colorful storage boxes for organization and flair.
- Experiment with staggered heights for a dynamic arrangement.
- Integrate LED strip lights or small lamps to spotlight featured items.
With these changes, your bookshelf won't only look stunning but also reflect your personal style!
Frequently Asked Questions
What Tools Are Essential for Furniture Makeover Projects?
For furniture makeover projects, you'll need a few essential tools to get started.
First, grab sandpaper or a power sander for surface prep. You'll also want a high-quality paintbrush or roller for applying paint or stain.
Don't forget a paint tray, drop cloths, and a good pair of safety goggles.
If you're reupholstering, a staple gun and fabric scissors are vital.
With these tools, you'll be ready to transform your furniture!
How Can I Choose the Right Paint for Furniture?
When you're choosing the right paint for furniture, consider durability, finish, and color.
You'll want a paint that withstands wear and tear, a finish that matches your style, and a color that complements your space.
Test samples on a small area first, and look for paints specifically formulated for furniture.
Don't forget to think about how the paint interacts with your furniture's material; it can make all the difference in your makeover.
Are There Any Safety Precautions to Consider During Makeovers?
When you're tackling a makeover, it's essential to prioritize safety.
Always wear gloves and a mask to protect yourself from dust and fumes. Make certain your workspace is well-ventilated, especially when using paints or solvents.
If you're using tools, verify you've read the instructions and understand how to handle them properly.
Keep a first aid kit nearby, just in case, and clear the area of any hazards to avoid accidents.
Where Can I Find Inspiration for My Own DIY Projects?
You might think finding inspiration for your DIY projects is tough, but it's easier than you think.
Start by browsing platforms like Pinterest and Instagram for endless ideas. Check out local thrift stores and flea markets for unique pieces that spark creativity.
Don't forget to explore DIY blogs and YouTube channels, where you can watch transformations unfold. Take notes on what excites you, and soon you'll have your own vision ready to tackle!
How Do I Maintain My Upcycled Furniture's Appearance Over Time?
To maintain your upcycled furniture's appearance over time, regularly clean it with a soft cloth and mild soap to remove dust and dirt.
Avoid harsh chemicals that can damage the finish. If you've used paint, consider applying a clear sealant to protect the surface.
Keep your furniture away from direct sunlight to prevent fading, and periodically check for any signs of wear.
With a little care, your pieces will stay beautiful for years!
Conclusion
Who knew that transforming old furniture could be so revolutionary? You might've thought your vintage hutch was just a relic of the past, but it turns out it had hidden potential all along. Each makeover not only breathes new life into forgotten pieces but also challenges the notion that beauty requires brand-new items. So, next time you consider tossing something out, remember: sometimes, the most stunning decor is just waiting for a little love and creativity to shine through.