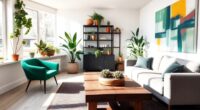
If you want to transform your space, try hand-painted accent walls for a personalized touch or upcycle old furniture with creative techniques like distressing and decoupage. Add unique macramé wall hangings for texture, or create beautiful plant-themed terrariums to bring nature indoors. Don't forget about customized gallery walls that showcase your style. These projects will truly elevate your home decor. Keep exploring to discover even more innovative ideas to blow your mind!
Key Takeaways
- Transform old furniture with upcycling techniques like distressing and decoupage for a unique, rustic look that adds character to your space.
- Create stunning hand-painted accent walls with personalized designs to serve as a focal point and enhance the room's ambiance.
- Incorporate macramé wall hangings to introduce texture and a bohemian vibe, adding unique decorative elements to your decor.
- Design customized gallery walls showcasing personal artwork and photos, allowing for a dynamic display that reflects your individuality and style.
- Craft plant-themed terrariums using various plants and decorative elements, creating miniature gardens that enhance visual appeal and bring nature indoors.

Plaster Painting Kit for Kids & Adults with 3D Ready-to-Paint Ceramic Flowers, 12 Paints, Pearl Stickers & More Bulk Party Favors Birthday Mother’s Day Gifts Home Decor
- Complete plaster painting kit: Includes flowers, paints, and accessories
- Premium quality materials: Non-toxic paints and glossy varnish
- Ideal for parties and gifts: Bulk set for group crafting and celebrations
As an affiliate, we earn on qualifying purchases.
As an affiliate, we earn on qualifying purchases.
Hand-painted Accent Walls
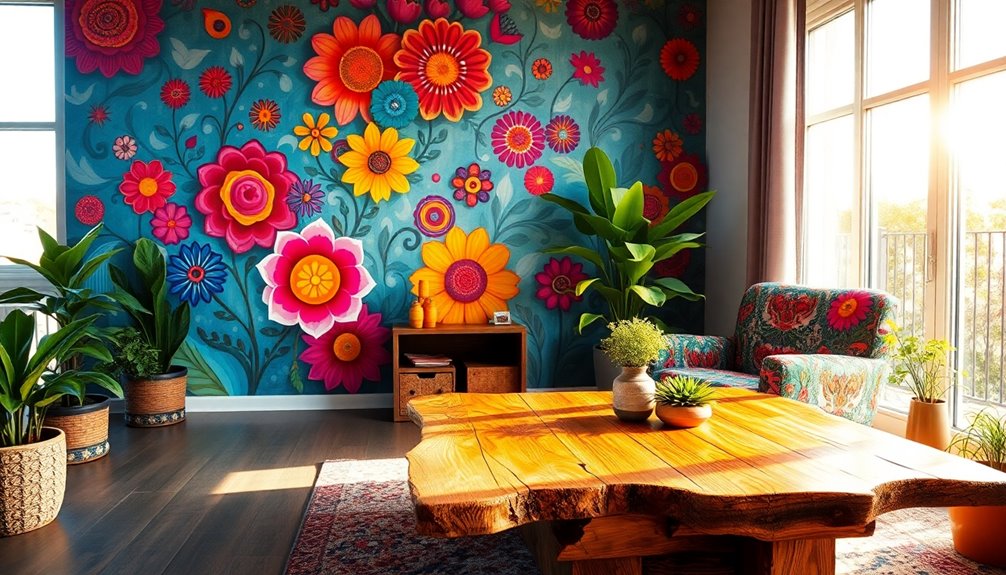
Creating a hand-painted accent wall can transform your space into a personalized haven. With DIY home projects, you can express your style through diverse designs like ombre effects or geometric patterns.
Start by visualizing your design and selecting colors that complement your existing furnishings—think soft pastels or bold hues. Quality supplies are essential; gather paint, brushes, and painter's tape to outline your design for clean lines.
Layering colors not only adds depth but also makes your wall a unique focal point. Proper planning and execution will elevate a simple wall into a stunning visual element, enhancing the room's ambiance and aesthetic appeal.
Immerse yourself in this creative project, and watch your space come alive!
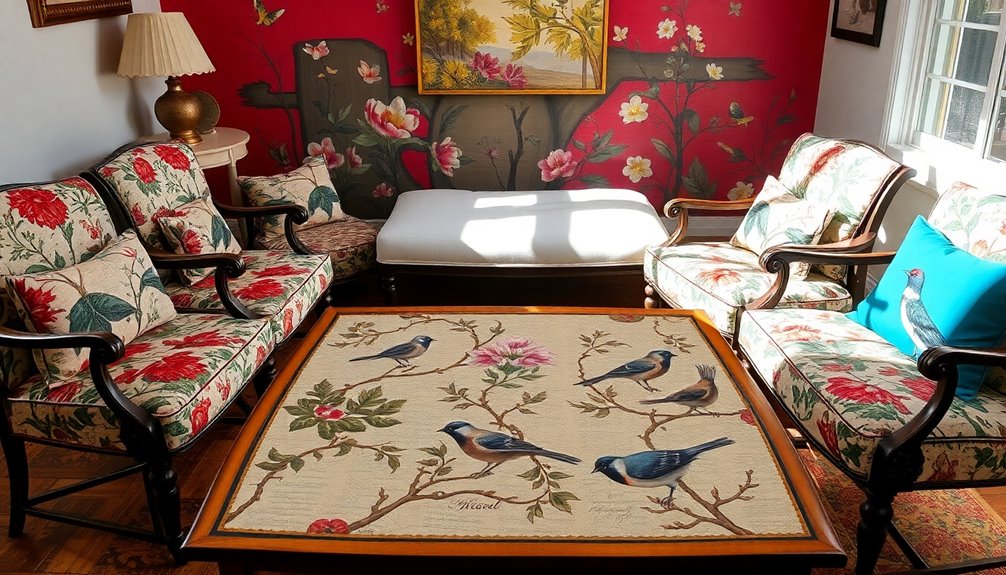
Upcycled Furniture With a Creative Twist
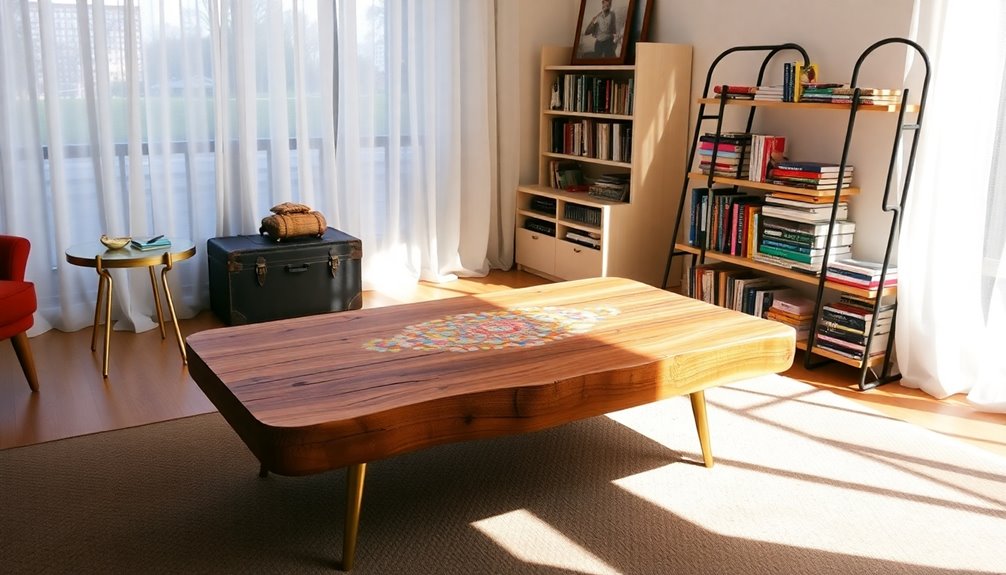
Upcycling furniture not only breathes new life into old pieces but also adds a personal touch to your home decor. By embracing sustainability, you can transform outdated items into stunning focal points, rich with vintage charm.
Techniques like distressing with sandpaper or paint washes create a rustic look that enhances the character of your upcycled furniture. Decoupage allows for endless design possibilities, where you can showcase your unique style with paper cutouts or fabric.
Reupholstering chairs and sofas in vibrant fabrics gives them a fresh, inviting feel. Tailor each piece to complement your existing decor, turning functional items into artistic statements that reflect your personal taste. Incorporating natural elements into your upcycled projects can further enhance tranquility and warmth in your space.
Upcycled furniture can truly redefine your home decor experience.
Unique Macramé Wall Hangings
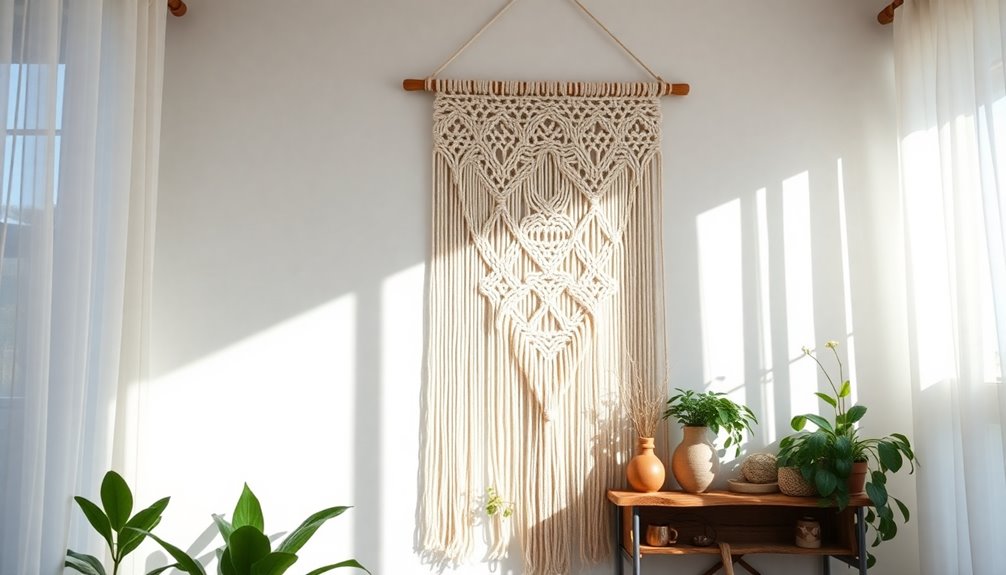
Macramé wall hangings add a unique touch to your home, showcasing intricate designs that reflect your creativity.
By using various knotting techniques, you can create stunning decor pieces that range from simple patterns to complex weaves. Start with basic knots like the square knot and half hitch, then progress to advanced styles such as the spiral knot or feather design.
Essential materials include macramé cord in different colors and thicknesses, along with a sturdy base like a wooden dowel.
When finished, these macramé pieces become striking focal points, adding texture and a bohemian vibe to any room. Choose a color scheme that aligns with your style to guarantee your unique macramé wall hanging enhances your existing decor beautifully.
Plant-themed Terrariums
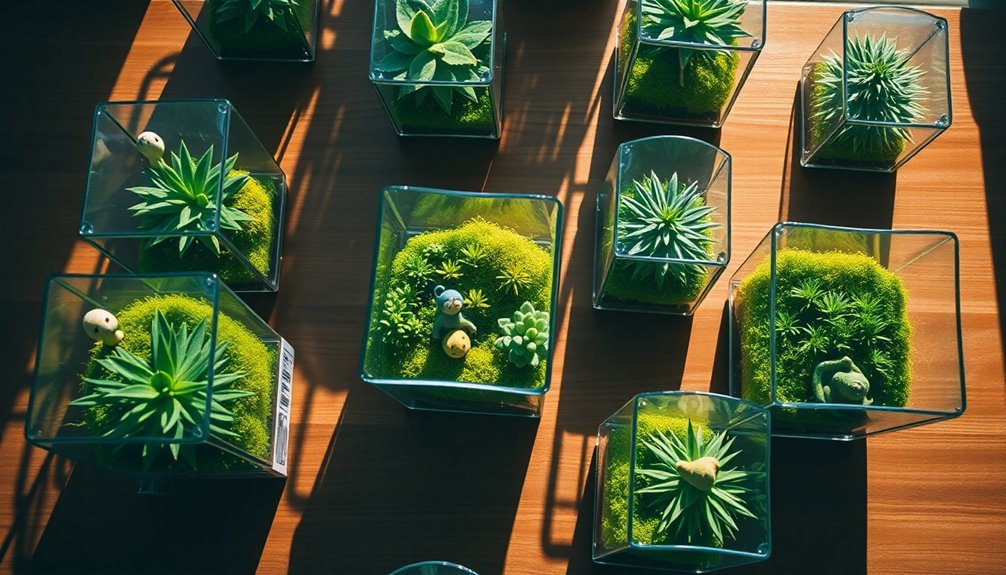
Have you ever thought about how a plant-themed terrarium can transform your space into a miniature garden?
These self-sustaining ecosystems are perfect for showcasing a variety of plants, with succulents and moss being popular choices.
To create your terrarium, grab a glass container—like a jar or vintage bottle—and layer it with soil, plants, and decorative elements such as rocks or figurines to enhance its visual appeal.
Remember, the right balance of light and moisture is key, so place your terrarium in indirect sunlight and monitor humidity levels.
Personalize your creation with unique decorative items, allowing for creative expression.
With a bit of regular maintenance like pruning and watering, your terrarium will thrive, adding charm to any room. Additionally, engaging in this creative project can enhance fine motor skills and provide a fun, hands-on learning experience for children.
Customized Gallery Walls
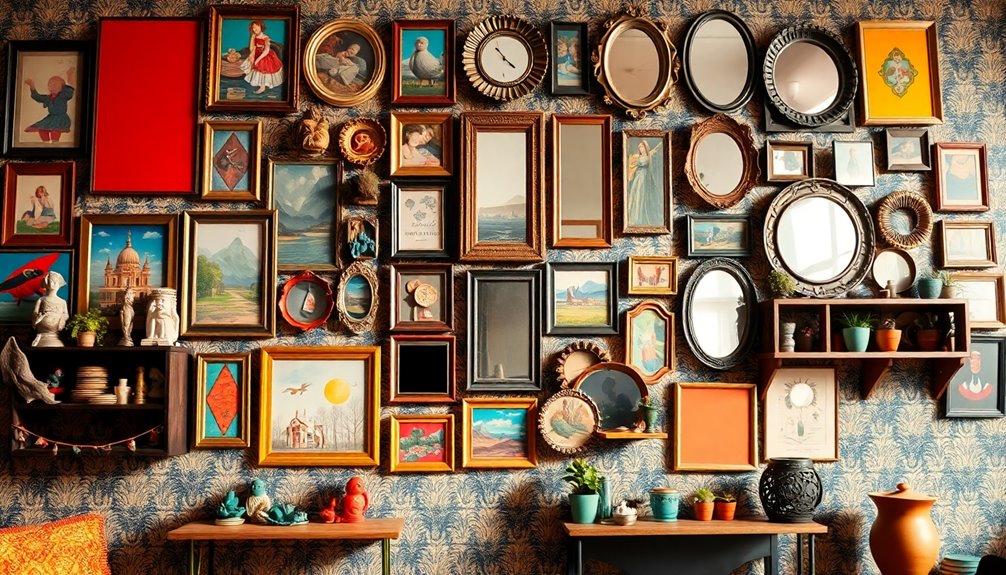
Creating a customized gallery wall lets you showcase your personality through art.
By choosing a theme for your pieces and experimenting with different layouts, you can craft a visually engaging display that tells your story.
Plus, using paper cutouts to plan your arrangement makes it easy to find the perfect fit before you hang anything.
Thematic Art Selection
How can you transform an ordinary wall into an enchanting story? Start with thematic art selection that enhances visual storytelling. Choose a cohesive theme that resonates with you, mixing different sizes, frames, and textures to add depth. Here's a quick guide:
| Theme | Artwork Type |
|---|---|
| Nature | Photographs & Prints |
| Urban Exploration | Mixed Media & Graffiti |
| Personal Memories | Family Photos & Keepsakes |
Experiment with layouts using paper cutouts to envision arrangements before hanging. Regularly refresh your gallery wall to keep it dynamic and personal, incorporating varied media to create an eclectic aesthetic. Consider incorporating sustainable materials for a unique touch that aligns with eco-friendly practices. With these tips, your wall will tell a unique story that captivates!
Layout Experimentation Techniques
Once you've selected your thematic art, it's time to think about how to arrange it on your wall.
Layout experimentation is key to transforming your space into a dynamic gallery that reflects your style. Start by using paper cutouts to test different arrangements without committing to nails just yet.
Here are three tips to guide you:
- Choose a cohesive theme: Verify all pieces complement each other.
- Mix frame styles and sizes: This adds depth and visual interest to your display.
- Consider your color palette: Make certain your gallery wall enhances your room's existing decor.
Additionally, incorporating vintage or distressed furniture into your gallery wall can enhance the overall farmhouse aesthetic. Don't forget to refresh your gallery wall regularly to keep it current and reflective of your evolving tastes!
Decoupage Techniques for Stunning Decor
What makes decoupage a go-to technique for adding personality to your decor? This creative process involves adhering paper cutouts, like patterned napkins, to surfaces using a glossy medium such as Mod Podge.
To achieve a seamless finish, use a fan brush and apply thin layers, allowing each to dry completely. Ripping paper instead of cutting it creates a blended look, while thicker materials, like rice paper, add durability and texture.
You can enhance your piece by incorporating layers of paint in different colors, adding depth and visual interest. For sturdy projects, using adhesives like E6000 guarantees longevity. Additionally, consider using certified solar filters to create unique, eye-catching designs that can also serve a functional purpose.
With these decoupage techniques, you can transform ordinary items into stunning decor that reflects your unique style.
Innovative Painting Techniques for Furniture

Let's explore some innovative painting techniques that can transform your furniture into a work of art.
You can experiment with layered color blending for depth and use textures to add interest.
Plus, creative stencil ideas can elevate your designs, giving your pieces a unique flair. Additionally, incorporating airless paint sprayers can enhance your projects by providing a smooth finish and reducing application time.
Layered Color Blending Techniques
When you plunge into layered color blending techniques for furniture, you're opening the door to a world of creativity and personalization. Start by selecting a base color that resonates with your style, applying it evenly. Allow 20 to 30 minutes for drying between layers to build depth.
For seamless shifts, use darker shades on the edges and lighter colors toward the center with a swirling motion.
Here are three tips to enhance your projects:
- Experiment with different applicators—sponges create softness, while brushes offer detailed strokes.
- Utilize tools like tiny paintbrushes for intricate designs.
- Layer multiple coats, ensuring each dries fully to retain vibrancy and achieve those stunning effects.
Incorporating natural materials can further elevate your furniture decor, adding authenticity and warmth. Embrace the creative process!
Texture Application Methods
Three key texture application methods can transform your furniture projects into unique pieces of art. Start by experimenting with sponges and brushes. Use darker base colors and layer lighter shades for depth. Next, try a swirling technique with water on wood edges to achieve a blended look, different from canvas. Finally, apply white chalk paint as a base coat to make subsequent layers pop. Incorporating HEPA filtration techniques in your workspace can also help maintain a clean environment while you work on your projects.
| Technique | Description |
|---|---|
| Distressing | Adds rustic charm and character |
| Dry Brushing | Creates complex designs and highlights |
| Layering | Builds depth with intricate details |
| Precision Tools | Enhances realism with tiny brushes |
With these texture application methods, you'll elevate your furniture projects to new heights!
Creative Stencil Ideas
Building on the texture application methods that can add depth and character to your furniture, creative stencils offer another exciting way to elevate your projects.
To achieve stunning results, try these tips:
- Use painter's tape: This guarantees sharp edges around your stencil designs, giving you clean lines and a polished finish.
- Choose quality materials: Opt for Mylar or adhesive vinyl to prevent paint bleed and increase the durability of your stencils.
- Experiment with layering: Combine multiple stencils and contrasting colors to create a unique, multi-dimensional look that catches the eye.
Don't hesitate to incorporate techniques like sponging or stippling.
Plus, designing your own stencils with a cutting machine allows for personalized patterns that truly reflect your style.
Incorporating color accuracy from your projector can enhance the visual appeal of your stenciled designs, making them pop even more.
Transforming Spaces With Terrarium Creations
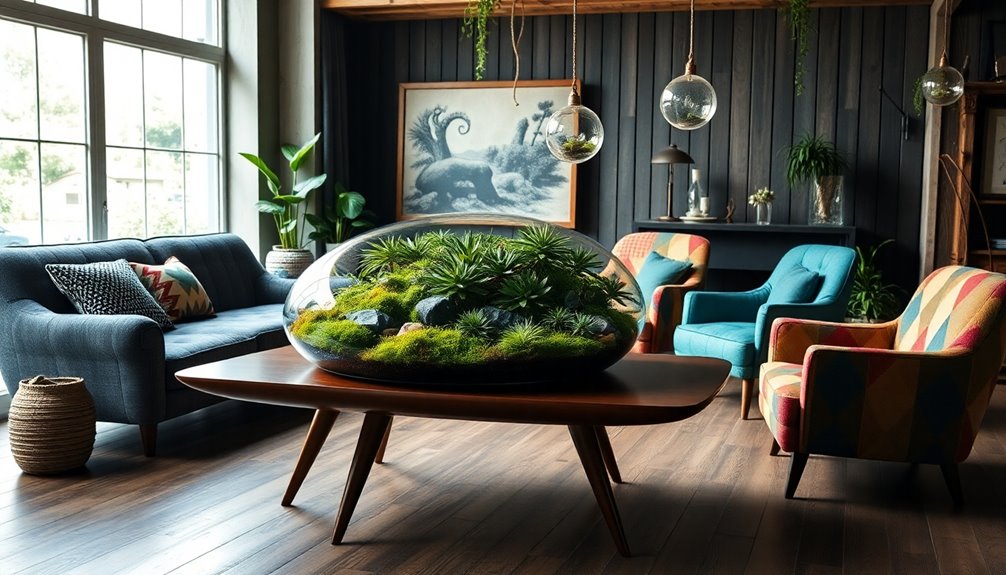
Terrariums can transform any space into a vibrant oasis of greenery, adding life and charm to your home decor. These self-sustaining miniature ecosystems thrive indoors with the right balance of light and moisture.
Choose plants like succulents, air plants, or moss that fit well in closed or open terrarium setups for lasting health. Use transparent glass containers such as jars, vases, or vintage bottles to showcase the layered soil and plant life beautifully.
Start with small stones for drainage, followed by activated charcoal, soil, and your selected plants. You can enhance your terrarium's appeal by incorporating decorative elements like figurines, rocks, or colored sand, creating a personalized display that reflects your unique style and brings nature indoors. To ensure the longevity of your terrarium, engage in open dialogues about the care and maintenance of the plants included.
Crafting Unique Decorative Elements

Crafting unique decorative elements can breathe new life into your home, making it a true reflection of your personality.
You can easily incorporate your style and creativity through various projects. Here are three ideas to get you started:
- Upcycling Old Furniture: Transform that worn-out chair or table into a stunning centerpiece using techniques like distressing or decoupage.
- Customized Gallery Wall: Curate a collection of artwork and photos that tell your story, enhancing the visual appeal of any room.
- Macramé Wall Hangings: Add a bohemian touch with intricate knots that can be tailored to your color scheme, bringing texture and warmth to your walls.
These projects not only beautify your space but also showcase your individuality!
Assembly Tips for Lasting Home Projects

When you're tackling furniture projects, choosing the right glue is essential for durability.
Remember to allow adequate drying time to guarantee everything holds together well.
You can also use reinforcement techniques to boost the strength of your assembly, making your creations last longer.
Optimal Glue Selection
Choosing the right glue is essential for ensuring your furniture projects stand the test of time.
Different types of glue serve various purposes, so it's important to select the best fit for your materials.
- E6000 glue: Ideal for industrial strength and versatility, it bonds well with wood and metal for long-lasting results.
- Gorilla Glue gel: Perfect for vertical surfaces or heavy-duty projects, its thick consistency provides better control and minimizes drips.
- Tacky glue: Great for lightweight materials and embellishments, it dries clear and offers a flexible hold.
Proper Drying Times
To guarantee your furniture projects last, proper drying times are essential for achieving a strong bond and a polished finish.
Always allow painted surfaces at least 20 to 30 minutes to dry before applying additional coats or handling them. This guarantees ideal adhesion and quality.
When using Mod Podge for decoupage, let the initial layer dry completely before trimming to avoid smudging.
For glue applications, like attaching legs, an overnight drying time is recommended for a secure bond.
If you're layering colors, make sure each layer dries fully to prevent blending issues and achieve the desired depth.
If you're in a hurry, a heat gun can expedite drying times for chalk paint, but be careful to avoid overheating the surface.
Reinforcement Techniques
Reinforcement techniques play an essential role in guaranteeing your furniture and decor projects stand the test of time. To create lasting assemblies, follow these tips:
- Use a combination of adhesives: Pair E6000 with Gorilla Glue gel for a strong hold.
- Attach components effectively: Use tacky glue for an immediate bond, then reinforce with hot glue for permanence.
- Prepare PVC pipes properly: Cut with a miter saw and sand edges to enhance adhesion and guarantee a clean finish.
Always allow ample drying time, preferably overnight, after assembly. This guarantees all adhesives cure properly, providing stability and durability to your project.
With these reinforcement techniques, you'll craft pieces that withstand the trials of everyday life while looking fantastic!
Frequently Asked Questions
What Tools Are Essential for DIY Furniture Projects?
For DIY furniture projects, you'll need a few essential tools to get started.
Grab a power drill for quick assembly and a circular saw for cutting wood. A measuring tape guarantees accuracy, while a level helps keep everything straight.
Don't forget a sander for smooth finishes and clamps to hold pieces in place during assembly.
With these tools in hand, you're ready to create something amazing that reflects your personal style!
How Can I Safely Source Materials for Upcycling?
When you begin your journey of upcycling, think of it as a treasure hunt.
Start by exploring thrift stores, garage sales, and online marketplaces for hidden gems. Always check for quality and safety—avoid anything with harmful chemicals or structural issues.
Connect with local communities or groups focused on sustainability; they can offer leads and advice.
Keep your eyes peeled, and you'll find materials that spark your creativity without compromising safety.
What Paint Types Are Best for Furniture Finishes?
When choosing paint types for furniture finishes, you'll want to contemplate durability and appearance.
Acrylic latex paints are great for a smooth finish and easy cleanup. Chalk paint offers a matte finish and adheres well, perfect for a vintage look.
If you're after a glossy finish, go for oil-based paints, as they're highly durable.
Don't forget to seal your project with a protective topcoat for added longevity!
How Do I Care for My Handmade Decor Items?
Caring for your handmade decor items is essential to keep them looking great.
Start by dusting them regularly with a soft cloth to prevent buildup. If they're made of wood, use a suitable wood cleaner and avoid harsh chemicals.
For fabrics, spot clean stains gently and consider using fabric protectants.
Always keep them away from direct sunlight to prevent fading.
With these simple steps, you'll maintain their beauty and longevity effortlessly.
What Are Some Common Mistakes to Avoid in DIY Projects?
When you're diving into DIY projects, avoid rushing the planning stage. Skipping measurements can lead to costly mistakes, so always double-check.
Don't overlook the importance of quality materials; cheap supplies often result in poor outcomes. It's also tempting to ignore safety gear, but protecting yourself should be a priority.
Ultimately, remember to embrace flexibility; if something goes wrong, adapt and find a creative solution instead of getting frustrated.
Conclusion
Incorporating these creative furniture and decor projects can truly transform your space, but did you know that personalizing your environment can actually boost your mood and productivity? It's true! Studies show that a tailored space reflects your personality and can enhance your well-being. So, immerse yourself in these projects with enthusiasm and watch how your surroundings come alive. Embrace your creativity, and don't be afraid to experiment—your home deserves a touch of your unique flair!