To guarantee your undermount sink lasts, carefully prepare your countertop with precise measurements and proper support structures like corrosion-resistant brackets and heavy-duty clips. Use quality adhesives and sealants to prevent leaks and protect against water damage. Proper installation, leveling, and secure fastenings are crucial for stability. Regular maintenance and addressing issues early help avoid long-term problems. If you want to learn more about making your undermount sink durable, keep exploring these essential tips.
Key Takeaways
- Properly measure and prepare the workspace, ensuring compatibility and a clean environment for secure installation.
- Use durable, moisture-resistant hardware like stainless steel brackets and corrosion-resistant clips for lasting support.
- Select high-quality, corrosion-resistant materials and adhesives to enhance the sink’s stability and prevent deterioration.
- Follow best sealing practices with even application of silicone sealant and allow proper curing to prevent leaks.
- Reinforce support structures and consider professional installation to ensure long-term stability and prevent common issues.

Qualward Undermount Sink Brackets,Adjustable Undermount Sink Support, Stainless Steel Installation Kit for Undermount Kitchen Sink Adjustable Support Pole (29-39.5 inches)
- Universal & Sturdy Support: Supports most sinks with 880 lb capacity
- Space Organization: Frees cabinet space and keeps items tidy
- Easy Installation & Adjustment: Adjustable from 15 to 40 inches in three sizes
As an affiliate, we earn on qualifying purchases.
As an affiliate, we earn on qualifying purchases.
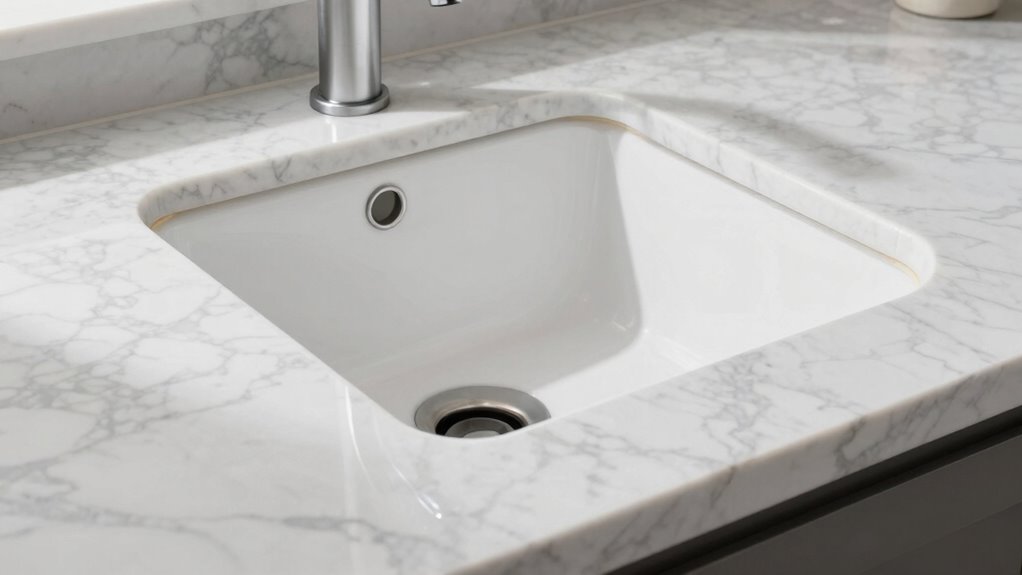
Preparing Your Countertop for Undermount Sink Installation

Before you begin installing your undermount sink, it’s vital to properly prepare your countertop. Start by measuring your sink’s dimensions carefully and marking the cutout area. Confirming sink compatibility is essential; verify that your chosen sink fits the designated space and that your countertop material can support the installation. When creating the countertop cutout, use a template or manufacturer’s instructions to achieve precise measurements. Double-check that the cutout aligns with plumbing and support structures beneath the surface. Proper preparation minimizes errors and guarantees a seamless fit. Additionally, understanding installation techniques can help you visualize the installation process more effectively and ensure all necessary materials are prepared beforehand. Rushing this step can lead to misalignment, leaks, or damage. Taking the time to plan and measure accurately sets the foundation for a successful, durable undermount sink installation. Being aware of appliance maintenance plans can also prevent future costly repairs that might affect your plumbing fixtures.
Choosing the Right Hardware and Support for Your Sink

Choosing the right hardware and support is key to a secure and long-lasting undermount sink. You should select durable materials that can handle daily use and moisture exposure. Proper support guarantees your sink stays stable and prevents damage over time. Additionally, selecting support systems that are designed to withstand moisture exposure ensures the longevity and safety of your installation. Incorporating corrosion-resistant hardware can further prevent deterioration caused by moisture and extend the lifespan of your sink setup. Using proper installation techniques can also help maintain the integrity of your sink and avoid future issues. Regular maintenance, such as inspecting and cleaning hardware components, can also help prevent issues related to hardware corrosion and ensure your sink remains secure for years to come.
Selecting Durable Materials
Selecting durable materials is essential to guarantee your undermount sink stays secure and functions properly over time. When choosing hardware and support, focus on material selection that withstands moisture, weight, and daily use. Durability factors include resistance to corrosion, strength, and stability. Stainless steel brackets, heavy-duty clips, and rust-resistant hardware are ideal choices for long-lasting support. Avoid materials prone to rust or weakness, as they can compromise the sink’s stability. Investing in high-quality, durable materials ensures your sink remains securely mounted, preventing damage or loosening. Additionally, understanding moisture resistance is crucial for selecting materials that will hold up well in a damp environment. Using corrosion-resistant hardware can further extend the lifespan of your installation. It’s also important to consider installation techniques that reinforce the support structure and distribute weight evenly. Choosing hardware with additional protective coatings can help prevent deterioration over time. Properly evaluating material quality at the outset can significantly impact the overall durability of your installation. Remember, the right material selection directly impacts the longevity of your installation and reduces the need for repairs or replacements down the line. Prioritizing durability factors now saves you time and effort later.
Ensuring Proper Support
Proper support is essential to guarantee your undermount sink stays secure and functions correctly over time. Choosing the right support brackets and adhesive selection ensures stability and prevents damage. Support brackets should be sturdy, compatible with your countertop material, and correctly installed to distribute weight evenly. When selecting adhesives, opt for high-quality, waterproof options designed for kitchen use to securely bond the sink to the countertop. Proper support prevents sagging, cracking, or detachment, preserving both appearance and functionality. Here’s a quick guide:
| Support Material | Adhesive Type | Best For |
|---|---|---|
| Metal brackets | Epoxy | Heavy sinks |
| Plastic brackets | Silicone | Lightweight sinks |
| Custom supports | Construction adhesive | Stone countertops |
| Reinforcement strips | Marine adhesive | Under heavy use |
Additionally, understanding the support requirements for your specific countertop and sink type can help you choose the most effective support system. Incorporating proper support techniques during installation can significantly extend the lifespan of your sink and prevent costly repairs later. Using appropriate installation methods ensures even weight distribution and minimizes stress on the fixture, further enhancing durability. Paying attention to installation procedures can help avoid common issues like misalignment or uneven support that compromise long-term stability.
Why Proper Support and Adhesives Ensure Your Sink Lasts

If your undermount sink isn’t properly supported and sealed with the right adhesives, it can lead to leaks, sagging, or even damage over time. Using the correct adhesives guarantees a strong bond between the sink and the countertop, preventing movement and water seepage. It’s vital to take into account sink materials and countertop compatibility to select adhesives that won’t damage surfaces or degrade prematurely. For example, some materials like granite or quartz require specific adhesives that adhere well without causing discoloration or cracking. Proper support distributes weight evenly, reducing stress on the sealant. When combined, support and adhesives create a secure, durable installation that withstands daily use, water exposure, and the weight of dishes. This longevity keeps your sink functioning smoothly for years.
How to Install Your Undermount Sink Step by Step

Before you begin, make sure your workspace is clean and well-organized to keep everything within reach. Next, carefully position the sink and secure it properly to guarantee a stable installation. Taking these initial steps will set you up for a smooth and successful undermount sink installation. Additionally, understanding pressure washer techniques can help you clean the surrounding area effectively, ensuring a neat finish. Be sure to select the appropriate installation tools to facilitate precise and secure mounting. Familiarizing yourself with cabling solutions such as secure mounting and leveling kits can also contribute to a more durable and professional-looking installation. Remember that proper support structures are essential for maintaining the integrity of the undermount sink over time. Knowing how to achieve optimal contrast ratio in your setup can enhance the appearance of your workspace, especially if you plan to incorporate display elements or lighting features.
Preparing the Workspace
To guarantee a smooth installation, you need to prepare your workspace thoroughly. Start by cleaning the area to remove dust, grease, and debris, ensuring proper adhesion and fit. Next, verify material compatibility between your countertop and sink to prevent damage or leaks. Then, gather all necessary tools and materials for the job, so nothing delays your progress. Finally, clear the surrounding space, providing ample room to work comfortably and safely. Proper cleaning procedures prevent future issues, while checking material compatibility ensures your sink fits perfectly and lasts longer. Additionally, understanding installation techniques can help you avoid common mistakes and achieve a professional finish. By organizing your workspace and paying attention to these details, you set a solid foundation for a successful undermount sink installation.
Securing the Sink Properly
Securing your undermount sink correctly is essential for a durable and professional finish. The sink material influences the mounting method, so check the manufacturer’s recommendations. For example, stainless steel sinks often use clips or brackets, while stone or composite sinks may require specialized hardware. Confirm your hardware is compatible with the sink’s material to prevent damage or instability. Additionally, understanding gear care tips can help you select the appropriate hardware that will protect your sink’s surface and ensure longevity. Begin by positioning the sink under the countertop, then attach the mounting clips or brackets securely, following the manufacturer’s instructions. Use a level to verify proper alignment before tightening. Properly secured hardware distributes weight evenly, preventing sagging or movement over time. Taking these steps guarantees your sink remains firmly in place, enhancing both functionality and aesthetic appeal.
Sealing and Caulking Techniques to Prevent Leaks

Proper sealing and caulking are essential steps in preventing leaks around your undermount sink. To guarantee a watertight seal, focus on sealant application and caulking techniques:
Proper sealing and caulking prevent leaks around undermount sinks effectively.
- Clean the area thoroughly to remove debris and old caulk, ensuring proper adhesion.
- Apply a high-quality silicone sealant evenly along the sink’s edges, using a caulking gun for control.
- Smooth out the caulk with a damp finger or caulk finishing tool for a neat finish.
- Allow the sealant to cure fully before using the sink, typically 24 hours, to prevent future leaks.
Mastering these caulking techniques guarantees a durable seal that keeps water where it belongs, protecting your countertop and cabinetry from damage.
Attaching Your Sink Securely With Brackets and Clips

Choosing the right brackets and clips is essential to secure your undermount sink properly. Make sure they’re strong enough to support the weight and fit well with your sink’s material. When attached correctly, these fasteners will keep your sink stable and prevent any movement or damage.
Selecting Proper Brackets and Clips
Selecting the right brackets and clips is vital to guarantee your undermount sink stays firmly in place. Proper bracket selection ensures compatibility with your sink and countertop, preventing movement or damage. When choosing clips, consider their size and strength to support the weight effectively. Here are key points to keep in mind:
- Match brackets to your sink’s weight and countertop material.
- Use corrosion-resistant brackets for longevity.
- Ensure clips are compatible with your sink’s mounting holes.
- Follow manufacturer instructions for clip installation for a secure fit.
Choosing the proper brackets and clips is essential for a solid, lasting installation. Focus on the right bracket selection and precise clip installation to avoid issues down the line. Proper hardware makes all the difference in keeping your sink secure.
Ensuring Secure Attachment
To guarantee your undermount sink stays firmly in place, it’s essential to attach it securely using brackets and clips. Proper hardware compatibility ensures the brackets fit snugly without shifting or loosening over time. Before attaching, apply a continuous bead of sealant around the sink’s perimeter on the countertop to create a watertight seal. This prevents water from seeping underneath, which could weaken the attachment. When installing, double-check that the brackets and clips are compatible with your sink and countertop material. Tighten all hardware firmly but avoid over-tightening, which can damage the sink or compromise the sealant. Proper installation, combined with sealant application and compatible hardware, guarantees a stable, long-lasting undermount sink.
Common Mistakes That Can Make Your Sink Unstable
One of the most common mistakes that can make your undermount sink unstable is improper support during installation. If you don’t securely attach the sink flange and ensure the countertop cutout fits perfectly, stability suffers. Here are key errors to avoid:
- Neglecting to reinforce the countertop around the cutout, leading to sagging.
- Using inadequate adhesive or sealant that doesn’t support the weight.
- Failing to properly align the sink flange with the countertop cutout, causing uneven stress.
- Over-tightening mounting brackets, cracking the countertop or loosening the sink.
Making sure proper support and correct placement of the sink flange is vital for a long-lasting, stable undermount sink. Skipping these steps can result in shifting or damage over time.
Tips for Maintaining and Keeping Your Undermount Sink Lasting
Proper maintenance is key to ensuring your undermount sink stays stable and functional for years to come. Establish regular cleaning routines to remove soap scum, mineral deposits, and grime that can cause stains or damage. Use gentle, non-abrasive cleaners to avoid scratching the surface, and wipe the sink dry after each use to prevent water spots. Stain prevention is also essential—avoid leaving acidic or staining substances like coffee, wine, or fruit juices in the sink for extended periods. Check the sealant periodically, and reapply if you notice any cracks or gaps. By staying consistent with cleaning routines and being mindful of stain prevention, you’ll keep your undermount sink looking new and working flawlessly for years.
Troubleshooting Installation Issues and Fixing Leaks

Even with careful installation, issues can arise that affect your undermount sink’s performance. Leaks and problems often stem from installation flaws or incompatible countertop materials. To troubleshoot:
- Check the sealant around the sink rim; reapply if you notice gaps or cracks, especially on porous countertops like marble.
- Inspect sink accessories such as clips and brackets; tighten or replace any loose or damaged parts.
- Examine the underside plumbing for drips or loose connections, ensuring everything is snug and properly sealed.
- Verify that the countertop material isn’t causing stress on the sink, which can lead to leaks or cracks over time. Addressing these issues promptly keeps your undermount sink functioning perfectly.
When to Call a Professional for Long-Lasting Results
While troubleshooting small leaks and installation issues can often be managed on your own, there are situations where enlisting a professional makes the most sense. If you notice your sink isn’t sitting level or if the support reinforcement seems inadequate, it could compromise sink durability over time. A professional can assess whether the support framework needs reinforcement to guarantee long-lasting performance. Proper support is vital for preventing stress on the undermount connection, which can lead to leaks or damage. If you’re unsure about your installation’s stability or there’s persistent leaking despite repairs, it’s time to call an expert. Investing in professional help guarantees your sink’s durability and helps avoid costly repairs down the line.
Frequently Asked Questions
How Do I Choose the Best Materials for My Undermount Sink?
When choosing materials for your undermount sink, focus on material selection that offers high durability factors like resistance to scratches, stains, and heat. Stainless steel is popular for its strength and ease of maintenance, while quartz composite provides durability and a sleek look. Consider your daily use and the environment; selecting the right material guarantees longevity and keeps your sink looking great for years.
Can I Install an Undermount Sink Without Professional Help?
Thinking you can just wing a DIY installation? It’s like trying to tame a wild stallion without a saddle. While you might save some money, undermount sink installation often needs professional assistance to guarantee a perfect fit and lasting durability. If you’re handy and confident, follow detailed guides, but for a seamless, leak-free finish, hiring a pro is the smarter move. Otherwise, you risk costly mistakes down the line.
What Tools Are Essential for Undermount Sink Installation?
You’ll need essential tools like a jigsaw or hole saw for cutting, a caulking gun for sealing, and screwdrivers for securing brackets. An overview of tools helps you prepare effectively. When selecting materials, choose sturdy silicone sealant and durable mounting brackets to guarantee longevity. Proper tool use and material choice make your undermount sink installation easier, saving you time and ensuring it lasts without professional help.
How Do I Prevent Mold and Mildew Under My Sink?
You might think mold and mildew are inevitable, but proper ventilation tips and moisture barriers are your best defense. Make certain your sink area is well-ventilated by opening windows or installing an exhaust fan. Use moisture barriers behind and underneath the sink to prevent water buildup. Regularly clean with mold-inhibiting solutions, and fix leaks promptly. These steps keep your under-sink space dry, preventing mold and mildew from taking hold.
Are There Specific Cleaning Products Recommended for Undermount Sinks?
You should use gentle cleaning agents like dish soap or a mixture of baking soda and water to clean your undermount sink. Avoid harsh chemicals that can damage the finish. Use soft scrubbing tools, such as a sponge or non-abrasive brush, to remove stains and grime without scratching. Regular cleaning helps prevent buildup, mold, and mildew, keeping your sink looking great and lasting longer.
Conclusion
By following these installation tips, you’ll guarantee your undermount sink stands the test of time—lasting longer than you ever imagined. Proper preparation, support, and sealing are your secret weapons against leaks and instability. Don’t rush the process or cut corners; otherwise, you risk turning your beautiful new sink into a disaster zone. With patience and precision, you’ll enjoy a flawless, durable sink that keeps your kitchen looking stunning for decades—truly a masterpiece that defies time.