To fix water damage under your sink, start by turning off the water supply and removing all items from the cabinet. Check for leaks and dry the area thoroughly with fans or a dehumidifier. Assess the damage using a moisture meter, and sand down any swollen or warped areas. If the particle board is compromised, you may need to replace it. For detailed steps and tips on handling rotted wood, keep going to uncover more.
Key Takeaways
- Identify signs of water damage, such as discoloration, musty odors, and warped surfaces, to assess the extent of the issue.
- Turn off the water supply and remove items from the affected area to facilitate drying and damage assessment.
- Use towels or a wet-dry vacuum to soak up excess water, followed by fans or a dehumidifier to ensure thorough drying.
- Inspect for leaks and repair any plumbing issues before proceeding with surface repairs or replacements of damaged materials.
- Apply a waterproof sealant to protect against future moisture and allow it to cure fully before using the area again.
Identifying Water Damage Under the Sink
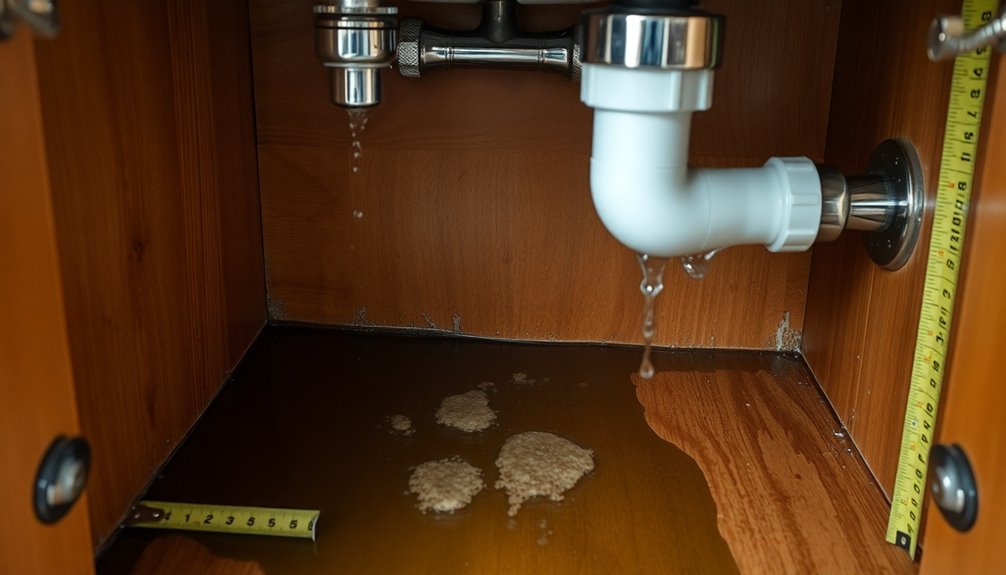
Have you noticed any unusual signs under your sink? Identifying water damage early can save you from costly repairs and serious health risks.
Look for discoloration or staining on the cabinet floor, which often indicates moisture infiltration. A musty or damp smell is another red flag, suggesting the presence of mold or mildew.
Pay attention to any warping or buckling of the cabinet floor, as these are common signs of prolonged exposure to water. If you spot mold or mildew, address it immediately to prevent health risks.
Ignoring these signs of water damage can lead to rotted wood and more extensive damage, so early detection is vital. Stay vigilant and protect your home from potential water damage.
Common Signs of Water Damage

When you check under your sink, look for visible moisture indicators like pooling water or dripping pipes—these are clear signs of a leak.
You should also pay attention to any stains on your cabinets or a musty odor, as they often point to prolonged water exposure.
Catching these signs early can save you from more serious damage down the line.
Visible Moisture Indicators
Visible moisture indicators are essential for identifying water damage under your sink. Start by checking for visible water pooling or dripping from pipes, which signals a leak needing immediate attention.
Look for discoloration or staining on the cabinet floor; this often indicates prolonged moisture exposure and potential water damage. A musty smell coming from the cabinet can suggest mold or mildew, flagging serious water damage.
Additionally, inspect for warping or buckling of the cabinet floor, as these signs show the material has been compromised by moisture.
Addressing these visible moisture indicators promptly is vital to preventing further damage and ensuring necessary repairs can be made before the situation worsens.
Odor and Staining
If you notice any unusual odors or stains under your sink, it's essential to take them seriously, as they often signal water damage.
Discoloration or staining on the cabinet floor typically indicates moisture infiltration from prolonged water exposure. A musty smell suggests mold growth, a common consequence of water damage.
Stains can appear yellow, brown, or black, reflecting the severity and duration of the issue. Early detection of these signs is important, as ignoring them can lead to rotted wood and structural damage to your cabinetry.
Addressing odor and staining promptly not only prevents further damage but also protects your indoor air quality and health.
Don't wait—take action as soon as you spot these indicators.
Potential Causes of Water Damage

Understanding the potential causes of water damage under your sink is essential for preventing costly repairs.
One of the most common culprits is a leaky pipe, often due to wear and tear or loose connections. High humidity can also lead to moisture buildup, especially on cold water pipes.
You might face drainage issues from clogged sinks, causing water to back up and overflow. Additionally, sealant failure around the sink or faucet allows water to seep into the cabinet, resulting in damage over time.
Don't overlook hidden leaks from faulty installation of pipes or seals, as these can go unnoticed until significant damage occurs.
Identifying these issues early can save you from extensive water damage restoration.
Immediate Steps to Take After Discovering Water Damage

As soon as you notice water damage under your sink, it is crucial to act quickly to minimize further issues. Start by turning off the water supply to prevent additional leaks. Remove all items stored in the area to assess the damage thoroughly and facilitate drying.
| Step | Action |
|---|---|
| 1. Turn Off Water | Prevent further flooding |
| 2. Remove Items | Clear the area for better access |
| 3. Soak Up Water | Use towels or a wet-dry vacuum |
| 4. Dry the Area | Employ fans or a dehumidifier to prevent mold growth |
Inspect for leaks and repair any plumbing issues before moving onto repairs. Addressing water stains and moisture quickly can save you from needing professional help later on.
Tools and Materials Needed for Repair

Repairing water damage under your sink requires the right tools and materials to guarantee a successful outcome.
Start by gathering essential tools like a table saw or magnesium circular saw for cutting cabinet-grade plywood, and a drill/driver combo set for fastening. A drip-free caulking gun is crucial for sealing seams effectively.
For materials, liquid nails will provide strong adhesion, while brad nails secure trim. Use 1/2" cabinet-grade plywood for the new cabinet floor, and trim pine (1x2x8) to cover exposed edges, enhancing the aesthetics.
Finally, have stain/polyurethane or paint on hand to seamlessly match the new panels with your existing cabinetry. Consider including hole saw bits for precise plumbing cuts in the plywood.
Step-by-Step Guide to Fixing Water Damage

With all the necessary tools and materials gathered, you're ready to tackle the water damage under your sink.
First, identify the source of the water and repair any plumbing issues to prevent further damage.
Next, measure the dimensions of the sink cabinet floor, cutting a piece of 1/2 plywood to fit snugly around plumbing fixtures. Use hole saw bits or a jigsaw to cut holes in the plywood for pipes, ensuring a proper fit.
Install the new plywood panels in two pieces due to the face frame divider, securing them tightly and filling any gaps with caulk or adhesive.
Finally, apply trim to conceal exposed edges, and paint or stain the new panels to match your cabinetry for a polished look.
Tips for Repairing Rotted Wood

Water damage can lead to significant rot in the wooden structures under your sink, so it's crucial to address it quickly.
First, inspect the wood to identify signs to look for, such as softness or discoloration, which will help you determine whether to spot fix or replace the wood entirely.
Carefully remove any rotted pieces with a chisel, ensuring you don't damage unaffected areas. After removal, apply wood hardener to reinforce the remaining wood and prevent future rot.
If there are voids, fill them with wood filler or epoxy and sand it smooth. If the rot is extensive, consider replacing the entire cabinet floor with waterproof boards to restore stability and effectively handle water damage.
Finally, identify the source of the water to prevent recurrence. Additionally, using color accuracy in the wood treatment process can help ensure that any repairs blend seamlessly with the remaining structure.
How to Repair Water-Damaged Particle Board

To repair water-damaged particle board, you first need to assess the extent of the damage.
Once you identify the affected areas, you can focus on repairing and sealing them effectively.
Taking these steps will help guarantee your particle board lasts longer and resists future moisture issues.
Assess Damage Extent
Before diving into repairs, it's crucial to thoroughly assess the extent of water damage on the particle board under your sink.
Start by checking for visible signs like swelling, warping, and discoloration, which indicate prolonged exposure to moisture. If the surface feels soft or crumbles when you touch it, that's a sign the particle board has absorbed significant water and may require replacement.
Also, inspect the underside for mold growth or a musty odor, as these suggest hidden moisture damage. Use a moisture meter to gauge the moisture content; readings above 20% typically indicate the board is compromised.
Document all damaged areas to determine if repairs can be made or if complete replacement is necessary for maintaining structural integrity.
Repair and Seal
Start by thoroughly drying the affected area to eliminate excess moisture and prevent mold growth. Use a fan or dehumidifier for effective drying.
Once the area is dry, follow these steps to repair and seal the water-damaged particle board:
- Sand the Damaged Area: Smooth out any swelling or warping to prepare the surface.
- Inspect for Hidden Damage: Look beneath the surface for any unseen rot that may need further repair.
- Apply Waterproof Sealant: Coat the sanded area with a waterproof sealant to protect against future moisture and prolong its lifespan.
Ensure the area is fully dried before sealing, as trapping moisture can lead to more damage over time.
When to Seek Professional Help

If you notice extensive water damage, such as rotted wood or structural issues, it's important to seek professional help. Professionals can identify hidden damage that you might overlook, guaranteeing a thorough evaluation. If mold is present, especially in large amounts, consulting experts is vital for safe and effective removal to avoid health issues. Recurring leaks or moisture problems despite your repairs indicate underlying plumbing problems that require a professional's expertise. Hiring professionals provides peace of mind, as they possess the right tools and knowledge for complex repairs. Additionally, understanding the importance of advance directives in planning for unexpected situations can help you make informed decisions about your property and health.
| Situation | Action Needed | Professional Benefit |
|---|---|---|
| Extensive water damage | Seek professional restoration | Prevent further deterioration |
| Visible mold | Schedule mold removal | Guarantee safe and effective removal |
| Recurring leaks | Diagnose plumbing problems | Identify hidden issues |
| Structural concerns | Structural assessment | Guarantee proper repairs |
Frequently Asked Questions
What to Do if You Have Water Damage Under the Sink?
If you've got water damage under the sink, start by finding and fixing the source of the leak.
Next, dry the area thoroughly with towels or a wet-dry vacuum.
Check the cabinets for any warping or mold and document anything that needs replacing.
Clean any mold with a mild detergent or specialized remover.
Finally, consider using waterproof materials and caulking to prevent future damage.
Taking these steps will help protect your home.
How to Fix a Water Leak Under the Sink?
To fix a water leak under the sink, start by inspecting the pipes and connections for any visible signs of damage.
Tighten loose fittings with a wrench and replace any worn seals or washers.
If the leak persists, you might need to cut out the affected section of pipe and replace it with a new piece.
Don't forget to check for leaks again after your repairs to guarantee everything's sealed properly.
How to Dry Out Particle Board Under Sink?
Did you know that over 14,000 people experience a water damage emergency each day?
To dry out particle board under your sink, start by soaking up any standing water with towels or a wet-dry vacuum.
Then, boost airflow using fans or dehumidifiers.
Sand down wet areas to combat swelling, and after it's dry, apply a waterproof sealant.
Regularly check the area to verify no moisture remains and prevent mold growth.
How Much Does It Cost to Replace Wood Under a Sink?
Replacing wood under a sink can cost you anywhere from $100 to $500, depending on the damage's extent and the materials you choose.
For minor issues, you might only spend around $100 for patching. However, if you face extensive damage requiring a full replacement, the cost can rise considerably.
Hiring professionals will add labor costs, while DIY options can help you save money if you're willing to tackle the repairs yourself.
Conclusion
Fixing water damage under your sink isn't just about restoring your cabinets; it's vital for your home's overall health. Did you know that 1 in 50 homeowners file a water damage claim each year? By taking quick action and addressing any issues promptly, you can save yourself from costly repairs down the line. Remember, staying vigilant can help prevent bigger problems, ensuring your home remains safe and sound. Don't hesitate—get started on those repairs today!

