
Transforming your space on a budget is easier than you think! Revitalize old furniture with chic stenciling techniques or distress pieces for character. Simple paint techniques can give wicker baskets a fresh look, and you can even create a faux leather effect with paint and wax. Layer finishes on your dining table for depth, and experiment with color mixing for unique designs. There's so much more to discover as you release your creativity and personalize your space!
Key Takeaways
- Utilize stenciling techniques to revitalize old furniture, creating stunning centerpieces at minimal cost.
- Experiment with color mixing and blending to achieve unique finishes that enhance your decor without breaking the bank.
- Distress surfaces using candle wax and sanding for a rustic look, adding character to furniture easily and affordably.
- Transform wicker baskets with light or metallic paints for a stylish upgrade that brightens your space on a budget.
- Upcycle storage boxes with bold paint colors and aesthetic hooks, maximizing functionality while maintaining an appealing aesthetic.

Aoxun 8 Piece Patio Furniture Set with 44” Fire Pit Table, Wicker Rattan Patio Sectional Sofa, Outdoor Furniture Set with Thickened Cushion, Grey
【EXTRA-WIDE COMFORT】Experience 25.5 wide seating surfaces (20% wider than standard 24 designs) with 4 thick cushions featuring 28D...
As an affiliate, we earn on qualifying purchases.
Revitalize Old Furniture With Chic Stenciling Techniques

If you've got old furniture that's seen better days, stenciling can transform it into a stunning centerpiece. This technique allows you to personalize your pieces with unique designs, enhancing their aesthetic appeal.
Using a small blunt brush for applying paint through stencils guarantees precision, preventing any bleeding under the edges. Don't shy away from bright colors mixed with texture powder to create vibrant surfaces that catch the eye.
After stenciling, a light sanding can give your furniture a polished, professional look. For intricate details, consider incorporating lace as a stencil and using tacky spray for better adherence. By revitalizing your furniture, you'll not only improve your home's appearance but also promote a healthier lifestyle through a cleaner living space.
With these chic stenciling techniques, you'll breathe new life into your old furniture without breaking the bank!

IKALIFE TV Stand for Living Room - up to 80 Inch TVs Mid Century Modern Entertainment Center with Storage and Adjustable Shelves, Media Console Table Walnut 71"
Elevate Your Space: This 71" TV stand blends mid-century modern style with functional design. Features elegant fluted swing...
As an affiliate, we earn on qualifying purchases.
Distress for Character: The Art of Aging Your Decor

Stenciling can give your furniture a fresh look, but there's something special about adding a touch of age and character to your decor.
To effectively distress for character, try these simple techniques:
- Rub an old candle on edges and hardware for a rustic, aged appearance.
- Use a sanding sponge for subtle distressing, enhancing the vintage appeal without exposing the wood.
- Apply dark wax after painting to highlight details and achieve a faux antique look.
- Combine thick paint with light sanding to mimic the wear of well-loved pieces.
These methods allow you to create unique, character-filled decor without breaking the bank. Additionally, using eco-friendly options for your paints can enhance the sustainability of your DIY projects.
Enjoy transforming your space with these easy DIY projects!

Rfiver Table Top TV Stand with Height Adjustable TV Legs, TV Stands Base with Cable Management for Most 37 to 86 Inch Flat or Curved TVs, Steel TV Feet Holds up to 150 lbs, Max VESA 800x600mm, Black
STABILITY IS SAFETY - HOLDS UP TO 150 LBS: Our professional team designed this double T-shaped TV stand...
As an affiliate, we earn on qualifying purchases.
Transform Your Wicker Baskets With Simple Paint Techniques

If you're ready to give your wicker baskets a fresh look, choosing the right paint is key.
You'll want to think about techniques that guarantee even coverage without losing the basket's unique texture.
Plus, experimenting with creative design ideas can help you craft personalized pieces that truly reflect your style. Additionally, consider using paints that are designed for uneven surfaces, as they can adhere better to wicker textures and enhance durability.
Choosing the Right Paint
Transforming your wicker baskets can breathe new life into your home decor without breaking the bank. Choosing the right paint is essential for achieving a stylish look.
Here are some tips to take into account when selecting the color of paint:
- Light Colors: Opt for light shades to brighten up your space and create an airy feel.
- Metallic Finishes: Try oil rubbed bronze spray paint for a rich, layered effect that highlights the basket's texture.
- Fast-Drying Options: Use spray paint for quick makeovers, allowing you to layer multiple coats in less time.
- Test Before Committing: Always test a small area first to verify the color complements your decor.
Adding natural elements like wood accents can further enhance the aesthetic appeal of your transformed baskets.
With these choices, your wicker baskets will look refreshed and chic!
Techniques for Even Coverage
Achieving even coverage on wicker baskets can feel intimidating, but it's simpler than you might think. Start by ensuring your wicker is clean and dry for better paint adhesion.
Instead of using a regular paint brush, try a pouncing technique with a foam brush or spray paint to apply the paint evenly across the weave without clogging its texture. For a rich finish, use oil rubbed bronze spray paint, applying it in layers for quick drying and a professional look.
Fast-drying spray paint cuts down on the time needed for multiple coats, making your project more efficient. Regular cleaning of your painting tools can also ensure a smooth application. Experiment with different colors and finishes, and watch your simple baskets transform into stylish decor pieces that elevate your space.
Creative Design Ideas
How can you give your wicker baskets a fresh look without breaking the bank? With a little paint and creativity, you can transform those old baskets into stylish decor.
Here are some simple techniques to try:
- Pouncing Technique: Use a sponge or brush to apply paint in an up-and-down motion, ensuring an even coat.
- Layering Colors: Start with a base color and add layers using fast-drying spray paint for a rich finish.
- Oil Rubbed Bronze: This paint adds depth and texture, enhancing the wicker's natural beauty.
- Personal Touch: Choose colors that match your decor, making the baskets unique to your space.
In addition, consider using eco-friendly materials and practices, as sustainable forestry supports a greener home environment. With these ideas, you'll elevate your home decor without overspending!

Aquzee 85 inch TV Stand, Entertainment Center for 70 75 80 85" TV, 75.2" Wide Wood Television Console Table for Living Room Bedroom Gaming Room, Rustic Brown
Big TV Stand for Up to 85in TV The 3-tier TV stand measures 75.20"W x 15.75"D x 23.98"H,...
As an affiliate, we earn on qualifying purchases.
Create a Faux Leather Look With Paint and Wax

While you might think real leather is out of reach for your budget, you can easily create a stunning faux leather look using paint and wax.
Start by applying black paint as your first color to cover any existing patterns, ensuring a solid base. For better fabric coverage, water down the paint to let it soak in, enhancing that leather-like appearance.
Next, use a chip brush to apply thinned brown paint over the black base, creating a natural, layered look. Once you're happy with the color, apply wax to mimic genuine leather's texture, adding depth and richness to the finish.
For a smooth, glossy look, finish with glossy paint and a warm water technique, enhancing your faux leather effect beautifully.
Enhance Your Dining Table With Layered Finishes
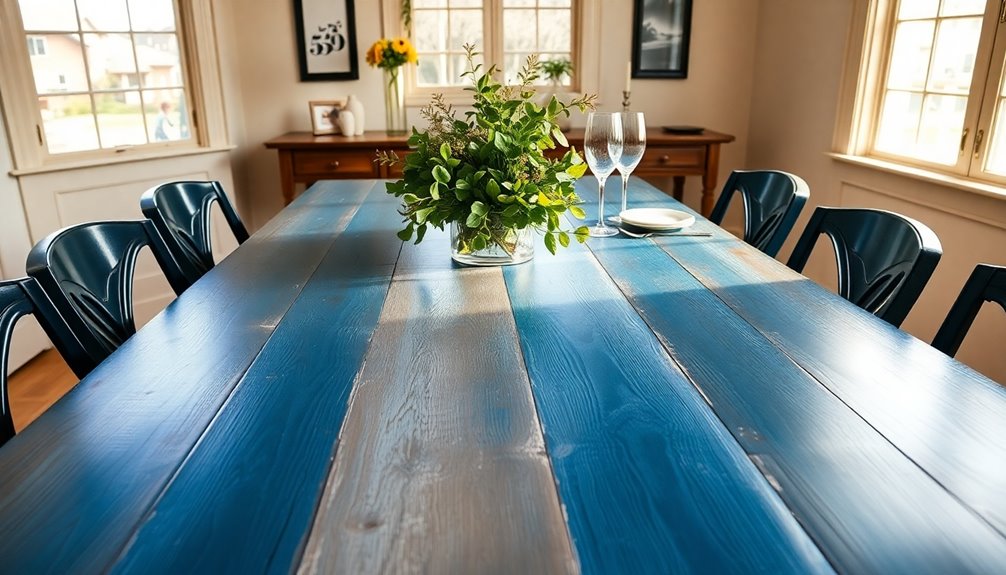
After giving your furniture a stylish faux leather makeover, it's time to turn your attention to the dining table.
To enhance its appearance, follow these steps to add a little flair:
- Apply a base coat of thick paint for full coverage.
- Experiment with colors, layering lighter shades over darker ones for depth.
- Use a lint-free cloth to stain the table after the paint dries, enriching the finish.
- Apply dark wax to emphasize details and create an aged look.
Finish with a glossy top coat, smoothing it with warm water for a protective sheen.
Additionally, using an airless sprayer can greatly reduce your painting time and ensure an even application.
These layered finishes not only elevate your dining table's style but also guarantee it stands the test of time.
Upcycle Storage Boxes for a Stylish Upgrade

If you're looking to refresh your home decor without breaking the bank, upcycling storage boxes is a fantastic way to add style and functionality. Start by using black paint to cover any unwanted patterns, giving your boxes a sleek, modern look. For better coverage, water down your paint and use a chip brush to enhance texture with thinned brown paint. If you want a leather-like finish, apply wax over the painted surface. Additionally, incorporating aesthetic hooks into your newly styled boxes can enhance both organization and decor.
Here's a simple comparison table for your next project:
| Technique | Effect |
|---|---|
| Black Paint | Sleek, modern look |
| Watered Down Paint | Even fabric coverage |
| Thinned Brown Paint | Rustic texture |
| Wax Finish | Depth and character |
Get creative with stenciling for a personal touch!
Experiment With Color Mixing for Unique Effects

Mixing colors can really elevate your painting projects, giving you the chance to create custom shades that fit your style.
Try out different combinations and blending techniques to see what unique effects you can achieve.
With a little experimentation, you'll transform ordinary items into eye-catching decor.
Color Combinations to Try
Color is a powerful tool in DIY painting projects, and experimenting with unique combinations can transform your space. Here are some color combinations to try that can add depth and personalization to your projects:
- Bright colors with texture powder: Mix vibrant hues with texture powder for a stunning finish.
- Layered shades: Use different shades of a single color for a multi-dimensional effect, perfect for furniture.
- Complementary colors: Pair contrasting colors to make ordinary items pop.
- Pastel blends: Soft pastels can create a calming atmosphere when layered together.
Practicing on scrap materials will help you understand how these colors interact. Additionally, consider how air quality can be affected by your painting materials, as some may release harmful VOCs into your space.
Techniques for Blending Colors
While diving into your DIY painting projects, mastering blending techniques can truly elevate your work.
Start by experimenting with color mixing to achieve unique effects. A little bit of practice on scrap materials can help you refine your skills before applying them to your final piece.
Using a small blunt brush allows for greater creativity, especially when applying mixed colors through stencils. If you want to add depth, try mixing bright colors with texture powder for striking surfaces.
Remember that layering thinned paint can create smooth shifts between shades, giving your work a polished look. Additionally, incorporating bold colors for accent walls can further enhance the energy and vibrancy of your space.
With these techniques, you'll be ready to transform your space and impress everyone with your artistic flair!
Custom Shades for Projects
How can you create custom shades that perfectly reflect your style? Start by experimenting with color mixing to find unique effects that enhance your projects.
Here are some tips to achieve those custom shades:
- Mix bright colors with texture powder for depth and interest.
- Thin your paint with water to improve fabric coverage and achieve a translucent finish.
- Use a chip brush to apply thinned paint, creating a natural texture on wood or fabric.
- Layer different top coats for a rich, dynamic finish on upcycled furniture.
Use Texture Powder for Eye-Catching Furniture Designs

Transforming your furniture into eye-catching pieces can be a breeze, especially when you incorporate texture powder into your painting projects. Mixing vibrant paint with texture powder creates dynamic finishes that enhance visual appeal. It allows you to add three-dimensional designs, giving depth to flat surfaces. By using stencils with texture powder, you can produce intricate patterns that elevate your DIY projects. Plus, the added texture helps camouflage imperfections, making it ideal for upcycling. Experimenting with different amounts of texture powder encourages creativity and personalization.
| Texture Amount | Effect | Recommended Use |
|---|---|---|
| Low | Subtle texture | Base coats |
| Medium | Defined patterns | Stenciling |
| High | Bold dimensions | Statement pieces |
| Mixed | Varied effects | Artistic flair |
| Textured finish | Unique character | Final touch on furniture |
Achieve a Professional Finish With Glossy Techniques

Achieving a professional finish on your DIY furniture projects can elevate their appearance dramatically. To master glossy techniques, follow these tips:
- Use glossy paint for a sleek look. Smooth it with warm water for even application.
- Apply multiple thin layers instead of one thick coat to prevent drips.
- Incorporate a sanding sponge on edges for a distressed, vintage feel without exposing the wood.
- Ensure the surface is clean and prepared beforehand to enhance adhesion.
Don't forget to use your glue gun for any necessary repairs or adjustments before painting.
Experimenting with glossy top coats can also add depth and shine, making your projects truly stand out.
With these techniques, your DIY furniture will look professionally finished!
Celebrate Uniqueness: Personalize Your Space With DIY Projects

Personalizing your space with DIY projects not only showcases your creativity but also reflects your unique style. You can transform an ordinary furniture piece into a statement item by using techniques like stenciling or upcycling.
This approach not only saves you money but also results in decor that adds character and charm to your home. Experiment with different finishes, such as wax or spray paint, to mimic high-end materials and textures, enhancing the luxurious feel of your projects.
Plus, sharing your DIY transformations fosters community, inspiring others to explore their own creativity. By engaging in these projects, you celebrate uniqueness while crafting a personal space that truly feels like home.
Frequently Asked Questions
What Tools Are Essential for DIY Painting Projects?
For your DIY painting projects, you'll need a few essential tools.
Start with high-quality paintbrushes and rollers for smooth application. A drop cloth will protect your floors, while painter's tape helps achieve clean edges.
Don't forget a paint tray for easy access to your paint. A ladder's vital for reaching higher areas, and a stir stick will mix your paint well.
Finally, wear old clothes and gloves to keep yourself clean.
How Do I Prepare Surfaces Before Painting?
Before painting, you need to prepare surfaces properly. Start by cleaning the area to remove dirt and grease.
Then, patch any holes or cracks with filler and sand the surface until smooth. If you're painting over a glossy finish, lightly sand it to help the paint adhere better.
Finally, wipe down the surface with a damp cloth to eliminate dust.
These steps guarantee a smooth, professional-looking finish when you start painting.
What Types of Paint Are Best for Furniture?
When it comes to giving your furniture a fresh look, think of it as a little makeover rather than a intimidating task.
You'll want to choose paints that not only shine but also endure. For furniture, chalk paint offers a matte finish and easy application, while acrylic or latex paints provide durability and a variety of colors.
Don't forget the benefits of using a good primer for a smooth, long-lasting finish!
How Can I Safely Dispose of Leftover Paint?
To safely dispose of leftover paint, start by checking local regulations, as many places have specific guidelines.
If the paint is latex, you can let it dry out and throw it away with regular trash.
For oil-based paints, take them to a hazardous waste facility.
You might also consider donating leftover paint to community organizations or schools.
Always make certain the containers are sealed tightly to prevent leaks during transport.
Can I Use These Techniques Outdoors?
You might think that DIY painting techniques are just for indoor projects, but you can absolutely use them outdoors too!
Just make sure to choose weather-resistant paints and materials. Keep an eye on the weather; it's best to paint when it's dry and not too hot.
With the right preparation, you'll create stunning outdoor spaces that reflect your style, all while enjoying the satisfaction of doing it yourself.
Get creative and have fun!
Conclusion
With just a bit of creativity and effort, you can transform your space into a reflection of your personality without breaking the bank. As the saying goes, "The best things in life are free," and with these DIY painting projects, you'll discover that beauty often lies in the details. So grab your brushes and release your inner artist—your home will thank you for it! Now go ahead and bring your vision to life!