
Turn your outdoor spaces into envy-inducing masterpieces with mesmerizing DIY painting projects! Start by bringing vibrant color to seed pods with garden graffiti. Revamp old furniture with bold hues and create eye-catching patterns on planters. A whimsical mural on your garden wall or a transformed garage door can elevate curb appeal. Don't forget the charming painted rocks for flower beds and colorful hardware accents. Stick around, and you'll discover even more inspiring ideas!
Key Takeaways
- Revamp old furniture with high-quality exterior-grade paint and bold colors to create a fresh, modern living space that stands out.
- Enhance your garden with vibrant graffiti on seed pods, using fluorescent colors to mimic blooms and add unexpected charm in off-season.
- Transform your garage and front door with all-in-one paint, opting for popular shades to boost curb appeal and property value.
- Create whimsical garden murals using weather-resistant paint, incorporating lively themes that reflect your personality and harmonize with existing plants.
- Use colorful hardware on outdoor spaces, like vibrant door handles and knobs, to add life and a modern twist to your home's exterior.
Vibrant Garden Graffiti: Bringing Color to Seed Pods

If you're looking to add a splash of color to your garden, vibrant garden graffiti might be the perfect project for you. This artistic technique uses spray paint to enhance the aesthetics of seed pods, like poppies and allium seed heads, which maintain their structure long after blooming.
By choosing fluorescent colors, you can create eye-catching effects that mimic blooming flowers, even in the off-season. Just be sure to select contrasting or harmonious colors and protect surrounding plants from overspray.
Remember to avoid watering the painted pods to prevent damage, and if you're unsure about your color choices, test the paint on less visible areas first. This creative endeavor will surely transform your garden!
Revamping Old Furniture With Bold Colors

Revamping old furniture with bold colors can breathe new life into your living space, instantly making it feel fresh and modern.
To get started, choose high-quality, exterior-grade paint for durability, especially if your piece will be exposed to sunlight or moisture. Applying a primer first enhances color vibrancy, ensuring a smooth and even painted front.
Don't shy away from experimenting with contrasting hues; this creates a striking visual appeal and makes your furniture a statement piece.
Consider adding decorative elements, like stencils or metallic accents, to elevate the overall look.
Eye-Catching Patterns on Planters

Transforming your outdoor space can be as simple as adding eye-catching patterns to your planters. Start by choosing outdoor-rated spray paint in vibrant colors that complement your garden's aesthetics.
Use stencils or masking tape to create unique geometric or floral designs, giving your planters a personalized touch. For a professional finish, apply a neutral base coat first, enhancing the visual impact of your eye-catching patterns.
Protect your surroundings from overspray by laying down a tarp or cardboard, and always spray paint in a well-ventilated area for safety. Air purifiers can help reduce outdoor pollutants, ensuring your painting project remains enjoyable and free from allergens.
Once your designs are complete, add a layer of clear sealant to protect them from fading and to keep those colors looking fresh and vibrant over time. Your neighbors will be envious!
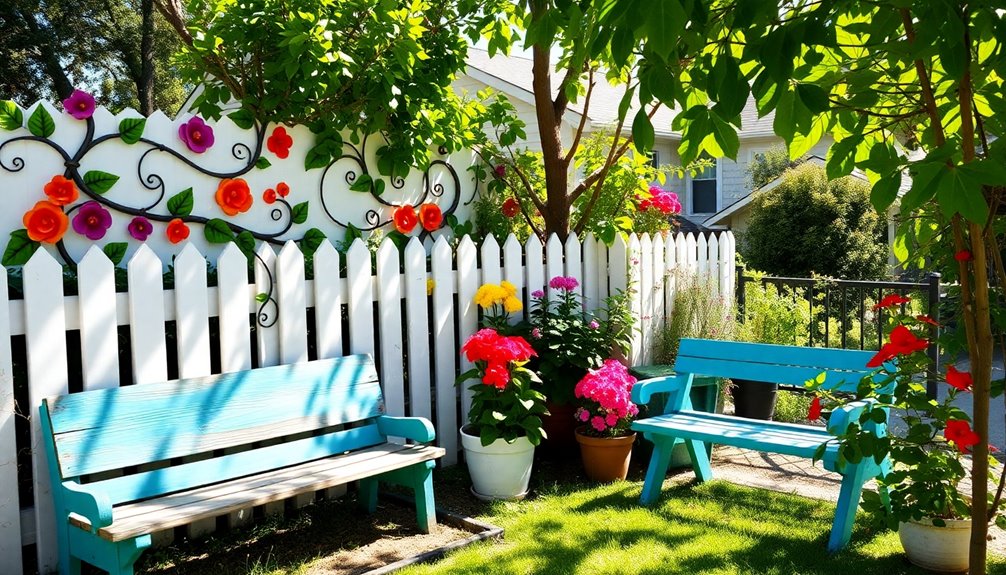
Creating a Whimsical Mural on a Garden Wall

When creating a whimsical mural on your garden wall, start by choosing a fun theme that captures your imagination. Then, select vibrant colors that harmonize with your existing plants, bringing your mural to life. This eye-catching backdrop will enhance your garden's charm and invite creativity into your outdoor space. Additionally, incorporating unique textures will add depth and interest to your mural, making it even more captivating.
Choosing a Theme
How can you turn an ordinary garden wall into an enchanting work of art? Start by choosing a whimsical theme that reflects your personality.
Think vibrant colors that complement your garden's natural beauty and even match your door color for a cohesive look. Incorporate lively elements like flowers, butterflies, or abstract shapes to create a mesmerizing mural that'll make your neighbors green with envy.
Use painter's tape and drop cloths to protect surrounding plants from overspray while you work. Opt for weather-resistant paint to guarantee your masterpiece endures the elements.
Don't be afraid to experiment with layering colors and shapes, adding depth and interest. Maintaining a cohesive color palette between your garden wall and surrounding outdoor decor will ensure your unique design becomes the focal point of your outdoor space!
Selecting Vibrant Colors
What vibrant colors will you choose to bring your whimsical mural to life? When selecting a color, think about tangerine, turquoise, or mint green to create an inviting atmosphere.
These shades not only enhance aesthetics but also complement your garden's existing colors. To make elements pop, pair contrasting colors, like soft blue with vibrant floral designs, for visual interest.
Don't forget to use high-quality outdoor paint like Benjamin Moore Aura to guarantee your mural stays vibrant against the elements.
Plan your design carefully, considering the surrounding landscape for a cohesive look. Additionally, understanding art theory can inspire your color choices and enhance the overall impact of your mural.
Finally, protect adjacent plants and surfaces from overspray with painter's tape and drop cloths, and avoid windy days for better control.
Happy painting!
Transforming a Garage Door With All in One Paint

Transforming your garage door can be a game-changer for your home's curb appeal, and using All In One Paint makes the process both straightforward and rewarding. Start by prepping your door; scrub it clean with a degreaser like TSP to guarantee smooth adhesion. With an estimated cost of just $39, this project is budget-friendly. Choosing the right color is crucial—consider Cathedral (steel gray) to enhance your exterior. After applying two coats, reinstalling the door will make it a standout feature in your neighborhood. Additionally, a well-designed exterior can increase property value, making this project a smart investment.
| Step | Action | Notes |
|---|---|---|
| 1. Preparation | Scrub with degreaser | Remove oils and debris |
| 2. Painting | Apply first coat | Let dry thoroughly |
| 3. Second coat | Apply second coat | guarantee even coverage |
| 4. Reinstall door | Reattach after drying | Elevates home's appearance |
Refreshing Front Door Colors for Curb Appeal

After giving your garage door a fresh new look, it's time to turn your attention to the front door, which serves as the focal point of your home's entrance.
Revitalizing front door colors can greatly enhance your home's curb appeal, making it pop in the neighborhood. Consider popular shades like soft blue, bold tangerine, or mint green, which complement various styles and landscaping.
A yellow door brightens a dull brick facade, creating an inviting atmosphere. If you're into color theory, pair a kelly green door with magenta blooms for a stunning effect.
For timeless charm, a classic red door symbolizes safety, while trendy bright turquoise or teal adds a modern twist. Your front door deserves that vibrant update! Additionally, investing in your home's curb appeal can positively influence its overall property management and value in the long run.
Customizing Outdoor Accessories With Paint

Customizing outdoor accessories with paint can breathe new life into your garden or patio, making your space uniquely yours.
With a few simple steps, you can transform ordinary items into striking focal points. Here's how to get started:
- Choose High-Quality Paint: Use durable outdoor paint like Benjamin Moore's Aura Grand Entrance to resist chipping and fading.
- Prepare Surfaces: Clean surfaces thoroughly and apply a primer, especially on metal or plastic, for a professional finish.
- Experiment with Designs: Incorporate vibrant colors and patterns, and try techniques like stenciling or sponging to showcase your personal style. Additionally, consider the impact of color accuracy to ensure that your painted accessories look stunning in various lighting conditions.
Painting Rocks for a Charming Flower Bed

Adding painted rocks to your flower bed can give it a whimsical charm that sets it apart from ordinary arrangements. Use outdoor acrylic or spray paint to guarantee your designs withstand the elements. Consider stencils for intricate patterns, enhancing the visual interest of your garden alongside flower pots. It's also crucial to maintain a clean and safe environment, especially if you have a wood stove nearby, to minimize any fire risks.
Here's a simple guide to get you started:
| Step | Description | Tips |
|---|---|---|
| Choose Rocks | Select a variety of shapes and sizes | Look for smooth, flat surfaces |
| Paint | Apply your chosen colors, using multiple layers if needed | Use outdoor acrylic for durability |
| Seal | Finish with a clear outdoor sealer | Protects against fading and moisture |
| Arrange | Place rocks among flowers for a cohesive look | Match colors with existing flowers |
| Admire | Sit back and enjoy your charming flower bed | Watch as neighbors admire your work |
Adding Flair With Faux Wood Look Paint

If you want to enhance your home's curb appeal effortlessly, faux wood look paint is the way to go.
With versatile design options, you can easily customize the finish to complement your style.
Plus, the simple application techniques make it a fun project that anyone can tackle!
Enhance Curb Appeal Effortlessly
Transforming your home's exterior can be a breeze when you use faux wood look paint, as it instantly elevates your curb appeal.
A beautifully painted front door or garage door can create a sophisticated and inviting appearance. Here's how you can achieve that stunning look:
- Choose Your Colors: Opt for rich browns and warm tones that complement your landscaping.
- Layer Shades: For a realistic finish, layer different shades and use high-quality paint like Benjamin Moore Aura.
- Add Hardware: Enhance the faux wood look with decorative handles or hinges for an authentic touch.
Remember to paint in a well-ventilated area and during moderate weather to guarantee the best results. Incorporating sustainable materials can further enhance your home's aesthetic while being eco-friendly.
Your neighbors will definitely take notice!
Versatile Design Options Available
Faux wood look paint not only enhances your home's curb appeal but also opens up a world of versatile design options.
This innovative paint can replicate the appearance of real wood without the hassle of maintenance, making it perfect for outdoor projects. You can achieve a rustic or natural aesthetic while enjoying high-quality finishes that resist chipping and fading.
The versatility of faux wood look paint means it's suitable for various surfaces, like garage doors, shutters, and outdoor furniture, creating a cohesive look throughout your exterior.
Plus, you can tailor color selections to match existing landscape elements, markedly boosting your home's charm and inviting admiration from neighbors and passersby. Additionally, this approach aligns with the sustainable design practices that are gaining popularity in modern farmhouse trends.
Simple Application Techniques Explained
While adding flair to your home's exterior, you'll find that applying faux wood look paint is surprisingly simple.
To achieve that rustic charm, follow these simple application techniques:
- Base Coat: Start with a light-colored base coat to set the foundation for your faux wood look.
- Glazing: Once dry, apply a darker wood-tone glaze. Use a brush or sponge to create a wood grain pattern that looks great.
- Finish: Don't forget to add a clear topcoat for durability and polish, protecting your work from the elements.
Before you plunge in, make sure to practice on scrap material to nail the technique.
With these steps, your faux wood look will impress your neighbors and elevate your home's curb appeal!
Enhancing Outdoor Spaces With Colorful Hardware

If you want to breathe new life into your outdoor spaces, consider adding colorful hardware like vibrant door handles and knobs. By choosing contrasting colors—like a bright tangerine against a muted backdrop—you'll create a modern twist that draws attention and sparks creativity.
Decorative hardware on outdoor furniture, such as chic brackets or colorful drawer pulls, not only enhances usability but also elevates the overall look. Upgrading existing fixtures with bold colors can achieve a curated and polished appearance.
Plus, using color theory guarantees your colorful hardware blends harmoniously with your landscaping, enhancing your outdoor environment's beauty. So, plunge into these DIY projects and watch your neighbors become envious of your design flair!
Frequently Asked Questions
What Type of Paint Is Best for Outdoor Furniture?
When you're choosing paint for outdoor furniture, opt for acrylic latex paint.
It's durable, weather-resistant, and easy to clean up with soap and water. You'll want to guarantee it's specifically formulated for outdoor use to withstand the elements.
If you're working with metal, consider a spray paint that's rust-resistant.
Don't forget to use a primer for better adhesion and longevity.
This way, your furniture will look great and last longer!
How Do I Prepare Surfaces for Outdoor Painting Projects?
Before you release your creativity, think of your surface as a blank canvas. Start by cleaning it thoroughly, removing dirt and old paint, which acts like a stubborn memory.
Sanding smooths rough spots, ensuring the paint adheres well—like preparing the soil for a beautiful garden. Rinse off any dust and let it dry completely.
Finally, apply a primer to create a solid foundation. With these steps, you're ready to bring your vision to life!
Can I Use Regular Paint for Outdoor Projects?
You can't use regular paint for outdoor projects. It won't withstand the elements, leading to peeling and fading.
Instead, opt for exterior paint specifically formulated to resist moisture, UV rays, and temperature changes. This type of paint guarantees durability and long-lasting color.
Before starting, always check the label for outdoor suitability. Investing in the right paint will save you time and effort in the long run, keeping your surfaces looking fresh and vibrant.
How Do I Protect My Painted Outdoor Projects From Weather?
Think of your painted outdoor projects as delicate flowers in a storm.
To protect them from the weather, you'll want to start with a high-quality outdoor paint designed to withstand the elements.
After your project dries, apply a clear sealant for added protection.
Regularly check for wear and touch up any areas that need it.
Finally, consider adding a roof or cover for extra shelter during harsh weather conditions.
What Tools Do I Need for DIY Outdoor Painting?
For DIY outdoor painting, you'll need a few essential tools.
Start with quality paintbrushes and rollers for smooth application. A sturdy ladder helps you reach higher surfaces, while painter's tape guarantees clean lines.
Don't forget drop cloths to protect your surroundings. A paint tray makes loading your brush easier, and a good primer can enhance paint adhesion.
Finally, have a paint stirrer handy to mix your colors thoroughly before you start.
Conclusion
With just a splash of paint, your outdoor space can transform into a vibrant oasis that dazzles the eye and sparks joy. Picture your neighbors gazing in awe at your colorful garden graffiti or the whimsical mural brightening your wall. Each brushstroke adds character, turning ordinary items into stunning focal points. So grab your paintbrush and release your creativity—your home deserves to be a canvas that makes everyone green with envy!