
To create an ombre wall with a smooth gradient, start by preparing the wall with a primer and choosing a harmonious color palette. Work in small sections, blending the colors with sponges or brushes, feathering the edges for a seamless shift. Use damp tools and work quickly for the best results, patiently building up the gradient. Attention to detail and proper techniques are key—continue exploring these tips to master your perfect ombre wall.
Key Takeaways
- Prepare walls with cleaning, sanding, and priming for smooth paint application.
- Use sponges or foam rollers to blend colors smoothly and create seamless gradients.
- Start with the lightest shade and gradually add darker tones, feathering edges for natural transitions.
- Work in small sections, keeping tools dampened to facilitate easier blending.
- Test colors on swatches beforehand and work patiently for a professional, eye-catching ombre effect.
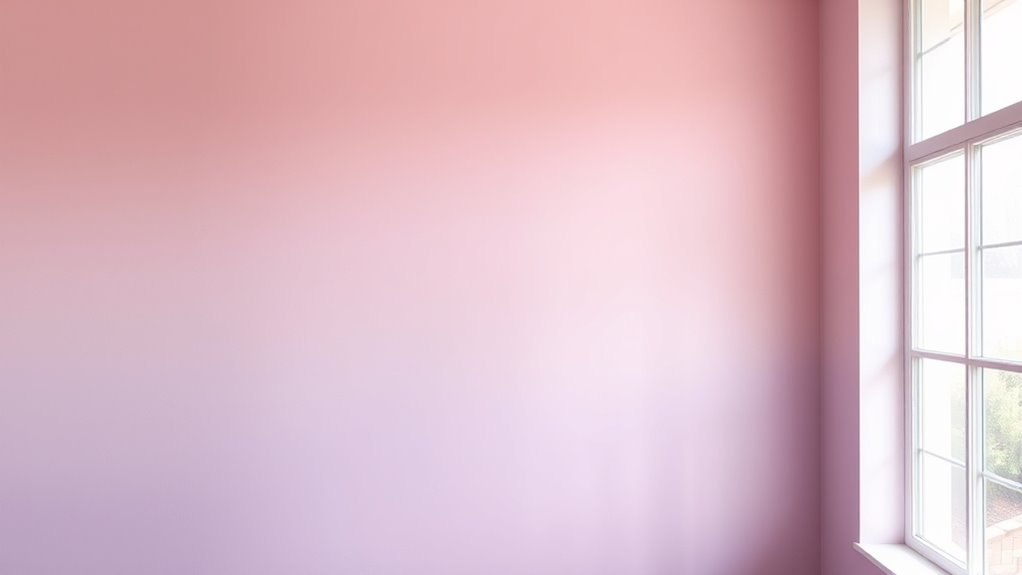
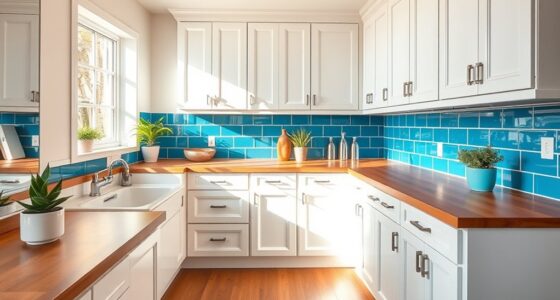
Ombre walls are a stylish way to add depth and visual interest to any room. Achieving that smooth gradient effect might seem challenging, but with the right DIY painting techniques, you can create a stunning focal point that transforms your space. The key to a successful ombre wall lies in mastering your approach to blending colors seamlessly. Start by preparing your surface thoroughly—clean, sand, and prime the wall to ensure paint adheres evenly. When it comes to DIY painting techniques, using sponges, soft brushes, or foam rollers can help you blend colors softly without harsh lines. Work in small sections, blending as you go to maintain a fluid transition from one shade to the next. Remember, patience is essential; take your time to feather the paint out gradually, creating a natural gradient. Proper maintenance of your tools and paints will help achieve a consistent and professional look.
Selecting your color palette is the first crucial step in designing your ombre wall. Think about the mood you want to establish—calm and relaxing, vibrant and energetic, or sophisticated and subdued. For a soothing look, choose shades within the same color family, like light to dark blues or pinks. If you prefer a more dynamic effect, opt for contrasting hues, such as deep purple fading into soft lavender or fiery reds blending into coral. When selecting colors, consider the lighting in your room; natural light can alter how shades appear, so test your chosen colors on the wall before committing. It’s often helpful to gather paint swatches and compare them side by side, ensuring they complement your existing decor. Use a good quality primer and quality paints for smooth application and longevity of the ombre effect.
Once you’ve selected your palette, sketch out your gradient design lightly with a pencil or painter’s tape as a guide. This helps you visualize the transition points and maintain symmetry. When applying the paint, start with the lightest shade at one end and gradually introduce darker tones, blending the edges where they meet. Using a sponge or a clean brush, softly feather the paint into the adjacent color, working quickly to keep the transition seamless. Keep your tools dampened for better blending, and don’t rush the process. If you make a mistake or the blend isn’t perfect, wait for the paint to dry slightly, then go over it again for a smoother finish. With patience, attention to detail, and a systematic approach, you’ll end up with an eye-catching ombre wall that adds personality and style to your room.

Hanroy Large Sponge Paint Roller for Painting Art Decorators Brush for Home Wall Painting(EG019-KD)
Large Sponge Paint Roller for Painting Art Decorators Brush for Home Wall Painting
As an affiliate, we earn on qualifying purchases.
As an affiliate, we earn on qualifying purchases.
Frequently Asked Questions
What Are the Best Tools for Creating Ombre Walls?
To create stunning ombre walls, you’ll want quality tools that help with brush techniques and color blending. Use soft, angled brushes for smooth progression and sponges to gently blend colors seamlessly. A good paint roller can help cover large areas quickly, while a detail brush is perfect for fine blending. Don’t forget to keep a damp cloth handy for touch-ups, ensuring your gradient looks flawless and professional.
How Long Does It Take to Complete an Ombre Wall?
It typically takes about 4 to 8 hours to complete an ombre wall, depending on the size and your experience, with drying time factored in. You’ll spend time on color blending, guaranteeing smooth transitions, and waiting for each layer to dry properly. To speed things up, work in sections and use a fan or open windows for faster drying. Patience ensures a flawless gradient effect.
Can Ombre Techniques Be Used With Wallpaper?
Yes, you can definitely use ombre techniques with wallpaper. With wallpaper blending, you can create stunning ombre effects by choosing gradient or fade designs that shift smoothly from light to dark. Ombre wallpaper techniques involve selecting patterns that mimic hand-painted gradients, giving your walls a stylish, seamless look. Just make certain you carefully align the wallpaper to achieve the perfect gradient, and you’ll have a stunning feature wall in no time.
What Lighting Enhances the Ombre Wall Effect?
You want your ombre wall to truly stand out, so choose lighting options that create a soft, ambient effect. Consider warm LED lights or dimmable fixtures that highlight the smooth gradient, casting gentle shadows and enhancing the color progression. Ambient lighting subtly accentuates the depth of the ombre, making the colors appear more vibrant and dynamic. Experiment with different angles and intensities to find the perfect glow that transforms your space.
Are There Any Maintenance Tips for Ombre Painted Walls?
To keep your ombre walls looking their best, regularly clean them with a gentle wall cleaning solution to remove dust and smudges. Avoid abrasive scrubbers that can damage the finish. For color touch ups, use matching paint and a fine brush to seamlessly blend repairs into the gradient. Keep an eye out for fading or chips, and touch up promptly to maintain the stunning gradient effect.

Abstract Art Paint by Numbers Kit for Adults – DIY Teal and Gold Marble Effect Abstract Painting on Canvas 16×20 Inches, Acrylic Paint Set, Suitable for Beginners,Art for Decoration or Gifts
Complete Paint by Numbers Kit: Includes a 16×20 inch pre-printed canvas, acrylic paints, 3 matched paintbrushes, instruction manual,…
As an affiliate, we earn on qualifying purchases.
As an affiliate, we earn on qualifying purchases.
Conclusion
Now that you’ve learned how to create stunning ombre walls, it’s time to get started. Remember, Rome wasn’t built in a day, and perfecting your gradient takes patience. Embrace the process, enjoy experimenting with colors, and trust your instincts. With a little practice, you’ll turn your space into a beautiful masterpiece. As the saying goes, “Practice makes perfect,” so don’t be afraid to make mistakes—each one is a step closer to your dream wall.

Mister Rui Foam Paint Roller, 2 Inch Mini Paint Roller Kit 10 Pack, Touch Up Small Paint Roller for Painting Wall, Door, Cabinet
Paint Roller kit 10 Pack: 2 inch foam paint roller covers 6 pack, 2 inch plastic paint tray,…
As an affiliate, we earn on qualifying purchases.
As an affiliate, we earn on qualifying purchases.

Polar Clear Binding Primer – 17 Fl Oz – High-Adhesion Primer for Drywall, Plaster, Cement, Stucco & Wood – Interior & Exterior Clear Base Coat & Paint Prep
Seals & Stabilizes: Designed to seal and stabilize damaged surfaces, this high adhesion primer forms a durable membrane…
As an affiliate, we earn on qualifying purchases.
As an affiliate, we earn on qualifying purchases.