
Have you ever been annoyed when something as simple as washing your hands becomes a struggle? This happens because of low water pressure. Many of us depend on our faucets every day. But, faucet aerators can get clogged with dirt and minerals, especially in areas with hard water. Learning to remove an aerator without tools can avoid expensive plumber visits and keep your faucet working well. Plus, a well-kept faucet can use up to 30% less water. This is good for both your wallet and the Earth.
In this guide, we’ll show you how to remove your faucet aerator. We’ll give you step-by-step directions so you can do it confidently.
Key Takeaways
- Regularly cleaning your faucet aerator can stop low water pressure from mineral buildup.
- Checking your aerators every few months is a good idea, particularly if you have hard water.
- Faucet aerators come in different sizes, so you might need to measure yours.
- Vinegar can dissolve mineral buildup if you soak the aerator in it.
- Keeping your aerator clean can make it last up to 50% longer.
- The right tools greatly increase your success in removing the aerator.
Understanding Faucet Aerators
You may not fully grasp what “faucet aerator” means. They are key to how your faucet delivers water. They affect your home’s water use and efficiency.
What is a Faucet Aerator?
A faucet aerator is a tiny device on your faucet’s tip. It’s job is to mix air into the water, making the flow even and preventing splashes. By doing so, it can cut water use by up to 30%, which is great for the planet. Knowing about faucet aerators shows you how they make using water better.
Common Issues with Faucet Aerators
Faucet aerators are great but can have problems. These often come from clogs, especially in places with hard water full of minerals. These minerals block the water flow, making pressure drop. Fixing these issues helps your water run better and your faucet last longer.
To avoid clogs, clean your aerator with something that can dissolve lime or vinegar overnight. This keeps your faucet in top shape.
| Common Faucet Aerator Problems | Symptoms | Recommended Solutions |
|---|---|---|
| Clogged Aerators | Reduced water flow | Soak in vinegar for 20 minutes |
| Mineral Buildup | Low water pressure | Use a lime-dissolving solution |
| Worn Components | Leaking or inconsistent flow | Replace the aerator with a new one |

Upgraded Metal 10-in-1 Faucet Aerator Tool – Heavy-Duty Removal Key for M16.5-M28 Sizes, Hidden Thread/Housing Aerators, Home Plumbing Repair Must-Have
- Multi-Size Compatibility: Fits 7 threaded, 2 housing, 1 round aerators
- Heavy-Duty Metal Construction: Made from high-grade, corrosion-resistant metal
- Scratch-Free, Faucet-Safe Design: Protects faucet finish during removal
As an affiliate, we earn on qualifying purchases.
As an affiliate, we earn on qualifying purchases.
Signs Your Faucet Aerator Needs Removal
Knowing when to check your faucet aerator is important for keeping water flow smooth. Ignoring signs of trouble can cause wasted water and increase your bills. Here are some tips to know when it’s time to remove your aerator.
Identifying Low Water Pressure
One sign of low water pressure is when water comes out slower than usual. This can mean your aerator is clogged, often due to hard water minerals. By doing regular checks, you can avoid this and keep water running evenly.
Visual Cues of Clogging
Look for signs that your aerator might be blocked. This includes debris or mineral buildup. If water spray is uneven or sputters, your aerator is likely clogged. Clean or remove it quickly to improve your faucet’s work and make it last longer.

| Signs | Implications |
|---|---|
| Drop in Water Flow | Possible aerator clogging |
| Uneven Water Output | Clogging or buildup in aerator |
| Frequent Sputtering | Indicates potential blockage |
| Visible Mineral Buildup | Requires cleaning or replacement |
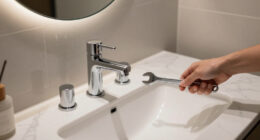
How to Remove Faucet Aerator without Tool
Removing a faucet aerator might look hard, but you can do it easily with some guidance. This guide will show you easy steps and useful tips. Learning how to take off a faucet aerator saves you time and might avoid a call for help.
Step-by-Step Removal Process
Start with this step-by-step faucet aerator removal process:
- Dry the faucet and your hands to get a better grip.
- Try unscrewing the aerator by hand since they’re usually not too tight.
- If it won’t move or your hands slip, cover it with a rag or tape and use pliers. This keeps it from getting scratched.
- If the aerator is really stuck, warming it with a hair dryer or spraying it with WD-40 might help.
Pro Tips for Success
Remember these important remove aerator tips:
- Use the “righty-tighty, lefty-loosey” rule to unscrew things.
- Be careful with pliers to avoid bending or breaking the aerator.
- A rubber kitchen jar opener can help you grip better and avoid slipping.

Knowing how to do this is more than just following steps. Many people don’t know you can often unscrew the aerator by hand, leading to unnecessary plumber calls. Regular cleaning prevents clogs from hard water minerals. Proper removal improves water flow and reduces waste.
Cleaning Your Faucet Aerator
Keeping your faucet aerator clean is key to good water flow.
Cleaning the faucet aerator regularly will make your water pressure better. It also stops mineral buildup.
Below are the steps to take apart and clean your aerator right.
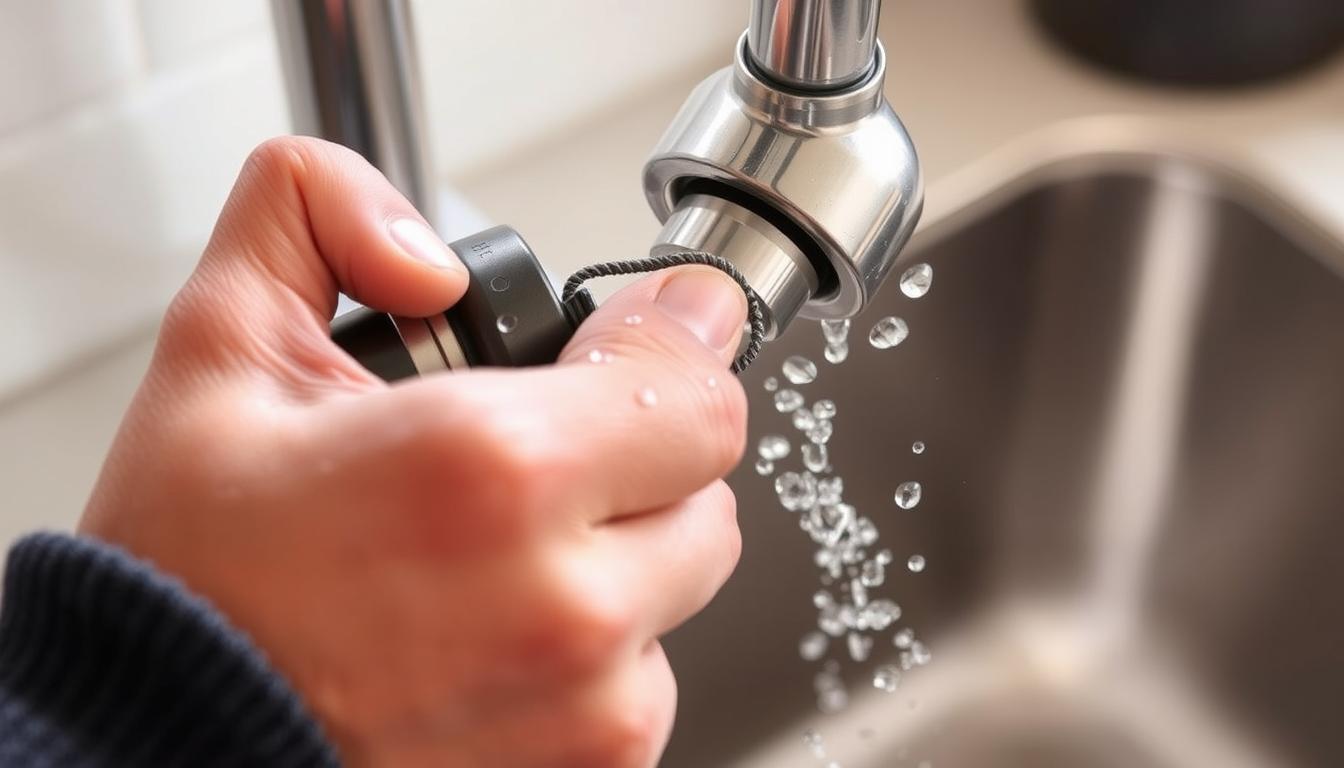
Disassembly Steps
First, you need to carefully take apart the faucet aerator. Follow these steps for cleaning the aerator to clean it safely:
- Turn off the water supply to avoid any unwanted spills.
- Gently unscrew the aerator from the faucet. Use a cloth to protect the finish if needed.
- Take the aerator apart, remembering how the small parts fit together for when you put it back.
Effective Cleaning Techniques
After taking it apart, it’s time to clean the aerator well. Here’s how to do it:
- Scrub off mineral deposits and debris from the aerator parts with a stiff brush.
- For a lot of buildup, let the aerator parts sit in a lime-dissolving solution like Lime-Away all night. This helps clean out mineral deposits and makes your faucet work better.
- If you want a natural option, soak the aerator in vinegar for around 20 minutes to loosen the tough residues.
Remember to rinse all the parts after cleaning to get rid of any leftover solution. Dry everything, then put the aerator back together and attach it to the faucet. Doing this will keep your faucet aerator working well, ensuring you have good water flow.

Conclusion
It’s really important for every homeowner to know about faucet care. Keeping your faucet aerator in good shape means it will work better. This stops problems like water flow being too slow or weak. It’s critical to regularly take out and clean the aerator to get rid of minerals or dirt that block the water.
Cleaning your aerator should be a part of looking after your home. Try to do it every six months or once a year. If you have hard water, you might need to clean it more often, like every 3 to 6 months. This kind of upkeep not only makes your water run smoother. It also makes your faucet last longer and saves you money on plumbing.
Let’s wrap up with some key steps: check if the aerator is clogged and clean it well. You can soak it in vinegar or check it by hand for any mineral build-up. Following these tips will help your faucet work at its best. By keeping an eye on your aerator, your sink will work better, making everyday tasks easier and more efficient.
FAQ
What tools do I need to remove a faucet aerator?
You don’t usually need special tools for this job. Most aerators come off by hand. If it’s tight, use pliers with a rag wrapped around them to prevent scratches.
How do I know if my faucet aerator is clogged?
A clogged aerator might cause low water pressure or uneven flow. Look for minerals or debris at the opening to be sure.
Is it necessary to clean my faucet aerator regularly?
Yes, cleaning your aerator often is important. It keeps water flowing well and stops mineral clogs, especially with hard water.
Can removing and cleaning my faucet aerator save water?
Definitely! A clean aerator controls water flow better. This can cut water use by up to 30% without losing pressure.
What should I do if the aerator won’t unscrew?
If it’s stuck, warming it with a hair dryer or using WD-40 can help. Always protect the faucet’s surface.
What cleaning solution is best for mineral deposits?
To remove heavy buildup, soak aerator parts in a cleaner like Lime-Away overnight. It clears up the mineral deposits.
How often should I check my faucet aerator?
Checking every few months is wise, or when you notice water pressure changes. Regular checks help you find issues early.