Clean Sticky wood kitchen cabinets can be a frustrating and unsightly issue in any home. Detracting from the overall beauty and cleanliness of your kitchen space. Whether it’s from cooking splatters, greasy fingers, or the inevitable buildup of dust and dirt, This sticky residue can be tough to tackle. However, with the right approach and some handy tips, you can get your wood cabinets looking spotless and new again. In this guide, We’ll walk you through the most effective methods to clean sticky wood kitchen cabinets, using easily accessible tools and ingredients.
The Importance of Cleaning Your Kitchen Cabinets
Keeping your kitchen cabinets clean is not merely a matter of aesthetic appeal. It’s crucial for hygiene and ensuring the longevity of your cabinetry. Over time, accumulated grime, grease, and other residues can mar the appearance of your cabinets and damage the wood, potentially resulting in expensive repairs or the need for replacements. Regular cleaning not only maintains their appearance and functionality but also ensures they continue to enhance your kitchen’s aesthetic for years. Moreover, a clean kitchen goes beyond looks and preservation.
Gather Your Supplies
- Mild dish soap
- Warm water
- White vinegar (for tougher residue)
- Baking soda (for really stubborn areas)
- Microfiber cloths or soft sponges
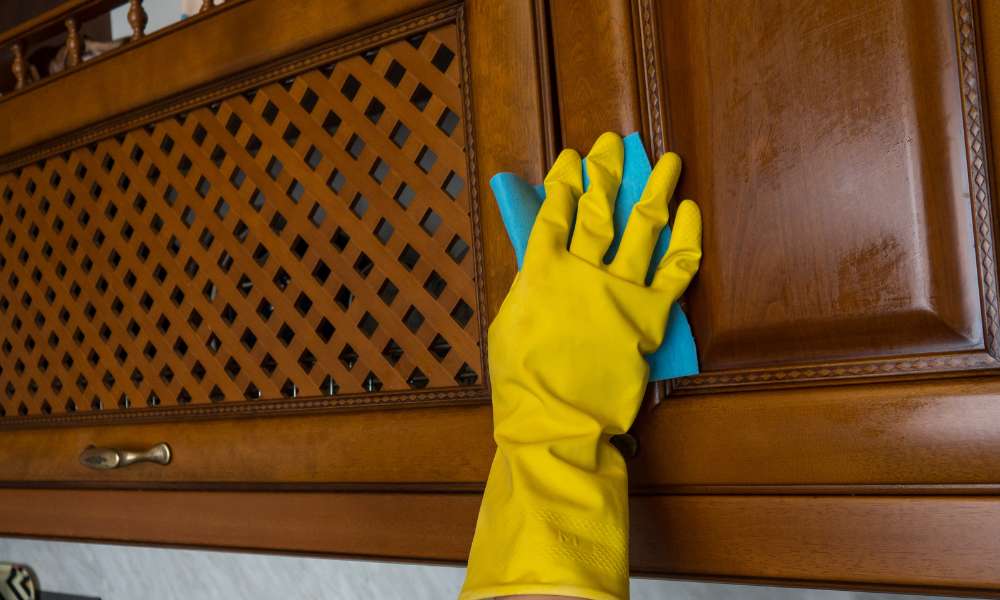
- Rubber gloves (optional)
- Soft toothbrush or an old, clean paintbrush (for crevices)
Here Are 8 Easy Methods For Getting Your Kitchen Cabinets Nice And Clean:
Method 1 – How to Clean Sticky Grease Off Kitchen Cabinets With Dish Soap
To begin, Mix a few drops of mild dish soap with warm water in a bowl or bucket to create a gentle cleaning solution. Dip a microfiber cloth or soft sponge into the mixture, ensuring it’s damp but not soaking wet to avoid damaging the wood. Gently wipe the sticky areas of your cabinets, working in the direction of the wood grain to prevent scratches. For areas with thick grease or sticky residue, you may need to go over them a few times for the best results after you’ve removed the grime. Rinse the cloth with clean water, wring it out, and wipe over the cabinets again to remove any soap residue. Finally, dry the cabinets with a clean, dry microfiber cloth to prevent water spots and to bring out the natural beauty of the wood.
Method 2 – Cleaning Kitchen Cabinets With Baking Soda
Baking soda can be an effective solution. Start by making a paste of baking soda and water, with a consistency that’s thick enough to stick to cabinet surfaces without running. Apply the paste directly onto the greasy areas and allow it to sit for a few minutes to break down the grease. Afterward, Gently scrub the area with a soft sponge or microfiber cloth. Moving in the direction of the wood grain to avoid any potential scratches. Once the grease has been removed, wipe the area clean with a damp cloth to remove any leftover baking soda residue. Then dry the surface with a clean, dry cloth.
Method 3 – Remove Grease on Kitchen Cabinets With Homemade Vinegar Spray.
To create this cleaning solution, simply mix equal parts of white vinegar and water in a spray bottle. The acidity of the vinegar helps to dissolve the grease without damaging the wood. Spray the mixture directly onto the greasy areas of your cabinets. Then let it sit for a few minutes to penetrate and break down the residue. After allowing the vinegar solution to work its magic, use a soft microfiber cloth or sponge to gently wipe away the grease. If you encounter any stubborn spots, a soft toothbrush can help to scrub these areas without scratching the wood. Rinse the area with a damp cloth to remove any vinegar residue. Then dry thoroughly with a clean cloth to prevent water marks.
Method 4 – How to Clean Grease Off Kitchen Cabinets With Toothpaste
To utilize this method, mix equal parts of toothpaste and baking soda until you achieve a paste-like consistency. This blend is mildly abrasive, so it works well on greasy surfaces without harming the wood finish. Apply the mixture directly onto the greasy spots and gently scrub with a soft-bristled toothbrush or a microfiber cloth. Take care to move in the same direction as the wood grain to avoid scratches. The toothpaste not only helps in breaking down the grease but also leaves the wood looking polished. After scrubbing, wipe the area clean with a damp cloth to remove any residue of the cleaning mixture. Finish by drying off the cabinet surface with a soft, clean cloth to reveal a grease-free, shiny surface.
Method 5 – Using Orange Oil
Orange oil is recognized for its natural cleaning properties and delightful citrus aroma. Making it an excellent choice for kitchen cabinet maintenance. Not only does it effectively cut through grease and grime, but it also nourishes the wood, helping to restore its natural luster. To use orange oil, Apply a small amount directly onto a clean microfiber cloth or sponge and gently rub it into the sticky or greasy areas of your cabinets. The oil works to break down the grease, while the pleasant scent helps to freshen up the space. After wiping the cabinets with the orange oil, use a separate clean, dry cloth to buff the wood, enhancing its shine and removing any excess oil.
Method 6 -Wipe the cabinets down with water.
Occasionally, gentle water cleanses can rejuvenate your kitchen cabinets, effectively eliminating surface grime without resorting to harsh chemicals. Start by filling a bucket or bowl with warm water, adding a touch of mild dish soap to enhance its grease-cutting and fingerprint-removing capabilities. Submerge a soft microfiber cloth in this mixture, Wringing it out thoroughly to ensure it’s moist, And not drenched. Carefully clean the cabinet surfaces, focusing on handles and edges where dirt tends to gather. Following the initial wash with soapy water. It’s crucial to go over the cabinets again with a clean, damp cloth to wipe away any soap remnants. Conclude the cleaning ritual by drying the cabinets using a soft, dry microfiber cloth, preventing water stains and preserving the wood’s inherent beauty.
Method 7 – Finish Off the Job: Cleaning, Waxing, or Polishing
You might want to consider finishing the job with a clean, Wax, Or polish to protect the wood and keep it looking its best. Depending on the finish of your cabinets, Choose an appropriate product. For a natural finish, beeswax or a wood conditioner can provide a protective layer that makes future cleaning easier and enhances the natural beauty of the wood. Apply a small amount of wax or polish to a clean, soft cloth and gently rub it into the cabinet surfaces in a circular motion, following the grain of the wood. Allow the wax to sit for a few minutes, then buff with a clean, dry cloth until the cabinets shine.
Method 8 – Reposition the doors onto their hinges and reattach them with screws.
Ensure each door aligns perfectly with its respective frame by first placing the doors on their hinges and holding them steady. Utilize a screwdriver, ideally a power one for efficiency, to secure the doors by fastening the screws into the hinges. Take care to tighten the screws firmly without overdoing it, to avoid stripping the wood or damaging the hinges. After all the doors are firmly attached, open and close each to verify their alignment and smooth operation. Make any necessary adjustments by moderately loosening or tightening the screws until every door functions seamlessly.
Conclusion
Keeping your Sticky wood kitchen cabinets clean is more than a mere chore. It represents an investment in the heart of your home. Regular application of appropriate cleaning techniques can fend off the accumulation of grease and dirt, keeping your cabinets in impeccable condition and selecting the ideal cleaning solution, whether a homemade concoction or a commercial product, is crucial in maintaining the aesthetic and functionality of your kitchen for the long haul. The kitchen is far more than a cooking space; it’s a haven where memories are crafted and shared. A clean kitchen not only enhances the appearance of your home but also fosters a warm, inviting environment for loved ones.


