
To install A vessel sink, Start by turning off the water supply, Attaching The mounting ring to the sink’s base, Placing The sink on The countertop, And Connecting The drain pipe And Water lines.
Choosing The Right Vessel Sink

Choosing The right vessel sink for your bathroom is an important decision. When considering the size, Shape, And Material, It is crucial to assess your existing bathroom decor to ensure compatibility. Take into account The overall aesthetics And Style you want to achieve. Additionally, Evaluating The quality And Durability of different sinks is essential as you want A sink that will last for years to come.
Preparing For Installation
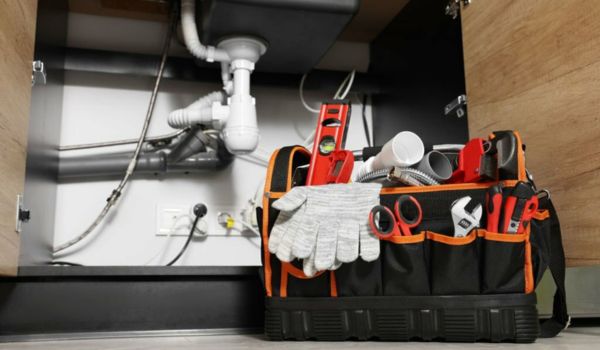
| Adjustable wrench | Bucket | Plumber’s putty |
| Plunger | Plumbing tape | Channel-lock pliers |
| Utility knife | Screwdriver set | Rags Or Towels |
Before starting The installation process, Shut off the water supply to The sink. Locate the shut-off valves below the sink Or The main water supply valve in your home. Turn the valves clockwise until they are fully closed. This will prevent any water from flowing while you work on the installation.
If you are replacing an existing one, You need To remove it first. Start by turning off The water supply to The sink, As mentioned earlier. Use an adjustable wrench To disconnect The water supply lines connected to The faucet. Next, Unscrew The drainpipe connections from The sink drain using channel-lock pliers. Finally, Use A utility knife to cut through any caulk Or Adhesive securing The sink to The countertop. Gently lift it out And Set it aside.
Setting Up The Countertop
When setting up The countertop for your vessel sink installation, It is crucial to measure and mark for proper placement. Start by measuring and marking The dimensions on The countertop. This will ensure that The hole for The sink is cut accurately. Additionally, Don’t forget to measure And Mark The placement of The faucet as well.
Once you have marked The dimensions, It’s time to cut The hole for The sink and faucet. Use A jigsaw Or A hole saw to carefully cut along The marked lines. Take your time And ensure a smooth And accurate cut. Remember to wear protective gear And Follow safety precautions while cutting.
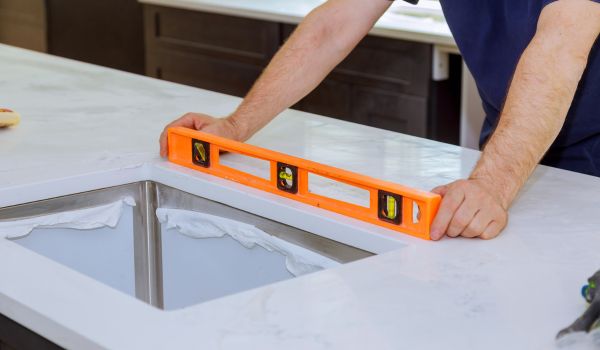
To ensure A-level installation, Use A level to check The placement of The countertop before securing it in place. Adjust if needed to ensure that it is completely level. This is important to prevent any potential water pooling Or Drainage issues in The future.
Installing The Faucet

Installing a vessel requires careful attention to detail, Especially when it comes to selecting the appropriate faucet. The faucet should not only complement the design of the sink but also fit properly. Before installation, It is essential to turn off the water supply lines and drain any remaining water. Once the old faucet is removed, You can begin connecting the water supply lines to the new faucet. Make sure to use the appropriate connectors and secure them tightly. After the connections are made, It is crucial to test for any leaks by turning on the water supply and checking for any drips or water escaping. Finally, You will need to seal and secure the faucet according to the manufacturer’s instructions to ensure a watertight seal and prevent any future leaks. Following these steps will ensure a successful installation of your vessel faucet.
Vessel Sink Placement

Placement is crucial when it comes to installing A vessel. To ensure the sink is aligned properly and securely, there are A few techniques you can follow.
The role of silicone sealant: Before placing the sink, Apply a thin layer of silicone sealant around the edge of the sink opening. This will create a watertight seal and prevent any leaks.
Double-checking the sink’s stability: Once is in place, Make sure it is level by using a carpenter’s level. Adjust as necessary by shimming under if needed. Additionally, Check for any rocking Or Shifting of the sink to ensure it is securely mounted.
| Techniques for sink alignment and securement |
| Apply silicone sealant around the sink opening |
| Use a carpenter’s level to check for proper alignment |
| Adjust with shims if necessary |
| Ensure is securely mounted with no rocking or shifting |
Drain Assembly Connection

Installing A vessel sink can be a straightforward process if you carefully follow the steps. One crucial aspect is the drain assembly connection. The first decision you’ll need to make is choosing the correct type of drain. There are several options available, Including pop-up drains, Grid drains, And Push-button drains. Make sure to select one that matches the style and design.
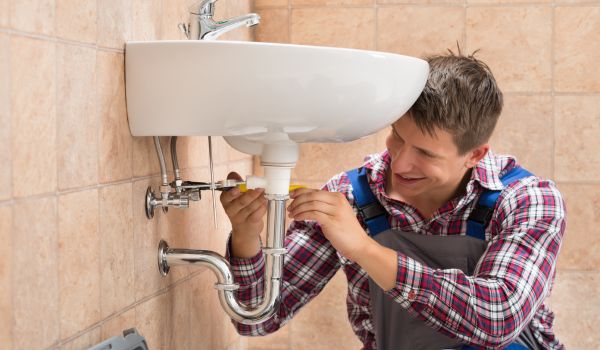
Once you have the appropriate drain, The next step is to attach it properly. Start by connecting the drain to the sink’s bottom, Ensuring a tight fit. Use a wrench to tighten the nut securely, But be cautious not to overtighten it, As this may damage The drain itself. Additionally, Remember to seal the connection with a plumber’s putty or silicone to prevent any leaks.
Lastly, When attaching the drain assembly to the main drainpipe, Use a rubber gasket or a compression ring for a watertight seal. Secure it firmly using the provided locknut, Avoiding excessive force that could result in damaging the pipes. It’s crucial to check for any leaks after completing the installation.
Final Touches And Water Test
After successfully installing a vessel sink, It’s important to complete A few final touches And Perform A water test to ensure everything is in working order. First, It’s necessary to clean up The work area by removing any excess debris And Materials. This will help create A Clean And Organized space.
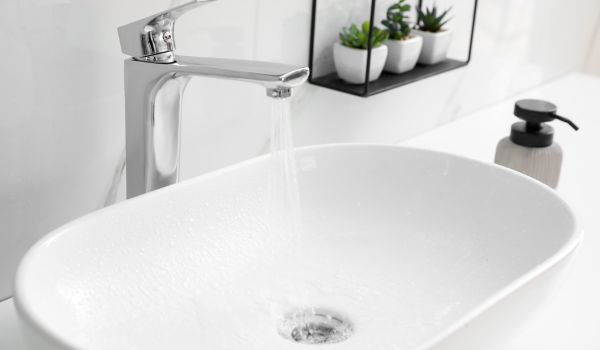
Next, It’s time to perform A water flow And Leak test. Start by turning on The water supply And Carefully observe The sink, Drain, And connecting pipes for any signs of leakage. Make sure The water flows smoothly And Drains properly without any obstructions or backups. This step is crucial to identify any potential issues And Address them before they become major problems.
Recommendations For Regular Maintenance

To keep your vessel in optimal condition, Regular maintenance is essential. Here are some simple recommendations:
| Task | Frequency |
| Regular cleaning with mild soap and water | Weekly |
| Avoid using harsh chemicals or abrasive cleaners | Ongoing |
| Inspect and tighten fittings as necessary | Monthly |
| Check for any signs of wear or damage | Regularly |
By following these maintenance recommendations, you can significantly extend the lifespan of your vessel sink and ensure it continues to function properly for years to come.
Troubleshooting Common Issues
When installing a vessel sink, It’s possible to encounter a few common issues along the way. Leaks at the drain or faucet connections are one such problem. To handle these leaks, You can start by making sure all connections are tight and secure. Applying plumber’s tape on the threads of the connections can also help prevent leaks. Adjusting a wobbly sink is another common issue that may arise during installation. To address this, Check if the sink is level and make adjustments as needed. You can use shims or silicone adhesive to stabilize and prevent wobbling. If the sink isn’t draining properly, there could be a blockage in the drain. Use a plunger or a plumbing snake to clear any obstructions and restore proper drainage. By troubleshooting these common issues, You can successfully install a vessel And Ensure its functionality for years to come.
FAQs
Are Vessel Sinks Easy To Install?
Yes, Vessel sinks are easy to install. They come with clear instructions and can be easily mounted on top of The countertop Or Vanity. No additional plumbing work is required, Making the installation process straightforward And Hassle-free.
How Do You Secure A Vessel Sink To A Countertop?
To secure A vessel sink to A countertop, Follow these steps:
-Apply A generous amount of silicone adhesive around The base of The sink.
-Place the sink on the countertop, Allowing The adhesive to bond.
-Clean any excess adhesive that oozes out.
-Let it dry for The recommended time.
-Test its stability before using.
Do I Need A Mounting Ring For My Vessel Sink?
Yes, You need a mounting ring for your vessel sink. It helps secure The sink to The countertop And provides stability. The mounting ring also helps create A proper seal between The sink And The countertop, Preventing leaks And damage.
How Do You Install A Recessed Vessel Sink?
To install a recessed vessel, Follow these steps:
- Prepare the countertop by cutting a hole that matches the sink’s measurements.
- Apply a bead of silicone caulking around the edge of the hole.
- Carefully lower the sink into the hole and press it firmly to ensure a secure fit.
- Connect the sink’s drain and water supply lines.
- Test for leaks and make necessary adjustments.
Conclusion
To sum up, Installing A vessel sink can be A straightforward process if you follow the right steps. Remember to gather all the necessary tools And Materials before starting, And Take your time to ensure A proper installation. By avoiding common mistakes And Properly sealing the sink, You can enjoy A Beautiful And Functional addition to your bathroom. So, Go ahead And Give it A try – you’ll be amazed at The difference can make!


