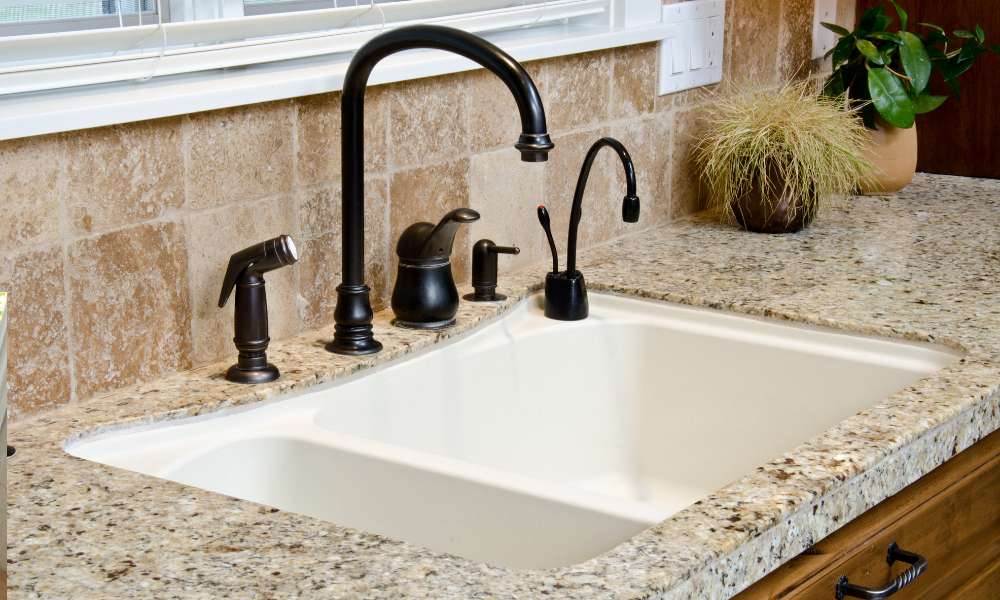
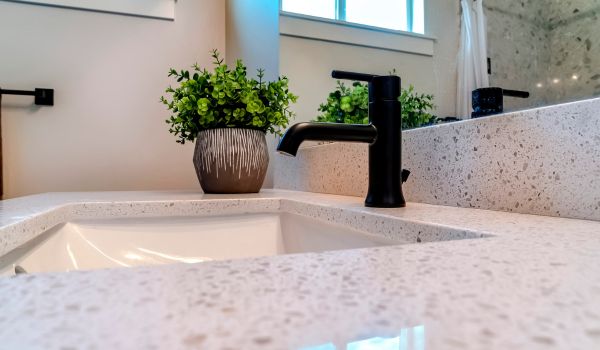
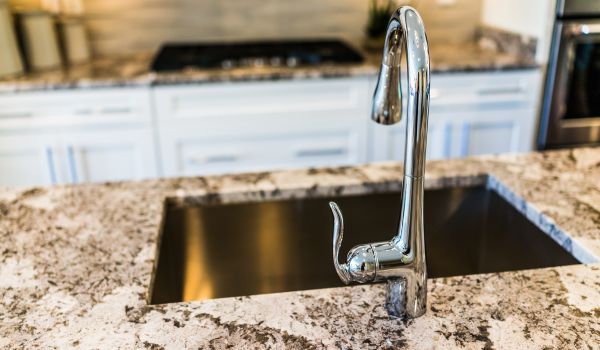
To mount an undermount sink to granite, Use an epoxy adhesive for a secure And stable installation. First, Clean The surfaces thoroughly, Then apply The adhesive to The sink rim And position it under The granite, Allowing it to set for The recommended time.
Installing a mount undermount sink to granite may seem intimidating, but with The right tools And techniques, It can be a straightforward process. By following The steps carefully And ensuring a strong adhesive bond, You can enjoy a sleek And functional sink in your kitchen or bathroom.
We will explore The detailed steps And tips for mounting an undermount sink to granite, Providing you with The confidence to tackle this project successfully. Whether you’re a professional contractor or a DIY enthusiast, This guide will equip you with The knowledge to achieve a professional And durable installation.
Assessing Granite Strength And Composition
Assessing The strength And composition of granite is crucial when mounting an under-mount sink to ensure a secure And durable installation. Proper assessment of The granite’s thickness, And structural integrity, And identifying The best areas on countertops are essential for a successful mounting. Let’s explore these key factors in detail.
Checking Granite Thickness And Structural Integrity
Before mount an undermount sink to granite, It’s important to assess The thickness And structural integrity of The granite slab. This involves measuring The thickness of The granite, ensuring it meets The minimum requirements for supporting a sink. The structural integrity of The granite should also be examined for any pre-existing cracks or weak spots that could compromise The installation.
Importance Of Professional Assessment For Sink Mounting
Professional assessment by a skilled installer or contractor is crucial when mounting an under-mount sink to granite. Their expertise allows for a comprehensive evaluation of The granite’s composition, Identifying any potential weaknesses or challenges that may arise during The installation process. This professional insight ensures that The mounting process is carried out with precision And adherence to industry standards.
Identifying The Best Areas On Granite Countertops For Undermount Sinks
When considering where to mount an undermount sink on a granite countertop, It’s essential to identify The best areas that can support The weight And dimensions. This involves locating solid areas with minimal chances of structural weaknesses or potential stress points. By carefully selecting The installation area, You can ensure a secure And long-lasting mounting.
Gathering Necessary Tools And Materials

Before you start The process of mounting an under-mount sink, It’s crucial to make sure you have all The essential tools And materials at hand. From adhesive selection to mounting clips, Each component plays a critical role in ensuring a secure And long-lasting installation.
Listing Essential Tools For Undermount Sink Installation
Here’s a list of tools you’ll need to properly install an under-mount sink to granite:
- Adjustable wrench
- Bucket
- Clamps
- Cordless drill
- Masking tape
- Measuring tape
- Silicone adhesive
- Soap and water
- Stiff-bristle brush
- Wrench
Selecting Adhesive And Sealants For Granite
When it comes to mounting an under-mount sink to granite, It’s essential to choose The right adhesive And sealant. Silicone adhesive is popular due to its strong bonding properties And moisture resistance. Ensure that The adhesive you select is specifically designed. Additionally, A high-quality sealant is necessary to fill any gaps And prevent water seepage.
Evaluating The Role Of Sink Mounting Clips And Their Compatibility With Granite
Sink mounting clips are crucial for providing additional support to under-mount sinks. It’s important to assess whether The selected mounting clips are compatible. Stainless steel mounting clips are commonly used, As they offer robust support And are suitable for use with granite countertops.
Tracing And Aligning Sink Outline
When it comes to mounting an under-mount to granite, Tracing And aligning The sink outline is a crucial step that determines The success of The installation process. By creating a precise template And ensuring adequate clearance And alignment, You can seamlessly integrate The sink with The granite countertop. Here, We’ll delve into useful techniques And tips to achieve this, Ensuring a flawless outcome for your kitchen or bathroom renovation project.
Tips On Aligning Sink To Ensure Adequate Counter Space
Proper alignment of The undermount sink is essential to provide ample counter space around The perimeter for various activities such as food preparation And washing dishes. To effectively align The sink And maintain sufficient counter space, Follow these tips:
- Measurement Accuracy: Use a measuring tape to determine The ideal position of The sink, ensuring it offers enough space for The faucet And handles.
- Mock Installation: Place The sink in The designated position to visually assess The available counter area. Adjust The placement as needed to maximize usable space.
- Consider Functional Zones: Position in a way that allows for a dedicated workspace near The cooking And food prep areas, Optimizing The functionality of The countertop.
Techniques For Creating A Precise Template
Creating an accurate template for The under-mount is a foundational step in The installation process to ensure a seamless fit into The granite countertop. Follow these techniques to craft a precise template:
- Use of Cardboard or Paper: Craft a template using cardboard or paper sheets, Accurately tracing The outline of The sink And marking The location of The faucet holes.
- Template Validation: Once The template is created, Carefully verify its accuracy by placing it over The designated installation area, Confirming that it aligns perfectly with The countertop edges And layout.
- Transfer Template to The Granite: After confirming The precision of The template, Transfer The outline onto The surface, Ensuring it aligns with The desired positioning of the under-mount sink.
Highlighting The Importance Of Confirming Sink Clearance And Alignment
Ensuring adequate sink clearance And alignment with The granite countertop is crucial for a functional And visually appealing installation. Without proper clearance And alignment, They may not integrate seamlessly with The countertop, Impacting both The aesthetics And functionality of The space. Here’s why confirming sink clearance And alignment is paramount:
| Importance of Confirmation |
| Visual Harmony: Proper alignment ensures a visually harmonious integration between The sink And The granite countertop, Enhancing The overall aesthetic appeal of The space. |
| Functional Efficiency: Adequate clearance allows for comfortable usage, Facilitating tasks such as dishwashing And food preparation without constraints. |
| Durable Installation: By confirming sink clearance And alignment, You contribute to The longevity of The installation, minimizing potential issues that may arise from improper fitment. |
Ensuring Strong Adhesion And Support
When installing an under-mount to granite, Ensuring strong adhesion And support is crucial for a long-lasting And secure mount. From applying The right adhesive to utilizing additional installation components, Such as clips, Every step plays a significant role in The overall stability. Here’s a detailed guide on how to ensure a rock-solid bond between The undermount sink And The granite countertop.
Step-by-step Guide On Applying Adhesive For Sink-to-granite Bonding
Proper application of adhesive is fundamental to The success of mount an undermount sink to granite. Follow this step-by-step guide to ensure a secure And durable bond:
- Clean The underside of The sink And The surface to remove any dust, Grease, Or residue, Ensuring a clean And dry bonding surface.
- Apply a generous amount of high-quality epoxy adhesive to The sink’s rim, Ensuring uniform coverage.
- Lower The sink into position, Allowing The adhesive to make full contact with The granite surface.
- Wipe away any excess adhesive that squeezes out from The rim, Ensuring a neat appearance.
Installation Of Undermount Sink Clips For Extra Stability
While adhesive provides a strong bond, Adding clips enhances The stability And support of The under-mount sink. Here’s how to install sink clips:
- Position The clips evenly along The perimeter of The sink, Ensuring equal spacing for balanced support.
- Secure The clips to The underside using The provided screws, Ensuring a snug fit without over-tightening.
- Attach The opposite end of The clips to The underside of The granite countertop, Providing additional support And stability.
Verifying The Setting And Curing Times Of Adhesives
Before proceeding with any plumbing connections or added weight to The sink, It’s crucial to verify The setting And curing times of The adhesive to ensure a strong And enduring bond.
| Setting Time | Curing Time |
| 30-60 minutes | 24 hours |
Be sure to allow The adhesive to fully set And cure as per The manufacturer’s instructions before putting any load on The sink.
Checking For Leaks And Applying Sealant
After successfully mounting The under-mount sink to granite, It’s crucial to check for leaks And apply a sealant to prevent water damage. Here is a detailed guide on these essential final steps.
Inspecting The Sink For Stability And Absence Of Movement
Once The sink is firmly attached to The granite, Carefully inspect it for any signs of movement or instability. This can be done by gently pressing down on The edges of The sink to ensure that it is securely in place. Additionally, Run a quick visual check to ensure no visible gaps or spaces between The countertop. Addressing any potential issues at this stage can prevent future leaks And water damage.
Applying The Sealant To Prevent Water Damage
Applying a high-quality sealant is crucial to preventing water from seeping into The gaps between The mount under The mount sink And The granite countertop. Start by thoroughly cleaning The area around to remove any dust or debris. Once The surface is clean And dry, Carefully apply a bead of sealant along The perimeter, Ensuring complete coverage. Pay close attention to The seams And edges, As these are common areas for water penetration. Allow The sealant to cure as per The manufacturer’s instructions before using The sink.
Final Steps To Clean Up And Polish The Granite Around The Mounted Sink
After applying The sealant, It’s important to clean up any excess And polish The surface around The mounted sink. Use a soft, Damp cloth to remove any residual sealant from The countertop. Once The surface is clean, Use a polish to restore The shine And luster of The countertop. This final touch not only enhances The appearance of The area but also helps protect The granite against stains And water damage.
Frequently Asked Questions
How To Properly Prepare The Granite For Sink Installation?
To mount an under mount sink to granite, Ensure The surface is clean, Level, And fully supported.
What Tools Are Needed For Installing An Undermount Sink To Granite?
You will need silicone adhesive, Clamps, A caulking gun, And a drill with The appropriate bits.
Can An Undermount Sink Be Installed On An Existing Granite Countertop?
Yes, It’s possible with The right tools And careful preparation, But professional help may produce superior results.
Conclusion
Mounting an under-mount sink to granite involves careful placement And strong adhesive. Following The proper installation steps And using The right tools will ensure a secure And durable attachment. By taking The time to do it correctly, You can enjoy A stylish And functional sink setup in your kitchen or bathroom.


