To polish a stainless steel sink to a mirror finish, Start by cleaning The sink with a mixture of warm water And mild dish soap. Once The sink is clean, Use a stainless steel polish And a soft cloth to rub The polish onto The sink in circular motions.
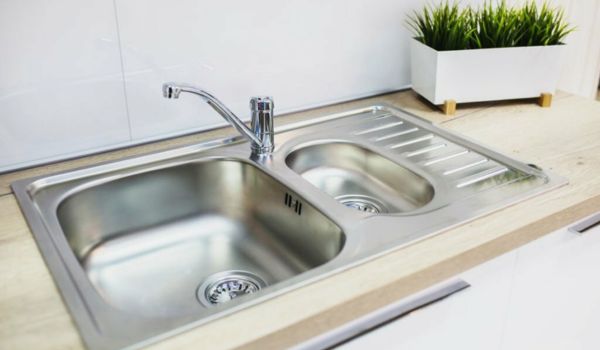
Buff The sink with a clean, Dry cloth to achieve a mirror finish. A sink can be a beautiful And durable addition to any kitchen. However, Over time, It can become dull And develop scratches. Polishing to a mirror finish can restore its shine And enhance The overall look of your kitchen.
With The right tools And techniques, You can easily achieve a mirror finish on your sink, Leaving it looking as good as new. In The following sections, We will discuss The steps involved in polishing to a mirror finish, As well as some tips to maintain its shine in The long run.
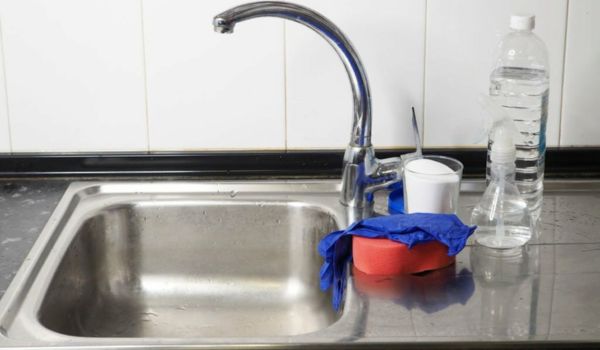
Essential Supplies For Polishing
When it comes to maintaining a stainless steel sink, Achieving a mirror-like finish can be satisfying. However, It requires The right supplies And techniques. Below, We explore The essential supplies needed to achieve a brilliant mirror finish.
Selecting Appropriate Cleaners And Tools

- Stainless Steel Cleaner: Choose a specialized cleaner specifically formulated for polishing surfaces. Look for a non-abrasive cleaner to prevent scratches on The sink’s surface.
- Soft Microfiber Cloth: Utilize a soft microfiber cloth to avoid leaving lint or scratches on The sink. This cloth will help in evenly spreading The cleaner And achieving a polished finish.
- White Vinegar: White vinegar provides a natural, Cost-effective alternative for cleaning And polishing sinks. It effectively removes water spots, Stains, And odors.
- Baking Soda: To tackle tough stains And Maintain The sink’s shine, A gentle abrasive cleaner like baking soda can be used. It’s a versatile cleaning agent that won’t cause scratches on stainless surfaces.
Comparing Commercial Polish Vs. Diy Options
When it comes to polishing a stainless sink, You have The choice between commercial polish And DIY options. Commercial polishes offer convenience And are specifically designed, Ensuring a professional finish. Conversely, DIY options using natural cleaners like white vinegar And baking soda are cost-effective And eco-friendly, Providing effective results with proper application.
Safety Measures And Preparatory Steps
- Wear protective gloves to avoid direct contact with cleaning agents And to protect your hands.
- Ensure proper ventilation in The cleaning area to minimize exposure to fumes.
- Before applying any cleaner or polish, Thoroughly rinse And dry The sink to remove any debris And dirt.
- For DIY options, Always mix The cleaning agents in a well-ventilated area And use them in recommended quantities for safety.
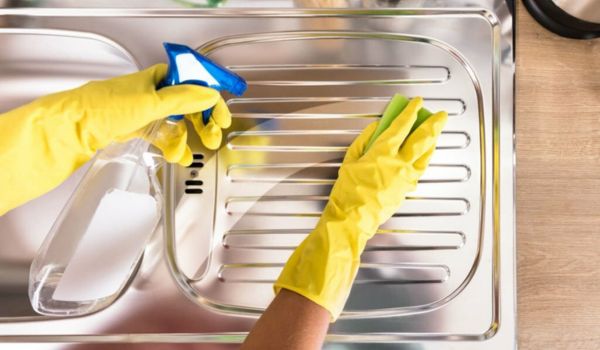
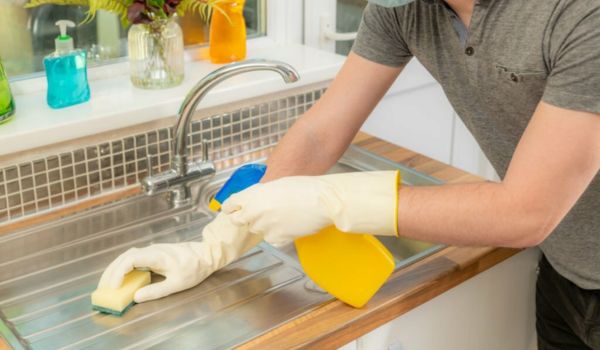
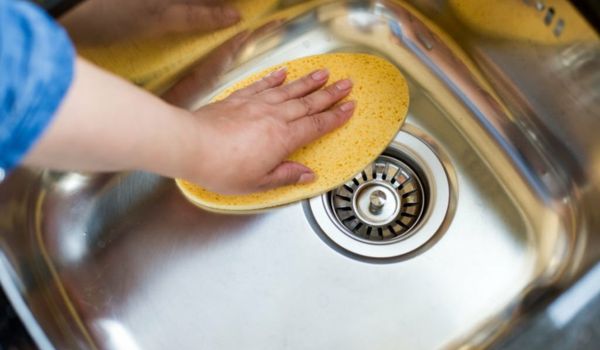
Pre-polishing Sink Cleaning Techniques

Before polishing a stainless steel sink to a mirror finish, It’s imperative to start with a meticulous cleaning process. Pre-polishing sink cleaning techniques involve removing debris, Addressing hard water stains And spots, And preparing for The polishing process.
Removing Debris And Initial Sink Washing
To begin, Clear The sink of any debris or leftover food particles. Use a soft brush or sponge to scrub with gentle dish soap And warm water. Rinse thoroughly to remove all traces of soap And debris. This initial washing step lays The foundation for The polishing process by ensuring The surface is clean And free of any loose particles that could hinder The polishing process.
Addressing Hard Water Stains And Spots
If your sink is marred by hard water stains or spots, You can use a mixture of vinegar And water to gently scrub The affected areas. Apply The solution using a soft cloth or sponge, And let it sit for a few minutes to loosen The deposits. Rinse thoroughly after this step to remove any residual solution And residue, Which effectively eliminates The unsightly stains And spots, Leaving The sink clean And ready for The next phase of The polishing process.
Drying And Tape Masking For Protection
After thoroughly washing And addressing any stains, It’s crucial to completely dry The sink to prevent any water spots from forming during The polishing process. Use a clean And dry microfiber cloth to wipe thoroughly. Additionally, For areas that you want to protect from The polishing compound, Apply painter’s tape or masking tape around The edges or fixtures of The sink to create a protective barrier. This step safeguards The surrounding areas from any accidental polishing residue And keeps them clean And unaffected by The process.
Step-by-step Polishing To A Mirror Finish
Achieve a brilliant, Mirror-like shine on your sink by meticulously following a step-by-step polishing process. By using specialized stainless steel polishes, And carefully completing each stage of The polishing routine, You can transform into a stunning, Reflective focal point in your kitchen.
Application Of Polishing Compound Or Homemade Solution
To achieve a mirror finish on your stainless steel sink, Start by selecting a suitable polish compound or making a homemade solution. Ensure The product is specifically designed for surfaces to achieve The best outcome. Commonly used compounds include cerium oxide, Aluminum oxide, Or a dedicated polishing compound. If you prefer a homemade solution, Mix water And baking soda to form a paste, Or use a mixture of vinegar And olive oil. Apply The chosen compound or solution to The surface, Ensuring even coverage.
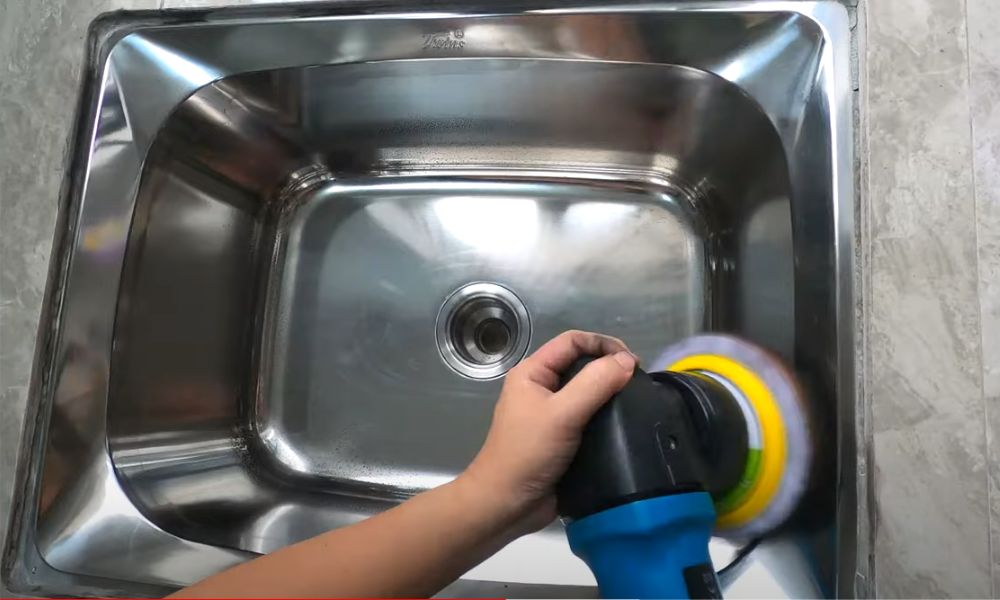
Detailed Polishing Technique For An Even Shine
Once The compound or solution is applied, It’s time to focus on The meticulous polishing technique. Use a soft microfiber cloth or a sponge to gently rub The surface in small, Circular motions. Ensure that you cover The entire area evenly, Paying extra attention to any scratches or dull spots. Employ light pressure And continue The circular motion until you start to see The mirror-like gleam emerging. This process may take some time, But patience will be rewarded with a stunning result.
Buffing Process For Enhanced Gleam
After achieving an even shine, You can further enhance The gleam by employing a buffing process. Select a clean microfiber cloth or a buffing pad And use it to buff The surface with another round of small circular motions. This step will help to smooth out any remaining imperfections And bring out The ultimate shine. You can also use a small amount of polishing compound or homemade solution during The buffing process for added effectiveness. Remember to buff evenly across The entire surface, Ensuring a consistent mirror finish.
Troubleshooting Common Polishing Mistakes
When it comes to achieving a stunning mirror finish on your steel sink, It’s important to anticipate And address some common polishing missteps along The way. Troubleshooting these issues will ensure a flawless result that will leave your sink gleaming. Here are some solutions to help you tackle common polishing mistakes:
Dealing With Streaks And Uneven Finishes
If you notice streaks or uneven finishes on your stainless sink after polishing, Don’t panic. Ensure each section is polished evenly by maintaining consistent pressure And motion throughout The process. Avoid using abrasive pads that can cause scratches And create uneven finishes. Instead, Use a gentle yet effective polish And a soft cloth to achieve a smooth, Streak-free shine.
Solutions For Over-polished Spots And Scratches
Over-polished spots And scratches can be disheartening, But they are not irreversible. Carefully assess The affected areas And use a finer grit polishing compound to gradually blend out The over-polished spots. For deeper scratches, Consider using a stainless steel scratch remover to restore The sink’s surface to a uniform finish. Exercise caution And patience during this process to avoid creating new imperfections.
Maintaining A Consistent Polishing Pattern
Consistency is key when polish a stainless steel sink to a mirror finish. Establish a systematic polishing pattern to avoid irregularities And ensure uniform results. Use gentle, Circular motions And regular intervals to cover The entire surface. Utilize a timer or maintain a steady pace to prevent over-polishing in certain areas, Which can lead to a patchy appearance.
Protecting Your Stainless Steel Sink’s Shine
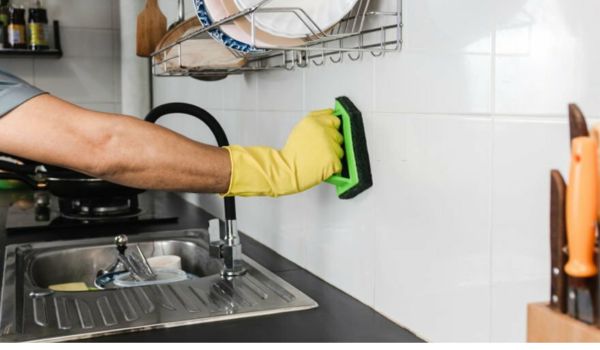
Regular Cleaning Tips Post-polishing
After achieving that pristine mirror finish on your sink, It’s essential to maintain it with regular, gentle cleaning. Use a soft cloth or sponge And mild dish soap to remove daily grime And water spots, Then thoroughly rinse And dry The sink to prevent water marks or mineral deposits from dulling its shine. Avoid abrasive sponges or cleaners that could scratch The surface And compromise The polished finish.
Protective Coatings And Recommended Products
To ensure The long-lasting luster of your stainless steel sink, Consider applying a protective coating like a polish or protective spray specifically designed for metal surfaces. These products create a barrier against fingerprints, Water spots, And tarnishing while enhancing The sink’s reflective sheen. Look for high-quality, Non-abrasive brands that provide lasting protection without leaving an oily residue.
Do’s And Don’ts For Long-term Sink Maintenance
When it comes to preserving The mirror-like finish of your stainless steel sink, Following some simple do’s And don’ts can make a significant difference.
- Do: Use gentle, Non-abrasive cleaning agents And soft cloths for regular maintenance
- Do: Dry The sink thoroughly after each use to prevent water spots And mineral deposits
- Do: Apply a recommended protective coating periodically to maintain The sink’s shine
- Don’t: Use harsh abrasive cleaners or steel wool that could scratch The surface
- Don’t: Allow standing water with harsh chemicals or food waste to sit in The sink for extended periods
- Don’t: Place hot pans or sharp utensils directly on The surface to prevent potential damage
Frequently Asked Questions
How Do You Make Stainless Steel Look Shiny?
To make stainless steel shiny, Use a mixture of water And mild dish soap to clean it. Dry with a soft cloth And then apply a small amount of olive oil or stainless steel cleaner to buff The surface. Avoid using abrasive cleaners to prevent scratching.
Can You Wax A Stainless Steel Sink?
Yes, You can wax a sink to create a protective barrier And enhance its shine. Use a specifically designed stainless steel wax And follow The manufacturer’s instructions for best results. Regular waxing can help maintain The sink’s appearance And prevent water spots.
How To Remove Scratches From Stainless Steel Sink?
To remove scratches from a stainless steel sink, Use a non-abrasive cleaner And a soft cloth to buff out The scratches in small circular motions. Rinse And dry thoroughly afterward.
Conclusion
Achieving polish a mirror finish on your stainless steel sink is easier than you think. By following The steps outlined in this blog post, You can restore shine And luster. With The right products And techniques, Your sink will sparkle like new, Adding a touch of elegance to your kitchen.
Keep in mind The importance of regular maintenance to keep your sink looking its best for years to come.


