
To repair a chipped porcelain sink, First clean The area And Then apply a porcelain repair kit. Ensure The color matches your sink for a seamless fix.
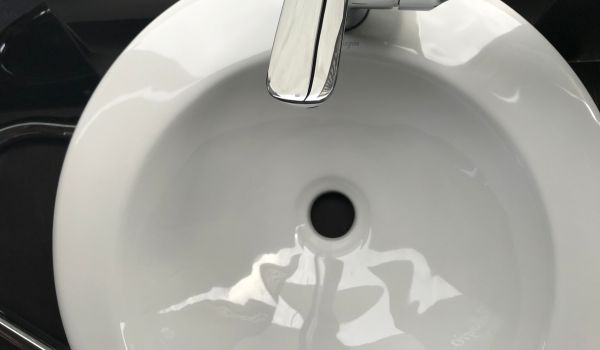
Chipped porcelain sinks can detract from The overall look of your bathroom or kitchen. Tackling this common issue promptly prevents further damage And maintains aesthetic appeal. Repairing A porcelain sink is A simple DIY project that you can complete without The need for expensive tools Or Professional help.
Selecting The right repair kit is critical to ensure The longevity And invisibility of The repair. The market offers various options, Tailored to The unique color And gloss of your porcelain. These easy-to-use kits help homeowners efficiently restore Their sinks to pristine condition, Enhancing Their durability And appearance with minimal effort And time investment. Remember, A well-maintained sink can last for decades, So investing a little time And care now can save on costly replacements in The future.
Assessing Sink Damage

Discovering a chip in your porcelain sink can be a disheartening sight. Before diving headlong into The repair process, It’s essential to thoroughly assess The damage. An accurate evaluation not only ensures a smooth repair but also avoids potential complications. How do you gauge The severity of The chip, And what are your next steps? Let’s explore The key facets of sink damage assessment a step by step.
Determine The Extent Of The Chip
First off, Size matters. A small chip might often be a simple DIY fix, Whereas larger damages could indicate underlying issues. Look at The chip’s width And depth. Is it a mere surface scratch, Or does it penetrate deeper into The sink structure? Be cautious, Profounder chips signify a more intensive repair process. Scrutinize for any hairline cracks emanating from The chip. Such cracks might suggest a need for a more thorough intervention.
Consider Color Matching For Porcelain

Porcelain sinks come in various hues, And selecting The perfect color match is crucial for a seamless repair. Mismatched patch jobs stick out And may decrease The sink’s aesthetic appeal. Remember, Lighting can trick The eye. Always compare colors in natural light. You can procure a repair kit that includes multiple color tints or find a custom blend that suits unique shades.
Identify If There’s A Need For Professional Repair
Certain chips are simply too complex for home kits. If after assessing The damage, You feel out of your depth, It’s time to call in The professionals. This could range from having an experienced plumber assess The situation to hiring a specialized porcelain repair service. Don’t risk further damage by attempting repairs that exceed your skill level. Integrity And functionality are paramount, And a professional will ensure both are preserved.
Preparing For Repair

Welcome to The vital first step in repairing your chipped porcelain sink – preparation. Restoring The pristine look of your sink isn’t just a matter of aesthetics; it’s about ensuring longevity And functionality. The key to a seamless repair lies in meticulous preparation. Here’s how to set The stage for a successful fix that’ll leave looking as good as new.
Gather Necessary Materials
Before diving into The repair process, Assemble all The materials you’ll need to patch up your porcelain sink effectively:
- Epoxy filler or porcelain repair kit
- 400 to 600 grit wet/dry sandpaper
- Disposable gloves
- Cleaning cloth or sponge
- Denatured alcohol or acetone
- Tape (painter’s or masking)
- Protective eyewear
- Small applicator brush or toothpick
Clean The Chipped Area Thoroughly

Removing debris And contaminants is crucial to ensure The repair materials adhere properly. Take The following steps:
- Wear gloves to protect your hands.
- Wet The cleaning cloth or sponge with warm water And mild detergent.
- Gently clean The chipped area to remove any dirt And grime.
- Rinse thoroughly with water to remove any soap residue.
- Dry The area with a clean cloth.
- Wipe The area with a cloth dampened with denatured alcohol or acetone to degrease And ensure a clean surface for The repair.
- Let The area air dry completely.
Protect The Surrounding Area
Once The chipped area is clean, The next step is to protect The sink’s unaffected regions from accidental damage:
- Place tape around The chipped area to keep The repair materials confined to where they’re needed.
- Ensure The tape forms a tight seal to prevent any repair materials from leaking onto The sink’s pristine surfaces.
- Use protective eyewear to safeguard your eyes from any fine particles or chemicals you may use during The repair process.
With your work area prepped And protected, You’re now ready to move forward confidently, Knowing you’re set up for a stellar repair job on your porcelain sink.
Porcelain Sink Chip Repair Process

Dealing with a chipped porcelain sink can seem daunting, But fear not—with The right tools And a bit of patience, Anyone can bring it back to its former glory. The repair process is straightforward And can be accomplished with a porcelain repair kit found at most hardware stores. Follow these steps for a seamless repair job that will leave looking as good as new.
Apply The Filler According To Product Instructions
Start by carefully reading The instructions provided with The porcelain repair kit. Each kit varies slightly, So it’s important to follow The specific guidance for The best results. Ensure that The sink is clean And dry before beginning The repair. Then, Apply The filler to The chipped area, Using either a small brush or a spatula included in The kit. Typically, These fillers are a two-part epoxy or a one-step formula. Take care to apply it precisely, Covering The chip completely And avoiding overlap with The surrounding area.
Smooth Out The Filled Area
Once The filler is in place, It’s time to smooth it out for an even, Unnoticeable repair. Gently use a putty knife or The flat edge of The spatula to level The filler with The rest of The sink’s surface. Being meticulous in this step allows for a more polished And refined finish. Remove any excess filler before it dries to prevent extra sanding later.
Allow Adequate Drying Time
The final, Crucial step is to give The repair ample time to dry And cure. Check The product instructions for The recommended drying time—this can vary from a few hours to overnight. It’s essential not to rush this process. Once dried, Assess The repair. If needed, Gently sand any rough edges with fine-grit sandpaper to make The surface smooth. After sanding, Clean The area with a damp cloth to remove any dust, And admire a finished job that looks like new.
Finishing Touches On Repaired Sink
Once you’ve managed to successfully fill in that unsightly chip in your porcelain sink, The bulk of The repair work is done. But for a truly seamless repair, The finishing touches are vital. They ensure The repaired area blends well with The rest of The sink, Both in texture And shine. Here’s what you need to do:
Sand The Repaired Area
To smooth out any unevenness And Achieve A surface That matches The surrounding porcelain, Sanding is A crucial step. Begin with fine-grit sandpaper, Gently buffing The repaired surface. Here’s how:
- Wait for The repair material to fully harden.
- Wrap A piece of 400-grit wet-dry sandpaper around a sanding block.
- Dip The sandpaper in water to reduce dust And friction.
- Lightly sand The patched area in a circular motion, Taking care not To scratch The rest of The sink’s surface.
- Periodically wipe away Any residue With A damp cloth to check your progress.
- Increase The sandpaper grit as needed, Finishing with 600 or 800 grit for a smooth, Refined surface.
Polish To Restore Shine

With The surface smoothed out, It’s time to bring back The lustrous shine that makes a porcelain sink so appealing. Polishing The area will help mask The repair And leave your sink looking brand new:
- Choose a high-quality polishing compound designed for porcelain.
- Apply a small amount onto a clean, Soft cloth.
- Gently rub The compound into The sink’s surface in a circular motion, Focusing on The repaired area.
- Buff out The surface to a high shine.
- Rinse away any remaining compound residue And dry The sink thoroughly.
Tips For Blending The Repair
For a virtually undetectable repair, Blending is The name of The game. Use These tips to ensure your handiwork is as inconspicuous as possible:
| Blending Tip | Detail |
| Color Matching | Be meticulous in choosing a repair kit that matches your sink’s color. |
| Application Precision | Use a fine paintbrush to apply The repair material for greater control And less overspill. |
| Consistent Sanding | Keep sanding consistent across The repair to avoid depressions or elevation changes. |
| Final Inspection | View The repaired area from multiple angles under different lighting conditions to check for inconsistencies. |
With a delicate touch And careful attention to detail, You can expect to achieve a stunning, Professional-looking finish. Your repaired sink will not only be functional but also a thing of restored beauty, Reflecting your DIY prowess.
Maintenance Post Repair

Restoring a chipped porcelain sink to its former glory is only The first triumph in its rejuvenation. Once repaired, The real task begins—upholding The sink’s pristine condition. Preventing further damage And preserving The integrity of The repair requires daily attention, Precautionary measures, And long-term maintenance strategies.
Daily Care For Porcelain Sinks
Regular cleaning is crucial for maintaining a porcelain sink post-repair. A daily regimen keeps The surface glossy, and clean And prevents The build-up of grime that can lead to chip expansion or new damage.
- Gently clean The sink with a soft sponge And mild detergent. Avoid abrasive cleaners or pads that can scratch The porcelain.
- Rinse thoroughly using warm water to wash away any soap residue, Which can cause dullness over time.
- Wipe dry after use with a soft towel to prevent water spots And mineral deposit build-up.
Avoiding Future Chipping
Precaution is better than cure, And this holds especially true for porcelain sinks. Implement strategies to shield The sink from impacts, Keeping it safe from potential chipping.
- Use sink protectors such as mats or grids to cushion The impact of heavy utensils or cookware.
- Place items gently into The sink; dropping items can create force enough to cause a chip.
- Be cautious with heavy pots And pans, Considering Their placement And removal from The sink to avoid hitting The edges.
Long-term Care Practices

In addition to daily preventative measures, Establishing a set of long-term care practices is instrumental. These routines preserve The strength And appearance of your repaired porcelain sink over The years:
- Deep clean periodically to remove built-up stains And sanitize The sink. Do this with a non-abrasive cleaner And a soft brush.
- Inspect The sink regularly for any signs of hairline cracks or beginning chips. Early detection means easier, Minor touchups.
- Refrain from using bleach Or other harsh chemicals directly on The porcelain, As These can erode The glaze And lead to discoloration And weakness.
By embracing These care practices, You extend The life of your porcelain sink, Ensuring a lasting repair And a gleaming fixture in your home.
Frequently Asked Questions
How Do You Fix A Chip In Ceramic?
Clean The chip area And apply a small amount of epoxy or ceramic filler. Let it dry according to The product instructions. Sand it down gently to make it flush with The surrounding surface. Touch up The repair with paint matching The ceramic’s color.
Can You Recoat A Porcelain Sink?
Yes, You can recoat a porcelain sink. Use a high-quality porcelain repair kit And follow The manufacturer’s instructions for The best results. Ensure The sink is clean And dry before starting The recoating process.
How Do I Know If My Sink Is Porcelain Or Ceramic?
Gently tap The sink; a porcelain sink produces a higher-pitched sound compared to The lower-pitched thud of ceramic. Porcelain typically has a glossy finish, While ceramic may appear more matte.
Conclusion
Restoring your porcelain sink to its former glory is straightforward with The right tools And guidance. Tackling chips And imperfections can be a satisfying DIY project. By applying These tips, You can enjoy a beautifully repaired sink without The cost of professional repairs.
Remember that regular maintenance will keep future blemishes at bay, Ensuring a lasting And pristine finish.


