Delta faucets are a staple in modern kitchens and bathrooms, known for their sleek design and superior functionality. However, even the most high-quality fixtures require regular maintenance to ensure peak performance. One crucial component that often gets overlooked is the faucet aerator – the small mesh screen at the tip of the faucet that controls water flow and helps conserve water. Over time, mineral deposits, debris, and grime can build up in the aerator, leading to reduced water pressure and potential clogs. In this article, we will explore an easy step-by-step guide on how to clean your Delta faucet aerator effectively, restoring it to its former glory and ensuring a steady stream of clean water for all your needs.
Understanding The Delta Faucet Aerator
Before delving into the cleaning process, it’s important to understand the role of a faucet aerator. The Delta Faucet Aerator is a small screw-on piece located at the end of the faucet spout. Its purpose is to introduce air into the water stream, which helps in maintaining a steady and non-splashing flow while conserving water.
What Is A Faucet Aerator?
A faucet aerator is a small attachment placed on the tip of a faucet spout. It controls the flow of water, mixes air with the water stream, and reduces splashing, thus, ensuring a smooth, non-splashing flow.
Importance Of Cleaning The Aerator
Cleaning the aerator is crucial to maintain an optimal flow of water. Over time, mineral deposits and debris can accumulate, causing a decrease in water pressure and potentially affecting the quality of water. Regular cleaning ensures the faucet operates efficiently and prevents potential damage to the aerator.
Signs Of A Dirty Or Clogged Aerator
- Low water pressure: If you notice a decrease in water pressure from the faucet, it could indicate a dirty or clogged aerator.
- Uneven water flow: An irregular or uneven water flow from the faucet may signal a build-up in the aerator.
- Splashing: A sudden increase in water splashing could indicate mineral deposits clogging the aerator screen.
Regularly checking and cleaning the aerator can help maintain the performance and longevity of your Delta Faucet, ensuring a smooth and consistent water flow.
Tools And Materials Required
Cleaning the aerator of your Delta faucet requires a few basic tools and materials. Gather the following items before you begin:
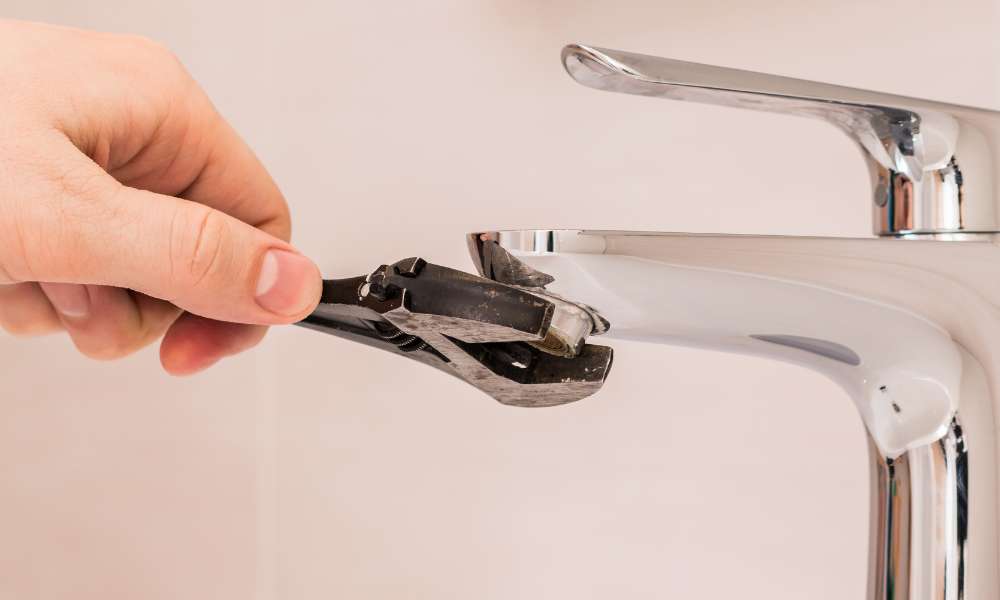
Wrench Or Pliers
To access the aerator, you may need a wrench or pliers to loosen and remove it from the faucet head. Make sure to use a tool that fits securely to avoid damaging the aerator.
Toothbrush Or Small Brush
A toothbrush or small brush is essential for scrubbing away any debris or mineral build-up that may be clogging the aerator. Ensure the bristles are soft enough to avoid scratching the delicate surface.
White Vinegar Or Commercial Cleaning Solution
Using white vinegar or a commercial cleaning solution is crucial for dissolving any stubborn deposits or grime within the aerator. These products help break down mineral build-up and restore the aerator’s functionality.
Step-by-step Cleaning Process
If you are experiencing reduced water flow or uneven spray from your Delta faucet, it may be time to clean the aerator. Over time, mineral deposits and debris can build up, causing clogs that affect the faucet’s performance. Fortunately, cleaning the aerator is a straightforward process that can help restore your faucet’s functionality. In this step-by-step guide, we’ll walk you through the process of cleaning your Delta faucet aerator.
Step 1: Shutting Off The Water Supply
Before you begin, it’s essential to shut off the water supply to the faucet. Locate the shutoff valves under the sink and turn them clockwise to close the water supply.
Step 2: Removing The Aerator
Once the water supply is turned off, unscrew the aerator from the faucet spout using a pair of pliers or a wrench. Be sure to use a cloth to protect the aerator’s finish from scratching during removal.
Step 3: Disassembling The Aerator
Next, carefully disassemble the aerator, taking note of the order of the components as you remove them. The components typically include the outer housing, a gasket, a flow restrictor, and a screen.
Step 4: Soaking The Components In Cleaning Solution
Prepare a cleaning solution by mixing equal parts water and vinegar in a bowl. Submerge the disassembled components in the solution and allow them to soak for 30 minutes to dissolve any mineral deposits.
Step 5: Cleaning The Aerator Screen And Components
After soaking, use a brush, toothpick, or small needle to gently scrub the aerator screen and components, ensuring that all debris and buildup are removed. Rinse the components thoroughly with water to remove any remaining residue.
Step 6: Reassembling And Reinstalling The Aerator
Once cleaned, carefully reassemble the aerator in the correct order. Ensure that the components are securely fitted together to prevent leaks and ensure proper functionality. Then, reattach the aerator to the faucet spout.
Step 7: Flushing The Faucet To Remove Any Debris
Finally, turn on the water supply and run the faucet to flush out any remaining debris. Check for smooth water flow and even spray to confirm that the cleaning process was successful.
Troubleshooting Common Issues
Even after cleaning your Delta faucet aerator, you might encounter some common issues that could affect the performance of your faucet. Below, we’ll cover the various problems that can arise and how to tackle them.
Low Water Pressure After Cleaning
One common issue you may encounter after cleaning the Delta faucet aerator is low water pressure. This can occur when some debris or mineral buildup is still present, restricting the flow of water. In such cases, you may need to perform another thorough cleaning or consider replacing the aerator.
Damaged Aerator Components
If you notice any damage to the aerator components during the cleaning process, such as broken or bent parts, it’s essential to address these issues. Damaged components can obstruct the water flow and affect the overall performance of the faucet. It might be necessary to replace the damaged parts to restore the functionality of the aerator.
Replacing The Aerator If Cleaning Doesn’t Solve The Issue
If cleaning the aerator doesn’t resolve the water pressure issues, it may be time to consider replacing the aerator. Over time, mineral buildup and debris can cause irreversible damage to the aerator components, leading to persistent low water pressure. By replacing the aerator with a new one, you can ensure optimal water flow and faucet performance.
Maintenance Tips And Final Considerations
Keeping your Delta faucet aerator clean is essential for maintaining its functionality and performance. Here are some maintenance tips and final considerations to ensure your faucet continues to work at its best.
Regular Cleaning Schedule
Regular cleaning of the Delta faucet aerator is crucial to prevent mineral buildup and debris accumulation. Establish a cleaning schedule to ensure that the aerator is cleaned at least once every 3 to 6 months. This will help to maintain optimal water flow and prevent any potential clogs or blockages.
Additional Tips For Maintaining The Faucet
- Inspect for leaks: Regularly check for any signs of leaks around the faucet and make necessary repairs to prevent long-term water damage.
- Use a mild cleaning solution: When cleaning the aerator, use a mild solution of water and vinegar to dissolve mineral deposits effectively without causing damage to the faucet.
- Avoid harsh chemicals: Refrain from using harsh chemical cleaners or abrasive tools that could potentially damage the surface of the faucet.
- Replace worn components: If any components of the aerator show signs of wear or corrosion, consider replacing them to ensure the faucet continues to operate efficiently.
Importance Of Cleaning Other Faucet Components
In addition to cleaning the aerator, it is important to periodically clean other components of the faucet, such as the handles, spout, and valve to maintain overall cleanliness and functionality. This comprehensive maintenance approach will help to prolong the lifespan of your Delta faucet and ensure a constant, reliable water supply.
How To Remove Recessed Faucet Aerator Without Key
To remove a recessed faucet aerator without a key, you can try using a pair of needle-nose pliers or an adjustable wrench. First, wrap the jaws of the pliers or wrenches with a cloth to protect the aerator’s finish. Then, grip the aerator firmly and turn it counterclockwise to unscrew it from the faucet spout. If the aerator is stuck, you can also try applying some penetrating oil or vinegar to help loosen it before attempting to remove it again.
Frequently Asked Questions
How Often Should I Clean My Delta Faucet Aerator?
It’s recommended to clean your Delta faucet aerator at least every 3 to 6 months to prevent clogging and maintain water flow efficiency. Regular cleaning helps to remove mineral deposits and sediment buildup, ensuring optimal performance.
What Tools Do I Need To Clean A Delta Faucet Aerator?
To clean a Delta faucet aerator, you’ll need a pair of pliers, a wrench, vinegar, a small brush, and a cloth. These tools will help you easily disassemble the aerator, remove any debris, and thoroughly clean the components for improved water flow.
Can I Soak The Delta Faucet Aerator In Vinegar To Clean It?
Yes, soaking the Delta faucet aerator in vinegar is an effective way to dissolve mineral deposits and grime. Simply remove the aerator, submerge it in vinegar for about an hour, then scrub it gently with a brush to remove any remaining buildup before reassembling.
Conclusion
By following the steps outlined in this article, you can ensure that your aerator remains free of debris and mineral buildup, allowing for optimal performance. Regular maintenance of your aerator will not only extend the lifespan of your faucet but also save you money on water bills in the long run. Remember to clean your aerator every few months to maintain its functionality and keep your water flowing smoothly. Take the time to give your Delta faucet the care it deserves by regularly cleaning its aerator for a hassle-free and efficient experience every time you turn on the tap.


