Faucet aerators play a crucial role in maintaining water efficiency and controlling the flow of water in your home. However, what happens when you need to remove a recessed faucet aerator but find yourself without the necessary key? The frustration sets in as you contemplate how to tackle this seemingly daunting task. Fear not, for we are about to embark on a journey of discovery together, exploring ingenious methods to remove a recessed faucet aerator without the elusive key that usually unlocks this mystery.
Identifying The Recessed Faucet Aerator
When it comes to maintaining and repairing faucets, knowing how to remove a recessed faucet aerator without a key is a useful skill to have. First, it is essential to identify the type of aerator installed in your faucet. In this section, we’ll focus on understanding the purpose of a faucet aerator, the importance of the aerator in a faucet system, and recognizing different types of faucet aerators.
Understanding The Purpose Of A Faucet Aerator
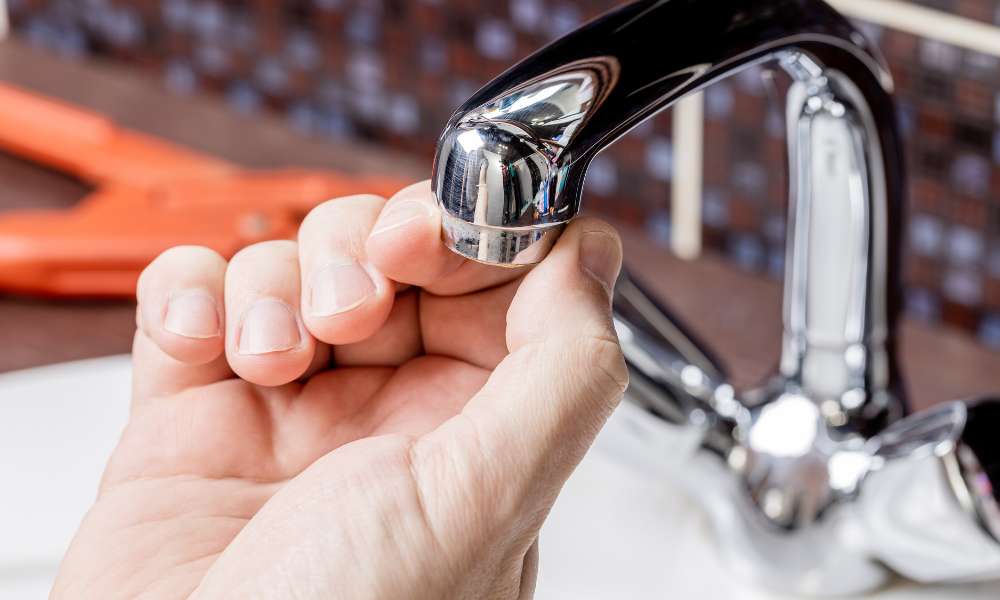
A faucet aerator is a small attachment that screws onto the end of a faucet, shaping the flow of water and adding air to the stream. The primary purpose of a faucet aerator is to conserve water and reduce splashing. It does so by breaking the water flow into smaller, individual streams, while infusing it with air, resulting in a softer, non-splashing flow of water.
Importance Of The Aerator In A Faucet System
The aerator plays a crucial role in maintaining water pressure and controlling the water stream. Moreover, it helps in preventing water wastage, making it an essential component in water conservation efforts. Furthermore, the aerator also contributes to reducing energy consumption by decreasing the demand for hot water, thus aiding in energy efficiency.
Recognizing Different Types Of Faucet Aerators
There are various types of faucet aerators available, each with distinct features and functions. Common types include cache aerators, male and female threaded aerators, and recessed aerators. Identifying the specific type of aerator in your faucet is vital to ensure successful removal or replacement.
Preparing To Remove The Recessed Faucet Aerator
If you’re experiencing reduced water flow from your faucet, you may need to remove the recessed faucet aerator to clean or replace it. However, many people face the challenge of removing the aerator without a key. In this guide, we’ll provide you with step-by-step instructions for removing the recessed faucet aerator without a key, starting with the preparations and safety precautions.
Gathering Necessary Tools And Materials
Before you begin, gather the following tools and materials to effectively remove the recessed faucet aerator:
| Tools | Materials |
| Screwdriver | Plastic bag |
| Pliers | Vinegar or lime dissolving solution |
Tools Required For Removing The Aerator
Two essential tools for removing the recessed faucet aerator are a screwdriver and pliers. The screwdriver will help in prying the aerator out, while the pliers can be used for added leverage if the aerator is stubbornly stuck.
Safety Precautions To Consider
Before attempting to remove the aerator, it’s important to consider the following safety precautions:
- Turn off the water supply to the faucet to prevent any accidental water spillage during the removal process.
- Place a rag or towel under the faucet to catch any dropped parts and avoid damaging the sink or countertop.
- Use caution when using tools to avoid injury or damaging the faucet or aerator.
Methods For Removing Recessed Faucet Aerator Without Key
When you need to remove a recessed faucet aerator without the key, there are a few alternative methods you can try. Whether the key has been misplaced or simply wasn’t provided, you can still successfully remove the aerator using alternative tools and techniques.
Using Alternative Tools For Extraction
If you don’t have the specific key for aerator removal, fret not. There are alternatives to unlock the aerator. One common method is to use needle-nose pliers to carefully grab the edges of the aerator and turn it counterclockwise to loosen it. Alternatively, a flathead screwdriver can be placed inside the aerator and used as leverage to twist it off. Just be cautious not to scratch or damage the faucet during this process.
Step-by-step Guide To Removing The Aerator Without Key
Follow these steps to remove the recessed faucet aerator without a key:
- Turn off the water supply to the faucet.
- Wrap the jaws of needle-nose pliers with a layer of electrical tape to protect the aerator and faucet surface.
- Insert the wrapped pliers into the recessed aerator and firmly grip the edges.
- Rotate the pliers counterclockwise to loosen and remove the aerator from the faucet.
- Inspect the aerator screen for any debris and clean as needed before reattaching.
Tips For Preventing Damage To The Faucet During Removal
When removing the aerator without a key, it’s important to take precautions to avoid causing any damage to the faucet. Here are some tips to prevent damage:
- Use a protective covering on the pliers to avoid scratching the aerator or faucet.
- Apply gentle and even pressure when using alternative tools to avoid causing any harm to the faucet.
- Inspect the faucet threads for any signs of wear or damage before reattaching the aerator.
Cleaning And Reinstalling The Aerator
When it comes to maintaining your faucet, proper cleaning and reinstalling of the aerator is crucial. It not only ensures optimal water flow but also extends the life of your faucet. In this section, we will discuss the importance of cleaning the aerator, effective cleaning solutions and techniques, as well as the proper reinstallation of the aerator.
Importance Of Cleaning The Aerator
Regular cleaning of the aerator is essential to prevent mineral build-up, debris accumulation, and clogging. A clean aerator facilitates a smooth and consistent water flow, avoids splashing, and maintains the overall efficiency of your faucet.
To remove the aerator from a Moen faucet, First, locate the aerator at the tip of the spout. You may need to use a pair of pliers or an adjustable wrench to unscrew it in a counterclockwise direction. Once removed, soak the aerator in vinegar or a mixture of soap and water for about 15-30 minutes to dissolve any mineral deposits or debris. After cleaning, rinse thoroughly and reattach it back onto the faucet by screwing it clockwise until tight.
Effective Cleaning Solutions And Techniques
To effectively clean the aerator, start by removing it from the faucet. Soak the aerator in a solution of equal parts white vinegar and water for approximately 30 minutes to dissolve mineral deposits. Use a small brush, such as a toothbrush, to gently scrub the screen and remove any remaining debris. Rinse the aerator thoroughly with water to ensure all particles are removed.
For stubborn build-up, you can also use a commercial lime and scale remover. However, always follow the manufacturer’s instructions when using these products to avoid damaging the aerator.
Proper Reinstallation Of The Aerator
After cleaning, it’s important to reinstall the aerator properly. Ensure that the screen and all components are in place before screwing the aerator back onto the faucet. Use pliers to tighten it securely, but be cautious not to overtighten it, as this can cause damage.
Lastly, turn on the faucet to check for any leaks or irregular water flow. If everything is functioning correctly, you have successfully cleaned and reinstalled the aerator, ensuring a well-maintained faucet.
Testing The Faucet After Aerator Removal
After successfully removing the recessed faucet aerator without a key, it’s important to test the faucet to ensure proper functionality. Testing the faucet allows you to confirm that the water flow is adequate and troubleshoot any potential issues that may arise.
Running Water To Confirm Adequate Flow
Once the aerator has been removed, run the water to confirm that there is an adequate flow. This will help ensure that there are no blockages or obstructions within the faucet. Turn on the faucet and observe the water flow, ensuring that it is at the level you would expect without the aerator. If the water flow is satisfactory, it indicates that the removal process was successful.
Troubleshooting Low Water Pressure Issues
If you notice low water pressure after removing the aerator, it’s important to troubleshoot the issue. Check for any debris or sediment that may be obstructing the flow of water. Additionally, examine the faucet for any potential leaks or faulty components that may be causing the low water pressure. Addressing these issues promptly will help restore the faucet to optimal performance.
Additional Maintenance Considerations For The Faucet
After removing the aerator and testing the faucet, it’s a good opportunity to consider additional maintenance tasks. Inspect the faucet for any signs of wear or damage, ensuring that all components are in good condition. It’s also advisable to clean the faucet thoroughly to remove any accumulated grime or debris. Regular maintenance will help prolong the lifespan of the faucet and ensure continued optimal performance.
Frequently Asked Questions
How Do You Remove A Recessed Faucet Aerator Without A Key?
To remove a recessed faucet aerator without a key, first, try using a pair of needle-nose pliers. If this does not work, wrap the aerator with a cloth and use adjustable pliers. Alternatively, a strap wrench can be used to grip and unscrew the aerator.
What Are The Alternative Methods To Remove A Recessed Faucet Aerator?
If you don’t have the aerator key, you can try using a rubber band, which can provide enough grip to unscrew the aerator. Another method is to use a flathead screwdriver as a substitute key by positioning it in the slots.
Why Is It Important To Remove A Recessed Faucet Aerator Properly?
Removing a recessed faucet aerator properly is important to maintain the faucet’s performance and prevent damage to the aerator or the faucet. Proper removal allows for cleaning or replacing the aerator, ensuring a steady water flow and preventing clogging and water pressure issues.
Conclusion
By following the step-by-step instructions outlined in this article, you can successfully remove the aerator and clean it for improved water flow. Remember to exercise caution and patience during the process to avoid damaging the faucet or aerator. With persistence and attention to detail, you can maintain your plumbing fixtures in optimal condition. Take the time to perform regular maintenance on your faucets to ensure smooth operation and efficient water usage.


