To fix a leaky Moen kitchen faucet single handle, start by shutting off the water supply and then disassembling the faucet to find and replace the damaged parts. You can do this by following step-by-step instructions provided by Moen or using a repair kit specifically designed for your faucet model.
A leaky kitchen faucet can be not only annoying but also wasteful, leading to higher water bills over time. Fortunately, repairing a leaky Moen kitchen faucet single handle is a relatively straightforward task that you can handle yourself without the need for professional help.
By following the correct steps and using the appropriate tools and replacement parts, you can successfully fix the leak and restore your faucet to its proper functioning. This guide will provide you with the necessary information to tackle the repair and ensure a smooth and efficient process.
Identifying The Leak Location
Identifying the Leak Location in your Moen kitchen faucet single handle is the crucial first step in diagnosing and fixing the issue. Pinpointing the exact location of the leak will help you determine the necessary repairs and save time and effort. In this section, we’ll walk you through the process of identifying the leak location, enabling you to address the problem effectively.
Observation Of Faucet Area
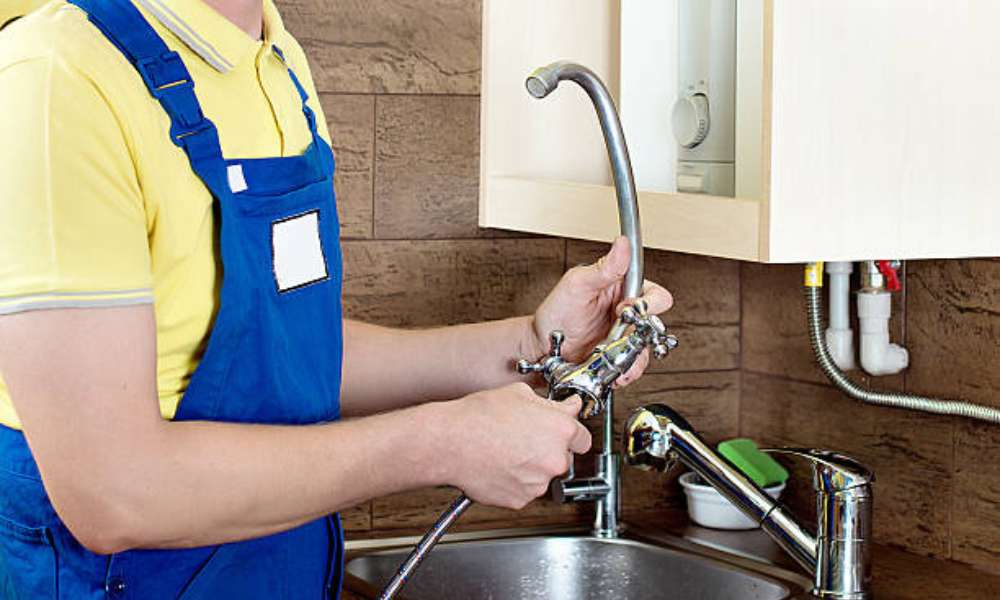
Start by visually inspecting the area around your Moen kitchen faucet. Look for any visible signs of water seepage or dripping. Pay close attention to the base of the faucet, the handle, and the spout. Additionally, check underneath the sink for any water accumulation or moisture, as this could indicate a leak originating from the connections or supply lines.
Water Flow Examination
Turn on the faucet and carefully observe the water flow. Note the location from where the water is leaking. If you notice water coming from the handle or the spout, it could indicate specific internal components that require attention. Alternatively, if the leak is occurring near the connections under the sink, it might point to issues with the supply lines or the faucet base.
Gathering Necessary Tools
Before you start fixing a leaky Moen kitchen faucet single handle, you need to gather the necessary tools and replacement parts. Proper tools and replacement parts are essential for a successful repair, so make sure you have everything you need before beginning the task.
Wrenches And Screwdrivers
First and foremost, you will need a set of wrenches and screwdrivers to disassemble and reassemble the faucet components. These tools are crucial for accessing and removing the damaged parts of the faucet.
To tackle common Moen faucet issues, such as leaks and drips, a set of adjustable wrenches and Phillips and flat-head screwdrivers are necessary for removing handle screws and other components.
Replacement Parts Checklist
Once you have the necessary tools, make sure you have the following replacement parts on hand:
- Moen Faucet Repair Kit: This kit typically includes O-rings, gaskets, and other small parts that commonly cause leaks in Moen faucets.
- Cartridge Replacement: Check to see if the cartridge is responsible for the leak, as this is often the case with single-handle faucets. Having a replacement cartridge on hand can save time during the repair process.
- Plumber’s Putty or Silicone Sealant: This is essential for creating a watertight seal around faucet bases and other components.
Shutting Off Water Supply
A leaky Moen kitchen faucet can cause water wastage and inconvenience. Before attempting any repair, it’s crucial to shut off the water supply to the faucet. This prevents any potential accidents and makes the repair process safer and more manageable. Here’s how to safely shut off the water supply to your Moen kitchen faucet.
Locating The Shut-off Valve
First, you need to locate the shut-off valve for your kitchen faucet. In most homes, the shut-off valve is usually located beneath the sink. It may be on the wall or the water pipe itself. If you have trouble finding it, refer to your home’s plumbing layout or contact a professional for assistance.
Safely Turning Off The Water
Once you’ve located the shut-off valve, carefully turn it clockwise to shut off the water supply to the faucet. This action will stop the flow of water to the faucet, allowing you to work on it without any leaks or accidents.
Removing The Handle
Removing the handle of a Moen kitchen faucet is the first step in fixing a leaky single-handle faucet. This process requires a few tools and a systematic approach to ensure the handle is removed properly without causing further damage to the faucet.
Unscrewing The Cap
Before removing the handle, you need to unscrew the cap on top of the handle. Use a flat-head screwdriver or an Allen wrench, depending on the model of the faucet, to carefully pry off the cap. Gently wiggle the screwdriver or wrench until the cap comes loose. Be cautious not to apply too much force as you don’t want to damage the cap or the handle.
Removing The Cartridge
Once the cap is removed, the next step is to access the cartridge inside the handle. This involves removing the retaining clip or nut that holds the cartridge in place. Use pliers or an adjustable wrench to carefully loosen the clip or nut and pull out the cartridge. Ensure you note the position of the cartridge and any accompanying components so that you can easily reassemble the faucet after fixing the leak.
Replacing The Cartridge
When it comes to fixing a leaky Moen kitchen faucet single handle, replacing the cartridge is a crucial step in the process. Over time, the cartridge may wear out or become damaged, leading to leaks and drips. By replacing the cartridge, you can restore the functionality of your faucet and prevent any further water wastage or damage to your kitchen.
Identifying The Moen Model
Before proceeding with the replacement of the cartridge, it’s essential to identify the model of your Moen kitchen faucet. Different models may have variations in the cartridge design, so knowing the specific model will ensure you purchase the correct replacement part. Look for the model number on the original packaging or the faucet itself. If the model number is not readily available, you can also visually inspect the faucet and compare it to Moen’s online catalog to find a matching model.
Installing The New Cartridge
Once you have the replacement cartridge, follow these steps to install it in your Moen kitchen faucet:
- Turn off the water supply to the faucet by closing the shutoff valves located under the sink.
- Using an adjustable wrench, remove the handle of the faucet by locating the set screw and loosening it.
- Remove the retaining clip that secures the cartridge in place.
- Grasp the top of the old cartridge with pliers and pull it out of the faucet body.
- Apply a thin layer of silicone lubricant to the O-rings of the new cartridge to ensure a smooth installation.
- Insert the new cartridge into the faucet body, ensuring it is aligned properly.
- Reattach the retaining clip to secure the new cartridge in place.
- Reinstall the faucet handle and tighten the set screw to secure it in place.
- Turn the water supply back on and test the faucet for any leaks or drips.
Reattaching The Handle
After repairing the leak in your Moen kitchen faucet single handle, it’s important to correctly reattach the handle to ensure proper function and avoid future leaks. Follow these steps to securely reattach the handle:
Ensuring Proper Alignment
To reattach the handle, ensuring proper alignment is crucial. Follow these steps to ensure the handle is properly aligned:
- Engage the tabs on the faucet handle with the notches on the cartridge stem ensuring they are correctly aligned.
- Gently push the handle down onto the cartridge stem to properly align it.
- Ensure the handle is straight and not askew to prevent future leaks.
Securing The Cap
After ensuring proper alignment, it’s crucial to securely secure the cap to prevent any wobbling or leakage. Follow these steps to secure the cap:
- Slide the cap onto the handle ensuring it fits snugly and aligns with the base of the faucet.
- Using a screwdriver, tighten the set screw located at the front of the handle to secure the cap firmly in place.
- Test the handle to ensure it functions smoothly without any wobbling or loose parts.
Testing The Faucet
When it comes to fixing a leaky Moen kitchen faucet single handle, testing the faucet is a crucial step in the process. This step will help identify any remaining leaks and ensure that the faucet is working as intended. By following the steps outlined below, you can efficiently test your faucet to ensure it is no longer leaking.
Turning On The Water Supply
To start testing the faucet, turn on the water supply by locating the shut-off valves beneath the sink and turning them clockwise to open the water supply. Ensure that the water flow is steady and without any sputtering or unusual noises, which may indicate further issues with the supply line. If the water flow appears to be normal, proceed to the next step.
Checking For Leaks
Next, visually check for leaks around the base of the faucet and the connections to the supply lines. Use a paper towel to dry any areas where leaks were initially present. Once dry, run the faucet at both hot and cold settings to ensure that no new leaks have developed. Inspect the connections and base for any signs of moisture, and make sure the faucet is securely in place without any wiggle or play. If there are no leaks and the faucet is secure, the repair is successful.
Regular Cleaning
If you want to ensure your Moen kitchen faucet single handle functions properly and continues to provide a steady stream of water without leaks, regular cleaning is key. Over time, mineral build-up can occur, affecting the functionality of your faucet. Ensuring you clean the faucet regularly can prevent these issues, so here’s how you can do it.
Removing Mineral Build-up
To remove mineral buildup in your Moen kitchen faucet, you can simply mix equal parts white vinegar and water in a spray bottle. Disconnect the spray wand and soak it in the solution for a few hours to dissolve any mineral deposits. Scrubbing the affected areas with a soft brush can also help remove build-up. Be sure to rinse the parts thoroughly with clean water before reattaching them to the faucet.
How To Remove Sink Faucet Handle
Ensuring Proper Functionality
After removing mineral build-up, it’s important to ensure the proper functionality of your Moen kitchen faucet single handle. Check for leaks and drips by turning on the water and observing the faucet closely. Tighten any loose nuts or connections, and replace any damaged components if necessary. Regularly checking and maintaining the faucet can prevent future leakage issues.
Preventative Maintenance
Proper preventative maintenance is key to ensuring the longevity and efficient functioning of your Moen kitchen faucet. Regular inspections and addressing minor issues early can help prevent major problems and prolong the lifespan of your faucet.
Periodic Inspection
Regularly inspecting your Moen kitchen faucet for any signs of wear and tear is essential in preventing leaks and other issues. Look for any slow drips, water stains, or unusual sounds when using the faucet. It’s important to examine all parts of the faucet, including the handle, spout, and base, for any potential problems.
Addressing Minor Issues Early
When you notice any minor issues such as a loose handle or a small leak, it’s crucial to address them promptly. Tighten any loose components and replace any worn-out parts to prevent the problem from escalating into a major leak. Regularly cleaning the aerator and checking for mineral buildup can also help prevent potential leaks.
Frequently Asked Questions
How Can I Identify The Source Of The Leak?
To identify the source of the leak in your Moen kitchen faucet, start by checking the base, spout, and handles for any visible signs of water. Next, inspect the connections and components for any signs of water accumulation or corrosion.
What Tools Do I Need To Fix A Leaky Moen Kitchen Faucet?
You will need an adjustable wrench, Phillips head screwdriver, Allen wrench, and a Moen faucet repair kit that includes replacement O-rings, cartridges, and other necessary components.
Can I Fix A Leaky Moen Faucet Without Professional Help?
Yes, you can fix a leaky Moen faucet without professional help by following step-by-step instructions and using the right tools. Most common leaks can be resolved with a few basic repairs and replacements.
How Do I Dismantle A Moen Single Handle Kitchen Faucet?
To dismantle a Moen single-handle kitchen faucet, start by turning off the water supply, removing the handle’s cover, unscrewing the handle screw, and then using a wrench to carefully disassemble the components. Refer to the manufacturer’s guidelines for specific instructions.
Conclusion
In just a few simple steps, you can repair your leaking Moen kitchen faucet with ease. By following the detailed guide provided, you can save time and money by fixing the problem yourself. Remember to use the right tools and follow the instructions carefully for a successful outcome.
Now, go fix that leak!


