A loose faucet base not only detracts from the aesthetics of your sink area but also poses potential water leakage risks if left unattended. Don’t let a minor annoyance spiral into a major plumbing headache – take matters into your own hands and learn how to secure that pesky faucet in place. From identifying the root cause of the looseness to implementing practical solutions using basic tools, we’ve got you covered with expert tips on tightening up your faucet base like a pro. So grab your toolbox and get ready to tackle this DIY project head-on – because with our step-by-step guide, How to fix a loose faucet base has never been easier!
Identifying The Issue
When dealing with fix a loose faucet base, It’s crucial to accurately identify the issue before moving forward with any repairs. A faucet can lead to water leakage, potential damage to the surrounding area, And difficulty in controlling water flow. Thus, resolving this issue promptly is essential to prevent further complications.
Symptoms Of A Loose Faucet Base
The first step in addressing a faucet base is to recognize the signs indicating the problem. Here’s what to look for:
- Visible movement of the faucet when touched or turning the handles
- Water pooling around the base of the faucet
- Evidence of grime or mineral buildup at the base, indicating movement
If you notice any of these symptoms, it’s likely that the faucet base is loose And requires attention.
Inspecting The Loose Faucet Base
Inspecting the Loose Faucet is a crucial step in addressing the issue before it leads to further damage. By carefully examining the faucet base, you can identify the underlying cause And take the necessary steps to fix it. In this section, we will discuss the key aspects of inspecting a faucet.
Checking For Visible Damage
Start by visually examining the faucet base for any signs of visible damage such as cracks, corrosion, or wear. Look closely at the area where the faucet connects to the sink or countertop. Check for any loose or missing screws, as loose connections can contribute to the instability of the base. Additionally, inspect the surrounding area for water stains or mold, which could indicate a water leak causing the base to loosen.
Determining The Cause Of The Looseness
Once you have checked for visible damage, the next step is to determine the cause of the looseness. Gently wiggle the faucet to identify any excessive movement or rocking. This can help you pinpoint the specific area of instability. Furthermore, check the underside of the sink or countertop to see if there are any issues with the mounting hardware or if the faucet is properly secured. You may also want to inspect the supply lines And ensure they are not hindering the stability of the faucet base.
Tools Required For Repair
When it comes to fixing a faucet base, having the right tools is essential to ensure a successful repair. Without the appropriate tools, you may find the task more challenging And time-consuming. In this section, we’ll outline the necessary tools you’ll need to effectively fix a loose faucet.
Necessary Tools For Fixing A Loose Faucet Base
Before you begin the repair, it’s important to gather the following tools to facilitate a successful fix.
- Adjustable Wrench: You’ll need an adjustable wrench to tighten And secure the necessary components of the faucet base.
- Plumber’s Putty: This will be used to create a tight seal between the faucet base And the sink, preventing future leaks And loosening.
- Screwdriver: Depending on the type of faucet, you may need a flat head or Phillips screwdriver to access And tighten screws.
- Plumbing Tape: For any threaded connections, plumbing tape will help provide a secure seal And prevent water leaks.
- Basin Wrench: If your faucet is in a tight space, a basin wrench will help you reach And tighten hard-to-reach nuts And bolts.
- Bucket: It’s always a good idea to have a bucket handy to catch any excess water that may drip during the repair.
- Rags or Towels: Keep rags or towels nearby to clean up any spills And to ensure a dry work area.
Materials Needed For The Repair
When it comes to fixing a faucet base, having the right materials is crucial for a successful repair. With the necessary tools And supplies, you can quickly and efficiently secure, preventing any potential water leakage or damage. In this section, we’ll discuss the required supplies for a successful repair And how they can help you effectively address the issue.
Required Supplies For A Successful Repair
Before you begin the repair process, make sure you have the following materials readily available:
- Adjustable Wrench: This tool will help you loosen And tighten the nuts And bolts that secure the faucet base.
- Plumber’s Putty: A water-resistant sealant that can be used to create a watertight seal between the faucet base And the sink.
- Plumbing Tape: Also known as Teflon tape, this thin white tape helps prevent leaks at threaded plumbing connections.
- Screwdriver: Depending on the type of screws used to secure the faucet base, a flathead or Phillips screwdriver may be required.
- Pliers: Useful for gripping And turning nuts, bolts, And other small objects during the repair process.
- Rag or Towel: Having a rag or towel on hand will allow you to wipe away any water or debris And keep the work area clean.
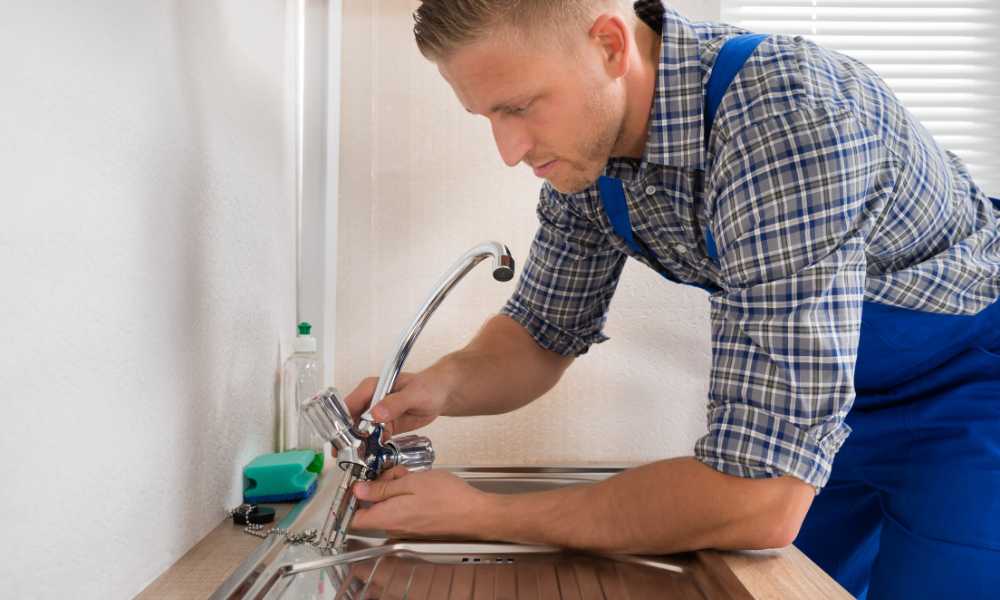
Fixing The Loose Faucet Base
Is your faucet base wobbly And causing a constant drip? A faucet base is a common annoyance that can lead to leaks and water wastage if not fixed promptly. Fortunately, tightening a loose faucet is a manageable DIY task that requires only basic tools.
Step-by-step Guide To Tightening The Faucet Base
Follow these steps to effectively tighten the faucet base:
- Turn off the water supply: Locate the shut-off valves under the sink And turn them clockwise to stop the water flow.
- Access the area: Use a flashlight to locate the nuts securing the faucet base. Depending on the faucet type, you may need to remove the decorative caps or covers to access the nuts.
- Secure the nuts: Gently tighten the nuts using an adjustable wrench. Be cautious not to overtighten, as this can damage the fittings or cause the base to crack.
- Stability test: Turn the water supply back on And check for any wobbling or movement of the faucet base. If it remains unstable, repeat the tightening process until the base is secure.
Applying Proper Technique For A Lasting Fix
When tightening the faucet base, remember to use the right technique for a durable solution. Here are a few tips to ensure a lasting fix:
- Apply even pressure: When tightening the nuts, distribute the force evenly to prevent uneven stress on the base.
- Use thread seal tape: Applying thread seal tape to the threads of the faucet base can help secure the fittings And prevent future loosening.
- Check for leaks: After tightening the base, inspect the area for any leaks. Address any leaks promptly to prevent water damage.
By following these steps And techniques, you can effectively fix a faucet base And eliminate the frustration of a wobbly fixture. Remember to perform regular maintenance checks to prevent future loosening And ensure the longevity of your faucet.
Testing The Repair
After fix a loose faucet base, it’s crucial to test the repair to ensure that it’s stable And secure. Proper testing will help determine if the issue has been successfully resolved And if the base is firmly in place.
Ensuring The Faucet Base Is Secure
To begin testing the repair, check the base of the faucet to ensure that it is securely fixed to the sink or countertop. Gently try to wiggle the faucet to see if there is any movement. A secure base should not move or feel loose. If there is still some movement, further adjustments may be required.
Verifying The Stability Of The Fixed Base
Next, Turn the water on And off to see if the repaired base remains stable during normal usage. Observe if there are any signs of movement or wobbling when the water is running. The base must maintain its stability under the flow of water. Additionally, pay attention to any leaks or unusual noise that may suggest the base isn’t fully secure.
Frequently Asked Questions
How Do I Identify A Loose Faucet Base?
To identify a faucet base, check for wobbling or movement when you use the faucet. Look for any gaps between the base And the sink. Leaks around the base may also indicate a faucet.
What Tools Do I Need To Fix A Loose Faucet Base?
You will need an adjustable wrench, screwdriver, And plumber’s putty or silicone sealant. These tools will help you tighten the base And seal any gaps to prevent further movement And potential leaks.
What Are The Steps To Fix A Loose Faucet Base?
Start by turning off the water supply to the faucet. Use the adjustable wrench to tighten the base by securing the mounting nut underneath. Apply the plumber’s putty or silicone sealant around the base to seal any gaps.
When Should I Seek Professional Help For A Loose Faucet Base?
If you encounter difficulty in tightening the base or notice extensive damage, it’s best to seek professional help. Professional plumbers can assess the situation And provide expert solutions to address the faucet effectively.
Conclusion
Fixing a loose faucet base is a simple task that can be completed with just a few tools and some basic DIY skills. By following the steps outlined in this article, you can ensure that your faucet remains stable and functional for years to come. Remember to turn off the water supply before beginning any work and take your time to carefully tighten all the necessary components. Regular maintenance and checks on your faucets can prevent future issues from arising. Take action today to address any loose faucet bases in your home and enjoy leak-free plumbing fixtures once again.


