The kitchen is the heart of every home, where delicious meals are prepared and memories are made. However, when it comes to renovating or upgrading your kitchen, one often overlooked aspect is the faucet. A stylish and functional faucet can completely transform the look and feel of your kitchen space, making it a focal point for both aesthetics and functionality. If you’re looking to upgrade your Grohe kitchen faucet or simply need to replace it due to wear and tear, knowing how to remove it properly is crucial. In this guide, we will take you through step-by-step instructions on how to remove a Grohe kitchen faucet with ease, so you can embark on your kitchen renovation journey confidently.
Necessary Tools For Removal
When it comes to removing a Grohe kitchen faucet, You will need a few important tools to ensure a smooth And efficient process. Taking The time to gather The necessary tools beforehand will save you from potential frustration during The removal process.
Allan Wrench
An Allan wrench, Also known as a hex key, Is an essential tool for removing a kitchen faucet. This specialized tool is designed to fit into The small screws And fasteners that hold The tap in place. Using an Allan wrench ensures that you can effectively loosen And remove these components without causing damage to The faucet or surrounding fixtures.
Adjustable Wrench
An adjustable wrench is another crucial tool for removing a kitchen faucet. This versatile tool allows you to grip And loosen nuts And bolts of various sizes, Providing The necessary leverage to disassemble The faucet components. Ensure that The adjustable wrench is of high quality And that it fits securely around The nuts And bolts to prevent slippage.
Plumber’s Putty
Plumber’s putty is a sealing compound that is often used in plumbing installations And repairs. When removing a kitchen faucet, The Plumber’s putty can be applied to The base of The tap to create a watertight seal And prevent any leaks or drips. This ensures that The area remains clean And dry throughout The removal process, Minimizing potential damage to The surrounding surfaces.
Shutting Off Water Supply
When it comes to removing a faucet, Appropriately shutting off The water supply is crucial. Failure to do so can result in water spillage And potential damage, making this a significant first step in The removal process.
Turn Off The Main Water Supply
To start, Locate The main water shut-off valve connected to your home’s plumbing system. This valve is usually located in The basement, Garage, Or near The water heater. Turn The valve clockwise to shut off The water supply to The kitchen faucet.
Depressurize The Faucet By Turning On The Handle
After turning off The main water supply, It’s essential to depressurize The faucet. You can do this by turning on the handle of the faucet to release any residual water pressure. Make sure to turn on both the hot and cold handles to allow the remaining water to flow out.
Detaching The Faucet Handle
When it comes time to remove your kitchen faucet, It’s essential to understand The correct steps to ensure a smooth process. Detaching The tap handle is The first step in The removal process, And it’s important to execute this step carefully to avoid causing damage to your faucet.
Removing The Handle Screw
Begin The process by locating The decorative cap on top of The handle. Using a small flat-head screwdriver, Carefully pry off this cap to reveal The handle screw underneath. Use a screwdriver appropriate for The size of The screw to unscrew it from The handle. It’s crucial to be gentle during this step to avoid stripping The screw or causing damage to The handle.
Lifting Off The Handle
Once The handle screw is removed, You can safely lift off The handle from The tap base. It’s essential to take your time And ensure that you lift The handle straight up And off The base, Avoiding any unnecessary twisting or force. This will prevent any potential damage to the faucet components And make the reinstallation process easier.
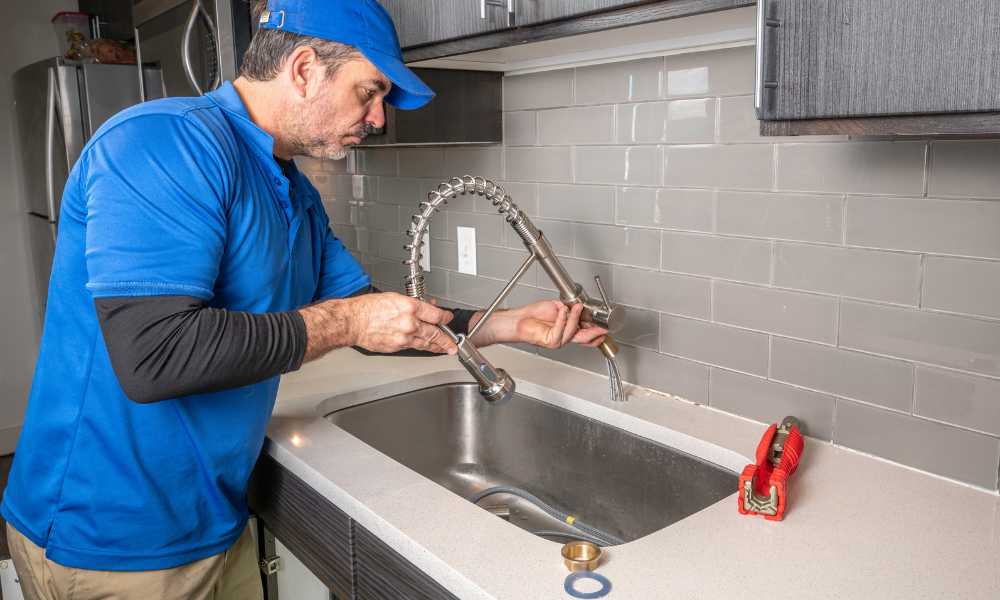
Uninstalling The Faucet Components
When it’s time to uninstall your kitchen faucet, It’s important to know how to properly remove The faucet components. This process involves carefully dismantling The various parts of The tap to ensure a smooth And successful removal. The crucial steps include dismantling The faucet spout And unscrewing The tap base from The sink
Dismantling The Faucet Spout
To begin The process of removing your faucet, Carefully dismantle The tap spout. This usually involves removing The decorative cap at The top of The spout And then unscrewing The spout from The tap body. Be sure to use The appropriate tools And exercise caution to avoid damaging The spout or surrounding fixtures.
Unscrewing The Faucet Base From The Sink
Once you dismantle the spout, the next step is to unscrew the faucet base from the sink. You can typically do this by locating and loosening the mounting nuts that secure the base to the sink. Using a wrench or pliers, Carefully unscrew The nuts, Ensuring not to put excessive force as this may damage The sink or surrounding area. Once The nuts are removed, The tap base should easily lift off The sink.
Clearing The Sink Area
Before removing a Grohe faucet, It’s crucial to clear The sink area to ensure a smooth And hassle-free process. This involves cleaning The mounting hole And applying the plumber’s putty for reinstallation.
Cleaning The Mounting Hole
Start by thoroughly cleaning The mounting hole of your sink. Use a mild cleaner And a brush to remove any dirt, Debris, Or old plumber’s putty that may be present. Ensure that The surface is clean And smooth, As this will help create a secure seal when you reinstall your faucet.
Applying Plumber’s Putty For Reinstallation
Next, You’ll need to apply the plumber’s putty to The underside of The faucet base. Roll The putty into a thin rope And place it around The base of The tap. This will help you create a watertight seal and prevent any leaks once you reinstall the faucet. Make sure you evenly distribute the putty and cover the entire base of the tap before you proceed with the reinstallation process.
How To Extend Faucet Supply Line
To extend a faucet supply line, you will need to purchase a longer supply line that matches the size and type of the existing one. Measure the distance between the faucet connection and the water supply valve to determine the length needed. Turn off the water supply, disconnect the existing supply line, and attach the new longer one using proper fittings and tools.
Frequently Asked Questions
How Do I Remove A Grohe Kitchen Faucet Handle?
To remove a faucet handle, Start by locating The set screw underneath The handle, Use an Allen wrench to loosen it, And then lift off The handle. This will provide access to The cartridge or mounting nut for further disassembly.
What Tools Do I Need To Remove A Grohe Kitchen Faucet?
You’ll need an adjustable wrench, A screwdriver, And possibly an Allen wrench, depending on The faucet model. These tools will allow you to disassemble The tap And access The components for repair or replacement.
Can I Remove A Grohe Kitchen Faucet Without A Plumber?
Yes, You can remove a faucet without hiring a plumber. With The right tools And a basic understanding of faucet mechanics, You can successfully disassemble The tap, Perform maintenance or change parts, And reassemble it on your own.
Conclusion
Removing a Grohe kitchen faucet is a manageable task that can be completed with the right tools and instructions. By following the steps outlined in this article, you can successfully uninstall your faucet without causing any damage to your sink or surrounding area. Remember to take your time and be cautious throughout the process to ensure everything goes smoothly. Once you have removed the faucet, you can either replace it with a new one or proceed with any necessary repairs.


