To remove a garbage disposal flange from the sink, first, turn off the power to the disposal unit and disconnect the drain trap. Then, use a screwdriver to loosen and remove the mounting screws that hold the flange in place.
After that, carefully separate the flange from the sink, and clean up any remaining gunk or debris. Are you dealing with a stubborn garbage disposal flange that’s refusing to budge from your sink? Don’t worry, we’ve got you covered! We’ll provide you with easy-to-follow steps on how to remove a garbage disposal flange from a sink.
We’ll walk you through the process, from disconnecting the power to the disposal unit to cleaning up any leftover mess. With our helpful tips, you’ll have that stubborn flange removed in no time. Keep reading to learn how to tackle this task like a pro!
Understanding The Garbage Disposal Flange
If you are experiencing issues with your garbage disposal, understanding the garbage disposal flange is an essential aspect of the repair process. The flange is a crucial component that connects the disposal unit to the sink, providing a tight seal to prevent leaks and maintain the proper functioning of the disposal system. To successfully remove the garbage disposal flange from your sink, it is important to grasp its role and significance in the overall system.
What Is A Garbage Disposal Flange?
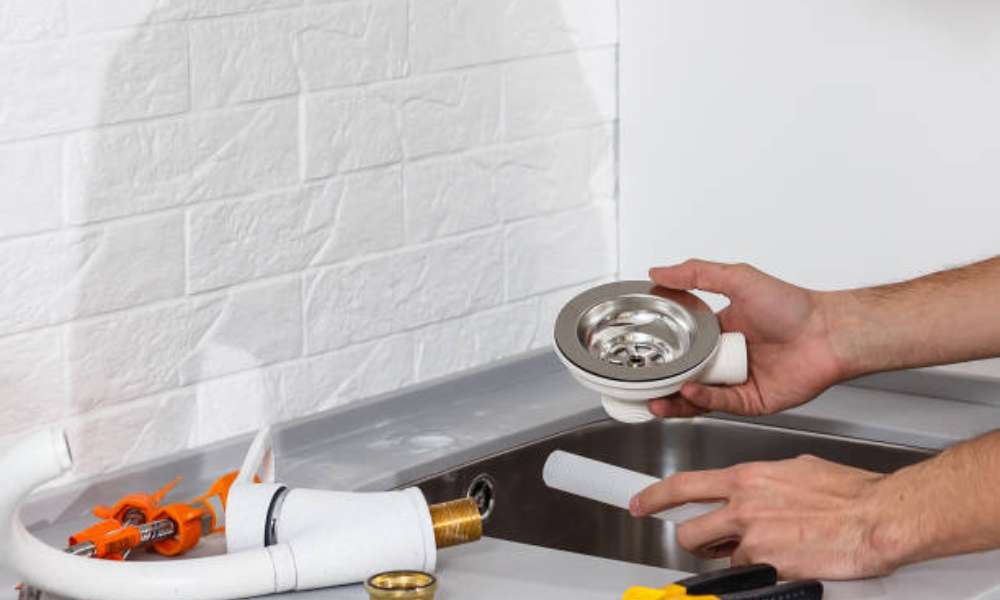
A garbage disposal flange is a circular, metal or plastic component that sits between the sink and the disposal unit. It serves as a connection point, allowing waste and water to pass into the disposal system. The flange also provides a seal to prevent leaks and ensure the proper flow of waste. Its positioning allows for easy attachment and removal of the disposal unit from the sink.
The Importance Of Removing The Flange
Removing the garbage disposal flange is necessary for various maintenance and repair tasks, such as replacing the disposal unit, cleaning the sink area, or addressing leaks and blockages. It allows access to the inner components of the disposal system and the sink, enabling thorough cleaning and effective repairs. Understanding how to remove the flange is crucial for maintaining the functionality of the entire disposal system.
How The Flange Connects To The Sink
The garbage disposal flange is typically connected to the sink using a mounting ring and bolts. The mounting ring secures the flange in place, creating a watertight seal to prevent leaks. The bolts are threaded through the mounting ring and into the disposal unit, holding the flange firmly against the sink. This secure attachment ensures the proper functioning of the disposal system and prevents water and waste from leaking into the under-sink area.
Tools And Materials Needed
When it comes time to remove a garbage disposal flange from your sink, having the right tools and materials on hand is crucial for a successful and efficient process. Below is a list of the essential items you’ll need to gather before getting started.
Wrench
Suitable wrench for the mounting bolts attached to the flange.
Screwdriver
Flathead screwdriver or Phillips head screwdriver, depending on the type of fasteners used in your garbage disposal.
Plumber’s Putty
High-quality plumber’s putty to seal the new flange during reinstallation.
Safety Gloves
Durable and protective safety gloves to shield your hands during the removal process.
Bucket Or Pan
A bucket or pan to catch any water or debris that may dislodge during the removal of the flange.
Step-by-step Removal Process
If you’re looking to remove your garbage disposal flange from your sink, don’t worry – it’s not as daunting as it may seem. With just a few simple steps, you can have the flange removed and ready for a replacement in no time.
Turn Off The Power To The Disposal
Before you begin removing the garbage disposal flange, it’s essential to ensure the power is turned off to avoid any electrical accidents. Locate the breaker that controls the disposal and switch it off to cut off the power supply.
Disconnect The Drain Pipe
Once the power is off, the next step is to disconnect the drain pipe from the garbage disposal. Using a wrench, loosen the bolts connecting the drain pipe to the disposal and carefully remove it to create easier access to the flange.
Loosen The Mounting Screws
After removing the drain pipe, locate the mounting screws that hold the flange in place. Using a screwdriver, carefully loosen and remove the screws, taking care not to damage them in the process.
Breaking The Seal Of The Plumber’s Putty
With the mounting screws removed, it’s time to break the seal of the plumber’s putty around the flange. Using a putty knife or a flathead screwdriver, gently pry and break the seal to free the flange from the sink.
Lifting The Flange From The Sink
Finally, once the seal is broken, it’s time to lift the flange from the sink. Carefully work your way around the edges, gently prying and lifting the flange until it is completely removed from the sink, ensuring not to damage the surrounding area in the process.
Troubleshooting And Tips
To remove the garbage disposal flange from the sink, first, shut off the power and water supply. Use a wrench to loosen the mounting screws and disconnect the sink flange from the disposal. Clean any residue from the area and carefully lift out the flange.
Following these steps will help you efficiently remove the garbage disposal flange from your sink.
Dealing With Stuck Or Stubborn Flanges
When removing a garbage disposal flange from the sink, you may encounter resistance due to accumulated grime or an old plumber’s putty. To deal with this, try applying penetrating oil around the flange and letting it sit for a few minutes to loosen the buildup. Additionally, using a rubber mallet to gently tap around the flange’s edges can help break any stubborn seal. If the flange remains stuck, consider using a flange remover tool specially designed for this purpose. These tools provide extra leverage and grip, making the removal process easier and more effective.
Proper Disposal Of Old Plumber’s Putty
When removing the flange, you’ll likely encounter old plumber’s putty used to seal the fixture. It’s important to dispose of this properly to avoid any mess or environmental hazards. Wrap the old putty in a piece of paper or plastic bag, then securely seal it and dispose of it in your household waste bin. Never wash it down the drain as it can cause clogs and plumbing issues down the line.
Checking For Any Damage Or Need For Replacement
After removing the flange, carefully examine the area around the sink for any potential damage such as cracks, corrosion, or warping. Inspect the flange itself for signs of wear and tear or degradation. If you notice any damage or if the flange appears worn, consider replacing it to ensure proper functionality and prevent future leaks.
Before proceeding with installing a new flange, make sure to thoroughly clean and prepare the sink surface to ensure a secure and watertight fit for the replacement flange.
Reinstalling The Flange Or Upgrading
After successfully removing the garbage disposal flange from your sink, it’s time to consider your next steps. Whether you’re simply reinstalling the existing flange or opting for an upgrade, the process is important to ensure a proper fit and effective sealing to avoid any future leakages. Here’s how to proceed with the reinstalling or upgrading the flange.
Preparing The Sink Surface
Before starting the reinstallation process, make sure the sink surface is clean and free of any old putty or debris. Use a putty knife to gently scrape away any remaining plumber’s putty or residue around the opening to create a smooth, clean surface for the new installation.
Applying New Plumber’s Putty
Next, roll a small amount of plumber’s putty into a rope-like shape and apply it around the underside of the flange. Ensure that the entire mating surface of the flange is covered with a consistent layer of putty to create a water-tight seal.
Securing The Flange Back In Place
Once the plumber’s putty is in place, carefully position the flange back into the sink opening and press it down firmly to create a secure seal. Wipe away any excess putty that squeezes out from around the flange to create a neat finish.
Considering Upgraded Flange Options
If you’re looking to upgrade your flange, consider available options such as a modern stainless steel flange or a decorative ceramic flange. Upgraded flanges can not only enhance the visual appeal of your sink area but also offer improved durability and performance. Evaluate the different options available and choose one that suits your preferences and requirements.
Frequently Asked Questions
How Do You Remove A Sink Flange From A Garbage Disposal?
To remove a sink flange from a garbage disposal, first, loosen the mounting screws. Then, disconnect the flange from the disposal unit. Finally, remove the flange from the sink.
How Do You Get A Flange Out Of A Sink?
To remove a flange from a sink, use a wrench to unscrew the retaining nut. Then, carefully pull the flange out of the sink. Be sure to clean the area thoroughly before installing a new flange.
How Do You Remove A Snap Ring From A Garbage Disposal?
To remove a snap ring from a garbage disposal, use snap ring pliers. Locate the snap ring. Insert the tips of the pliers into the holes on the sides. Squeeze the handles to compress the ring. Once compressed, carefully pull it out.
Be cautious and avoid damaging the disposal.
Conclusion
Removing a garbage disposal flange from your sink is a manageable task with the right tools and techniques. By following the steps outlined in this guide, you can successfully disassemble the flange and carry out necessary maintenance. Remember to approach the process with care, and don’t hesitate to seek professional assistance if needed.
With these tips, you’ll soon have your sink functioning smoothly once again.


