As one of the most popular brands in the plumbing industry, Moen faucets are known for their durability and reliability. However, even the highest quality products may require maintenance or replacement over time. By following our expert tips and instructions, you’ll be able to tackle this task like a pro and avoid any unnecessary frustration. Say goodbye to leaky handles and hello to a smoothly functioning faucet by mastering the art of remove your Moen faucet handle today!
Understanding Moen Faucet Handle Removal
Explaining The Function Of Moen Faucet Handles
Moen faucets play a crucial role in controlling the water flow And temperature of your faucet. They are designed to provide users with a smooth And comfortable operation while ensuring the proper regulation of water flow And temperature.
Differentiating Between Single-handle And Double-handle Faucets
Single-handle And double-handle faucets refer to the number of handles present on the faucet. Single- faucets feature a singular that controls both the water temperature And flow, while double-handle faucets have separate for hot And cold water. It’s important to consider the type of faucet you have when removing, as the removal process may differ.
Describing Common Issues That Necessitate Handle Removal
Several common issues may require the removal of a Moen faucet. These include leaky handles, loose, or the need to replace worn-out components such as cartridges or O-rings. Removing is often the first step in addressing these issues And carrying out necessary repairs.
Discussing The Importance Of Following Manufacturer Instructions
It’s essential to follow the manufacturer’s instructions when removing a faucet. Each model may have specific removal steps, and adhering to these guidelines ensures the proper removal of the handle without causing damage to the faucet assembly. This also helps in maintaining the warranty And ensures the longevity of the faucet.
Tools Needed For Moen Faucet Handle Removal
When it comes to removing a faucet, having the right tools can make the process much easier And simpler. Without the appropriate tools, you may end up damaging the handle or the surrounding fixtures. In this section, we will discuss the essential tools required for removing a Moen faucet, detailing the purpose of each tool And providing tips for ensuring safety during the removal process.
List Of Necessary Tools For The Task
- Adjustable wrench
- Flathead screwdriver
- Allen wrench
- Plumber’s grease
- Clean cloth
Detailed Explanation Of Each Tool’s Purpose
Each tool serves a specific purpose in the removal of a faucet handle. Let’s delve into the details:
| Tool | Purpose |
| Adjustable wrench | To loosen the retaining nut securing the faucet handle |
| Flathead screwdriver | For prying the handle off the cartridge |
| Allen wrench | To remove set screws (if applicable) |
| Plumber’s grease | For lubricating And preventing future corrosion |
| Clean cloth | For wiping down the faucet And handle |
Tips For Ensuring Safety During The Removal Process
- Before beginning the removal process, turn off the water supply to the faucet to prevent any accidental leaks or spills.
- Wear protective gloves to shield your hands from any sharp edges And to maintain a secure grip on the tools.
- Apply gentle And controlled force when using the wrench And screwdriver to avoid damaging the surrounding fixtures And components.
- Keep the work area well-lit to clearly visualize the process And prevent errors.
Step-by-step Guide For Removing Moen Faucet Handle
Removing a Moen faucet handle can be a simple task with the right knowledge And tools. This step-by-step guide provides a systematic approach to removal, addresses potential challenges, And highlights the importance of patience And precision. Follow these instructions to successfully remove your faucet.
Preparing The Workspace Before Starting
Before starting the removal process, it is essential to prepare the workspace to ensure a smooth And efficient operation. Here are the steps to set up your workspace:
- Turn off the water supply to the faucet to prevent any accidental leaks or spills.
- Gather the necessary tools such as a screwdriver, pliers, And a hex key to help with the removal process.
- Cover the surrounding area with a towel or cloth to protect it from any potential scratches or damage during the removal process.
Providing A Systematic Approach To Handle Removal
Follow these steps to systematically remove the Moen faucet handle:
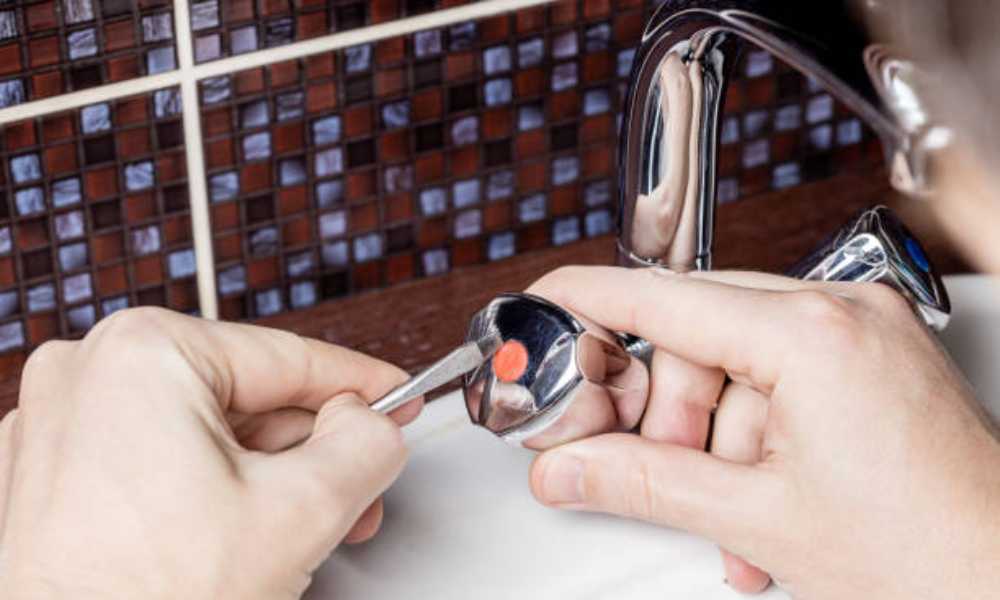
- Locate the set screw on the handle And use a screwdriver to loosen And remove it.
- Once the set screw is removed, carefully lift off the faucet And set it aside.
- If the is stuck, use a lubricant to help loosen it before attempting to remove it again.
Addressing Potential Challenges And How To Overcome Them
While removing the faucet handle, you may encounter the following challenges:
- The handle may be stuck due to mineral deposits or corrosion.
- The set screw may be difficult to access or turn.
To overcome these challenges, apply a rust penetrant to loosen any corrosion And use pliers or a wrench to carefully turn the set screw if it is stuck.
Highlighting The Importance Of Patience And Precision
Patience And precision are crucial during the removal process to avoid causing any damage to the faucet or handle. Take your time And ensure every step is performed with care to achieve successful removal.
Troubleshooting And Common Mistakes In Moen Faucet Handle Removal
When it comes to removing the faucet, the process can sometimes present challenges. It’s important to be aware of potential hurdles And common mistakes that can occur during the removal process. By understanding these issues And learning how to overcome them, you can ensure a smooth And successful handling removal experience.
Identifying Potential Hurdles During The Removal Process
Several potential hurdles can arise when attempting to remove a faucet handle. Identifying these challenges early on can help you navigate the removal process with greater ease. One common issue is encountering a stuck or stubborn handle that refuses to come off. Additionally, corroded or rusted components can make it difficult to disassemble. It’s also important to be mindful of any hidden set screws or fasteners that may be securing them in place.
Offering Solutions For Common Mistakes And Missteps
Fortunately, there are strategies And solutions for addressing common mistakes And missteps encountered during the Moen faucet removal. If the handle is stuck, applying penetrating oil And allowing it to sit for some time can help loosen the grip. In the case of corroded components, using a combination of vinegar And water or a rust-dissolving agent can aid in disassembly. When dealing with hidden set screws, carefully inspect And surrounding components to locate And access these fasteners for removal.
Providing Insights On How To Prevent Future Issues
To prevent future issues when removing a faucet handle, it’s important to exercise caution And regular maintenance. Regularly inspecting And cleaning components can help prevent corrosion And buildup, making future removals easier. When reassembling, applying a thin layer of lubricant to the components can aid in easy disassembly in the future. By taking proactive measures, you can minimize potential hurdles And ensure a smoother removal process in the long run.
Maintenance And Reassembly After Moen Faucet Handle Removal
When it comes to maintaining your faucet handle, it is essential to follow proper maintenance And reassembly techniques to ensure its longevity And optimal performance. After successfully removing the Moen faucet, attention to detail during the reassembly process And consistent maintenance practices is crucial. Highlighting the importance of these steps post-removal will help preserve the functionality And aesthetic appeal of your faucet for years to come.
Highlighting The Importance Of Proper Maintenance Post-removal
Proper maintenance after removing the Moen faucet is vital for preventing future issues And preserving the longevity of the fixture. By following specific maintenance steps, you can ensure that your faucet remains in top condition, preventing leaks And other problems from arising. You should carry out regular cleaning, lubrication, and inspection of internal components as some of the key maintenance tasks to keep the faucet functioning smoothly.
Explaining Reassembly Techniques And Best Practices
After removing the Moen faucet handle, understanding the reassembly techniques And best practices is essential to ensure that it functions correctly. Proper reassembly involves aligning the components accurately And securing them tightly to prevent any potential leaks or malfunctions. Referencing the manufacturer’s instructions And using the appropriate tools can make the reassembly process more efficient And effective, ensuring that operates as intended.
Tips For Ensuring The Longevity Of The Faucet Handle
To ensure the longevity of the Moen faucet handle, applying a thin layer of silicone-based lubricant during reassembly can help protect the internal components And prevent corrosion. Additionally, checking for any signs of wear And tear, such as worn-out O-rings or damaged seals, And replacing them as needed will further extend the lifespan of the faucet. Regularly inspecting And maintaining ensures that it continues to function optimally, enhancing its durability And performance.
Frequently Asked Questions
How Do I Remove A Moen Faucet Handle?
To remove a Moen faucet handle, start by locating the set screw, then use an Allen wrench to loosen it. Once the screw is removed, should lift off easily.
What Tools Do I Need To Remove A Moen Faucet Handle?
To remove the set screw, you will need an Allen wrench. A screwdriver to pry off the handle, and possibly some lubricant if it is stuck.
Are There Any Safety Precautions I Should Take?
Before attempting to remove the Moen faucet handle, make sure to shut off the water supply to the faucet to avoid any accidental leaks or spraying water.
Can I Reassemble The Faucet After Removing The Handle?
Yes, After performing any necessary repairs or maintenance, you can easily reassemble the Moen faucet handle by reversing the steps used to remove it.
Conclusion
By following the steps outlined in this article, you can successfully disassemble your faucet handle and address any issues such as leaks or drips. Remember to exercise caution while working with plumbing fixtures to avoid damaging any components. Regular maintenance of your faucet handles can help prolong their lifespan and ensure optimal performance. Take the time to inspect and clean your faucets regularly to prevent any future issues from arising.


